![]() Hot Articles
Hot Articles
![]() Topic
Topic

 My Account
 Logout
Successful Installation!
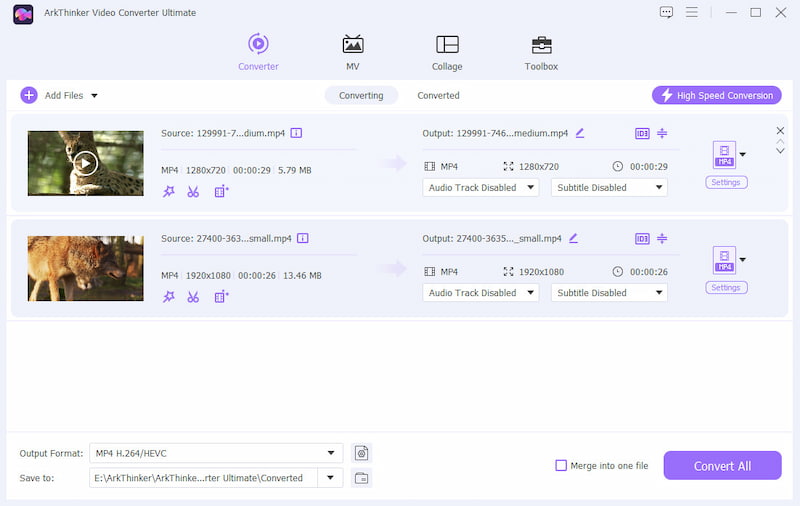
Step 1: Add video/audio files
Click Add Files or the plus icon to add the video or audio files. You can also drag and drop to add files.
Step 2: Select output format
Click the drop-down option of profile settings to choose the format and resolution you want.
Step 3: Start conversion
Set the output format or for one by one or at one time, and click the Convert All button to start video and audio conversion.
Get Complet Guide Here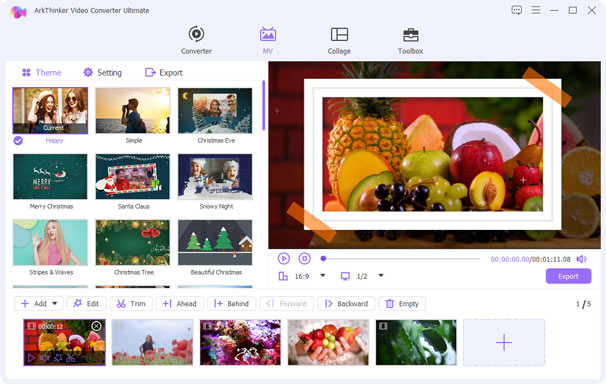
Step 1: Add videos photos
Run Video Converter Ultimate, and switch to the MV tab. Click the plus button to add videos or/and photos.
Step 2: Edit MV effects
Select the MV theme, then go to the Edit or Trim tab to crop, rotate, watermark, add filter, and edit MV effects.
Step 3: Export MV video
Make the settings for audio and title, and click Export to choose the output format, then start exporting the video.
Get Complet Guide Here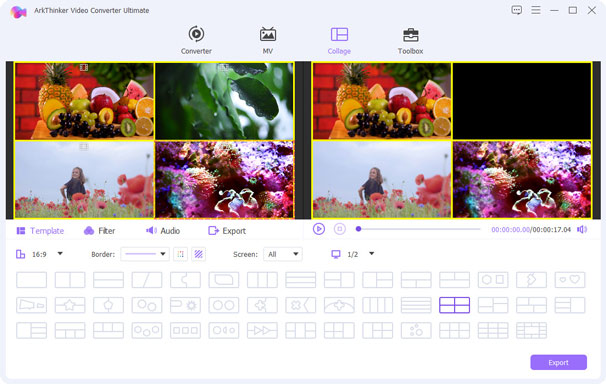
Step 1: Select Collage
Switch to the Collage tab, and select the collage screen templates at the bottom by clicking it.
Step 2: Add video photos
Click the plus icon to add the video or photo for separate screens. Then optionally edit the video effects through Filter and Audio tabs.
Step 3: Export video
While all the settings are made well, go to the Export tab to choose the output format and start exporting the video file.
Get Complet Guide Here![]() Hot Articles
Hot Articles
![]() Topic
Topic