


![]() 인기 기사
인기 기사
![]() 주제
주제

Successful Installation!
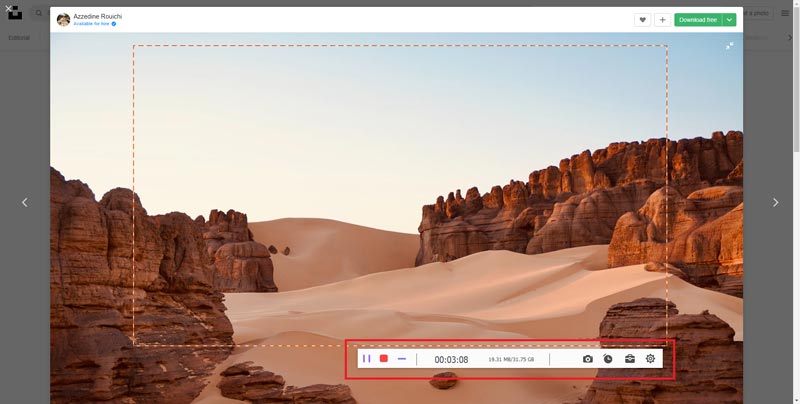
Step 1. Select a full or a custom screen
Select the screen scaling from 1920*1080, 1280*720, 854*480, 1024*768, 640*480. In addition, you can also draw a recording area with your cursor.
Step 2. Select the audio source
You can turn on or off the 시스템 사운드 option, 마이크로폰 option, according to the recording needs.
Step 3. Start and end the video process
딸깍 하는 소리 녹화 button to start the screen recording. Now you can add text, line, or arrow to the recording video by clicking the Edit icon. Then you can click the 멈추다 button to preview the recorded video or click the 구하다 버튼을 눌러 동영상을 저장하세요.
여기에서 전체 가이드를 받으세요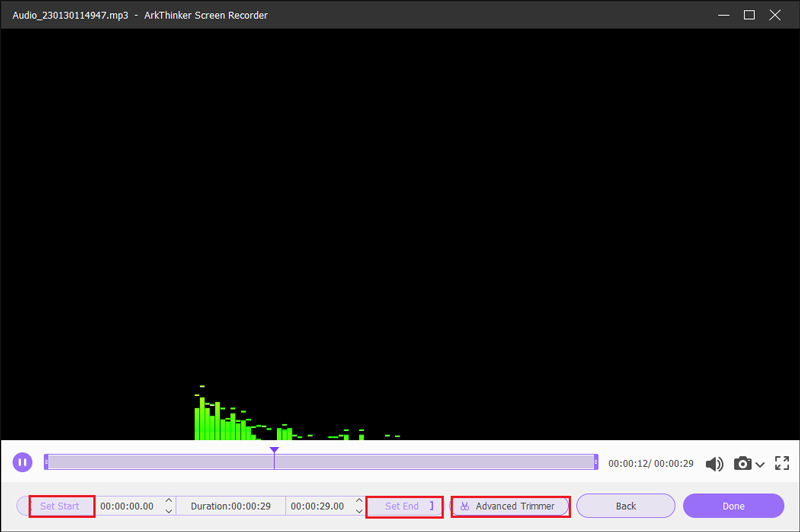
Step 1. Set recording audio from System Sound or Microphone
Turn on or off the 마이크로폰 또는 시스템 사운드. Or you can enable both voices at the same time.
Step 2. Start the audio recording
딸깍 하는 소리 녹화 button to begin your audio recording. Then you can click the 멈추다 버튼을 누르면 녹음된 오디오를 들을 수 있습니다.
Step 3. Edit and end the audio recording
다음을 클릭하세요. 고급 트리머 button to edit the recorded audio. Then remember to save the recording file.
여기에서 전체 가이드를 받으세요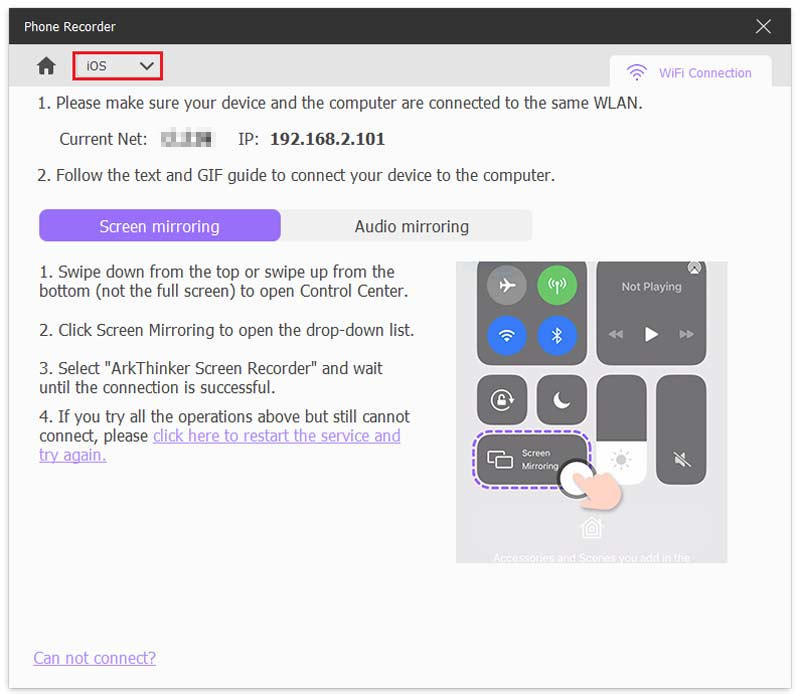
Step 1. Select the device type
In the main panel, choose iOS 녹음기 또는 안드로이드 녹음기 according to your device.
Step 2. Connect your device
Firstly, mirror your phone screen through Wi-Fi or USB Connection. Then you can select from 2 Wi-Fi connection modes and pick one from 핀 코드 그리고 QR 코드.
For iPhone users, you need to mirror the phone screen to the computer first. Then make sure your iPhone and computer has connected to the same WLAN.
Step 3. Record phone screen
After the connection, you can view the phone screen on your computer. Now you can start your phone recording.
Step 4. End the phone recording
You can preview and edit the recorded video after the recording. Click 내보내다 if you are satisfied with the recording.
여기에서 전체 가이드를 받으세요![]() 인기 기사
인기 기사
![]() 주제
주제