


Dynamic Range Compression: A High-Schooler’s Guide to Better Photos
Have you ever looked at a photo and thought, “Why do the dark areas look too shadowy, or the bright spots too washed out?” This is a common problem photographers face when their image has a broad range of light and dark areas. Thankfully, there’s a solution: dynamic range compression! It’s one of the coolest tools that can help improve the quality of your photos by balancing those extremes. Whether you’re a budding photographer or someone who just loves taking pictures with your phone, learning about dynamic range compression can seriously upgrade your photos. So, let’s continue reading and see what it’s all about!

- GUIDE LIST
- Part 1. What is Dynamic Range Compression
- Part 2. Dynamic Range Compression’s Use Cases
- Part 3. How to Use Dynamic Range Compression in Your Photos
- Part 4. Bonus: The Most Convenient Image Compressor
- Part 5. FAQs
Part 1. What is Dynamic Range Compression
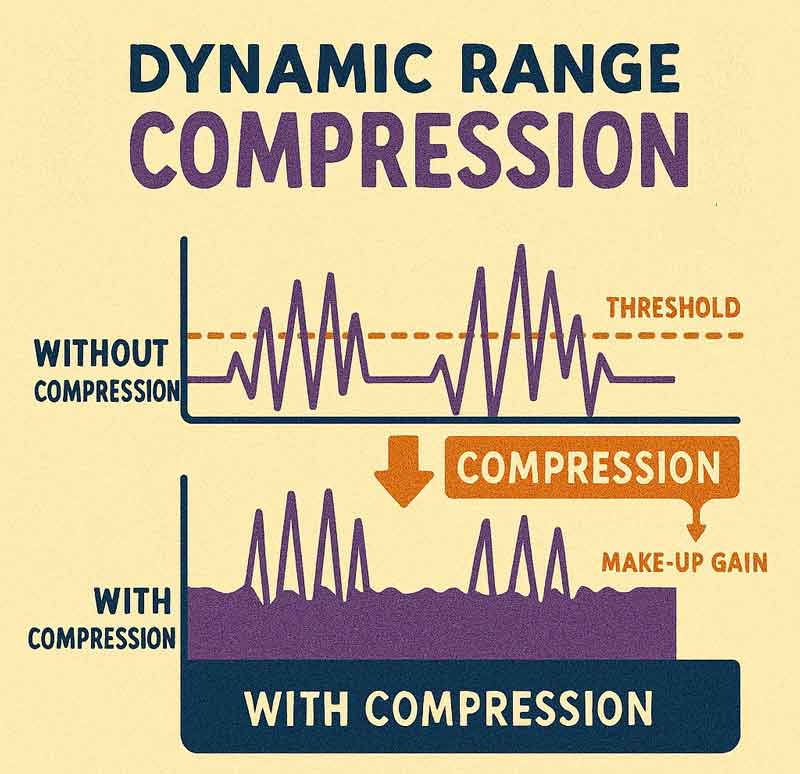
Dynamic range compression might sound like a complicated technical term, but it's pretty simple once you break it down. Dynamic range is your photo’s emotional spectrum, and capturing everything from the deepest shadows to the brightest highlights. It’s what gives your images depth, drama, and that irresistible "wow" factor. Think of a picture with bright sunlight shining through a window while the room inside is dark. That big difference in brightness is what we call "dynamic range."
Now, dynamic range compression is a technique that reduces that difference, making the shadows less dark and the highlights less bright. The goal? To make sure every detail in your photo is visible and balanced, no matter how extreme the lighting is.
To put it simply, dynamic range compression helps make photos look more natural by evening out the tones. Instead of your image having areas that are too dark or too bright to see clearly, it compresses that dynamic range so everything is easier on the eyes.
Part 2. Dynamic Range Compression’s Use Cases
1. High-Contrast Scenes
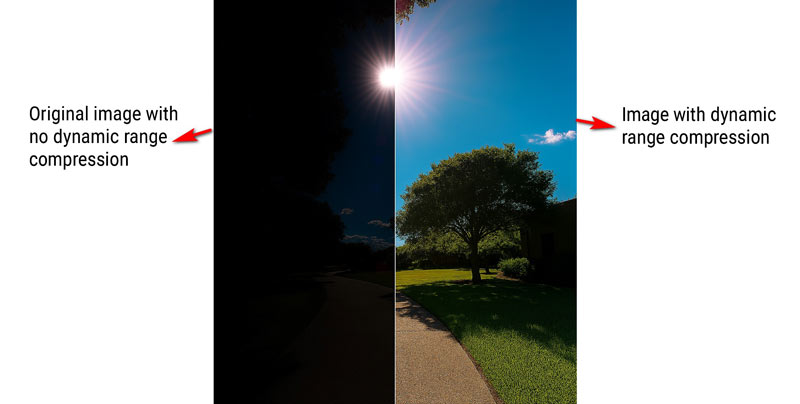
Imagine you're taking a picture on a sunny day with the sun shining directly at your camera. Without compression, the sky might look perfectly bright, but the dark areas under trees or buildings may be pitch black, making the picture hard to read. Dynamic range compression can help you see both the sky and those shadowy areas clearly.
If you regret the dynamic range compression, you can use an AI image upscaler to brighten the image and make it more clear.
2. HDR Photography
High Dynamic Range (HDR) photography is all about capturing the most detail in both bright and dark areas of a photo. While HDR usually involves taking multiple pictures at different exposures and combining them, dynamic range compression is often used to improve these images even further.
3. Editing Portraits
When you take a portrait indoors with a bright light source behind your subject, you might end up with harsh shadows on their face. Dynamic range compression helps soften those shadows and highlight details in the subject’s features without losing the lighting contrast.
4. Landscape Photography
In landscape photography, scenes often include both bright skies and dark land. If you don’t adjust the dynamic range, parts of the sky could look overexposed, and the land could look underexposed. Compression helps balance the two so that every element of your landscape is clear and sharp.
Part 3. How to Use Dynamic Range Compression in Your Photos
Now that we know what dynamic range compression is and when to use it, how do you apply it to your own photos? Let’s make this simple, and just follow these easy steps and you’ll be on your way!
1. Adjust Dynamic Range Settings on Your Camera
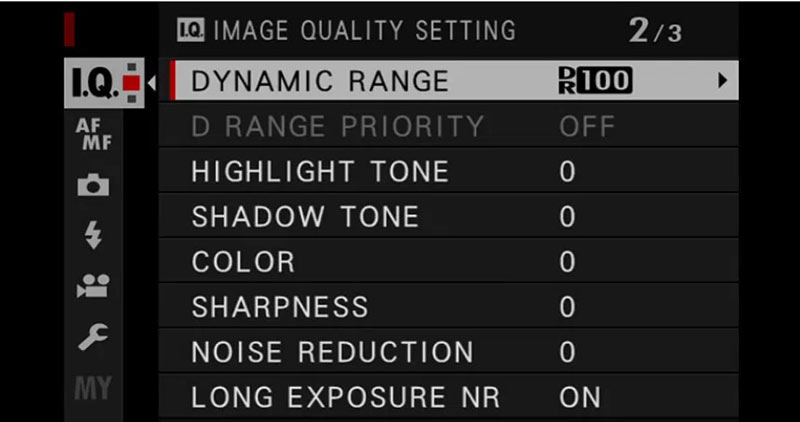
Some cameras have a built-in dynamic range compression setting. If you're working with a DSLR or mirrorless camera, you may find a "dynamic range" or "D-Lighting" option in your settings. This allows you to automatically compress the image while taking the shot, so you don’t have to worry about doing it later in editing.
2. Using Software for Post-Processing
If you’re editing a photo in post-production, many software programs like Adobe Lightroom or Photoshop have sliders or options specifically for dynamic range compression. You can adjust these settings to bring out the details in both the light and dark areas of your photo.
Here’s how you can do it:
• Shadows and Highlights: Increase the shadow slider to bring out the hidden details in dark areas, and decrease the highlight slider to tone down the bright spots.
• Tone Curve: Adjusting the tone curve in Lightroom can help compress the dynamic range manually. By flattening out the curve, you reduce the extremes between bright and dark parts of your image.
3. Use an Image Compressor
For a quick fix, especially if you’re working with a photo on your phone or computer, using an online image compressor can help. These compressors automatically reduce the dynamic range, giving you a better-looking photo without needing to fiddle with complex settings.
Most photo editing tools like Lightroom, Photoshop, or even free apps like Snapseed, have dynamic range compression settings built in. Here’s a simple workflow I use:
Open your image in an editor
Choose one with tone curve or exposure controls.
Adjust highlights and shadows
Dial down the bright spots, gently raise the dark ones, and that’s where the magic of compression begins. It’s all about balance, depth, and making every detail shine.
Use tone curves or sliders
Fine-tune the midtones to keep the image from looking flat.
Check the histogram
Make sure you’re not clipping (losing detail) in the darkest or brightest areas.
Export in high quality
PEGs are fine, but if you’re serious, go for PNG or TIFF to preserve detail.
If you get the image format that you do not want, you can convert TIFF to PNG to get a transparent image file.
Tip: On dynamic range compression Windows 10 systems, you can use built-in tools like Photos or Paint 3D for basic adjustments. For more control, try free software like RawTherapee or GIMP.
Part 4. Bonus: The Most Convenient Image Compressor
If you’re looking for an easy way to compress your images without the hassle of installing software, ArkThinker Image Compressor Online is your best bet! It’s free, fast, and user-friendly.
Features of ArkThinker Image Compressor Online:
• ArkThinker automatically adjusts the contrast, making it easier for you to get a balanced photo in just a few clicks.
• Batch your images in one go, and it’s a smart way to save time and keep things moving.
• The tool ensures that your images retain their sharpness and clarity after compression.
• No techy knowledge needed. Just upload your image, adjust settings if needed, and download the result!
Steps to use ArkThinker Online Image Compressor:
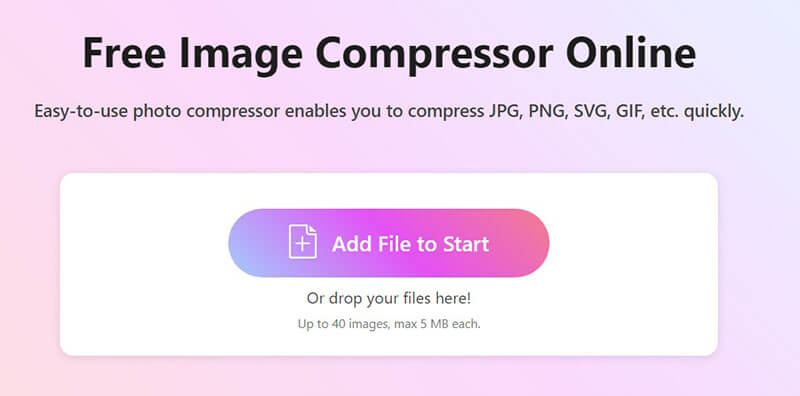
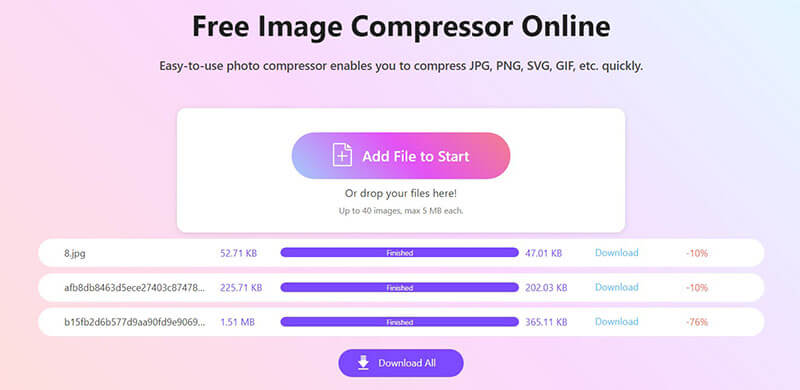
Launch ArkThinker Image Compressor Online in your browser
Whether you're kicking back at your desk or multitasking on your phone, just pop open your browser and head to ArkThinker Image Compressor Online. No downloads, no setup, and just instant access right from the web. It’s ready when you are.
Upload your images
Click the Add Files to Start button, or go full pro and drag your JPG or PNG files straight into the upload box. Feel free to upload up to 40 images in one go—just keep each under 5MB for a smooth ride. Perfect for batch projects, social media prep, or tidying up your photo library.
Compress images online
Compression will be done automatically, and no extra clicks needed. Once it’s done, you’ve got two easy ways to download:
Save the individual images one by one by clicking the Download button next to each image.
Or click Download All to get everything bundled in a tidy ZIP file
Whether you need a quick solution for personal use or are editing photos for a project, ArkThinker can streamline your photo-editing process.
Part 5: FAQs
What is dynamic range in a camera?
Dynamic range in a camera refers to the camera’s ability to capture both the lightest and darkest parts of an image without losing detail in either extreme. A high dynamic range camera sees the full story, capturing both dazzling highlights and deep shadows for beautifully balanced shots.
How do dynamic range compression settings work in photo editing?
Dynamic range compression smooths out the extremes: softening bright highlights and lifting deep shadows to create a more balanced photo. You can fine-tune it yourself in editing software, or let smart tools like ArkThinker Image Compressor Online do the heavy lifting for you.
Can I use dynamic range compression in Windows 10?
Yes, you can use dynamic range compression in Windows 10 using photo-editing software or online tools. ArkThinker Image Compressor Online, for example, works seamlessly on Windows 10, allowing you to compress your images without any special software.
Is DRC better on or off?
Turn DRC ON if you’re watching movies late at night, using headphones, or want to avoid loud volume spikes. It gently boosts the quiet parts and tames the loud ones, and so everything sounds just right.
Turn DRC OFF if you want full cinematic audio with big dynamic range - great for home theaters or daytime viewing with good speakers.
What is dynamic range in audio?
Dynamic range is the space between a whisper and a roar—the full spectrum of sound your audio can capture. A wide dynamic range means more contrast and impact between soft and loud moments.
Is dynamic range compression good for movies?
Yes, especially if you're watching in a quiet setting or don’t want to disturb others. It keeps explosions and whispers at manageable levels. For full cinematic impact, though, turning it off is better.
Conclusion
To sum it up, dynamic range compression is a powerful technique that can make your photos look more polished and balanced by reducing the contrast between the darkest and brightest parts. Whether you're taking photos in tricky lighting or editing your shots afterward, this tool can significantly improve the final result. For a fast, simple, and effective solution, I recommend trying out ArkThinker Image Compressor Online. It’s an easy way to enhance your photos without any complicated software. Give it a try and see the difference for yourself!
What do you think of this post? Click to rate this post.
Excellent
Rating: 4.7 / 5 (based on 476 votes)