


How to Crop Screenshots on Mac Using 4 Methods in 2026
Since taking screenshots is a practical way to share information on screen quickly, learning how to crop screenshots on Mac is an important way to ensure that only the information you want to share is captured. However, there are multiple options for taking screenshots on macOS, and choosing the best one can be confusing for beginners. In this article, we will provide a full tutorial on four built-in methods for cropping screenshots on Mac, with a detailed guide for each.

- GUIDE LIST
- Part 1. How to Crop a Screenshot on Mac: The Easy Way
- Part 2. Other Built-In Mac Tools to Crop Screenshots
- Part 3. Crop a Video Clip or Screenshot Online with a Free Video Cropper
- Part 4. FAQs About Cropping Screenshots on Mac
Part 1. How to Crop a Screenshot on Mac: The Easy Way
To start our guide, we will first feature the two options for cropping on macOS that are designed to be the easiest ways to crop screenshots. These are none other than using the keyboard shortcuts and the Preview app.
Crop While You Capture with Shift + Command + 4
Among these options, the most direct way to learn how to take a cropped screenshot on Mac is to apply the image crop adjustment while you take the screenshot. Fortunately, this can be done using the keyboard shortcut Shift + Command + 4.
Press the keyboard combination Shift + Command + 4.
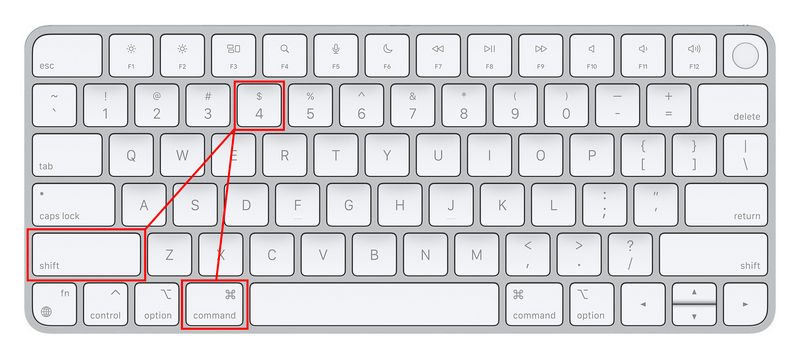
After pressing the key combination, your on-screen cursor will be transformed into the screenshot tool. You can then simply click and drag it to take a screenshot of the section covered by the screenshot tool.
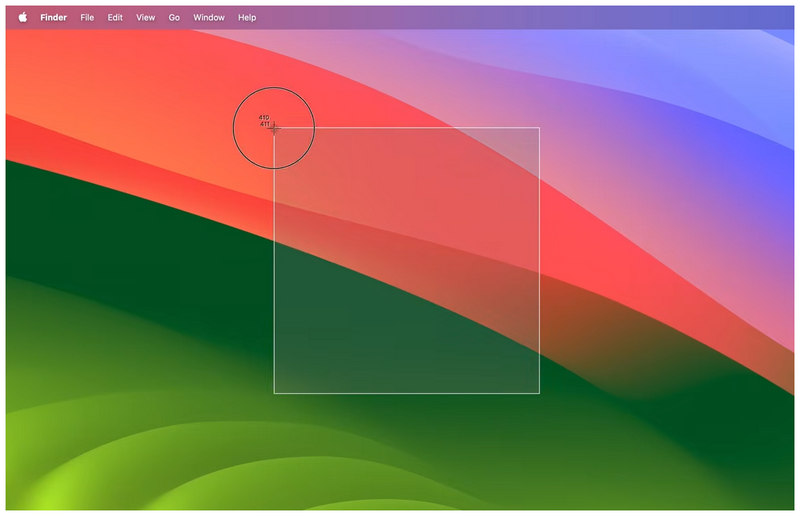
The keyboard combination Shift + Command + 4 selects the Capture Selected Portion mode in the Screenshot app. However, using this shortcut will instantly activate the mentioned mode without opening the Screenshot app first.
Crop a Saved Screenshot in Preview
If you want more control over screenshot options, you can use the Preview app to access more advanced editing tools for the raw image you capture. To learn how to crop a screenshot in Mac Preview, make sure to read our guide below.
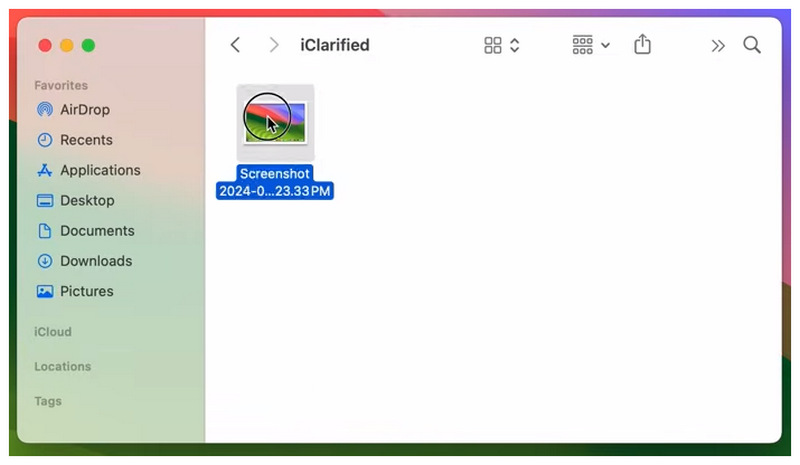
Open the Preview app, then open the screenshot you took.
In the photo preview, click on the Markup button to open the editing settings. Then, select the Rectangular Selection Tool and use it to select the portion of the image you want to crop.
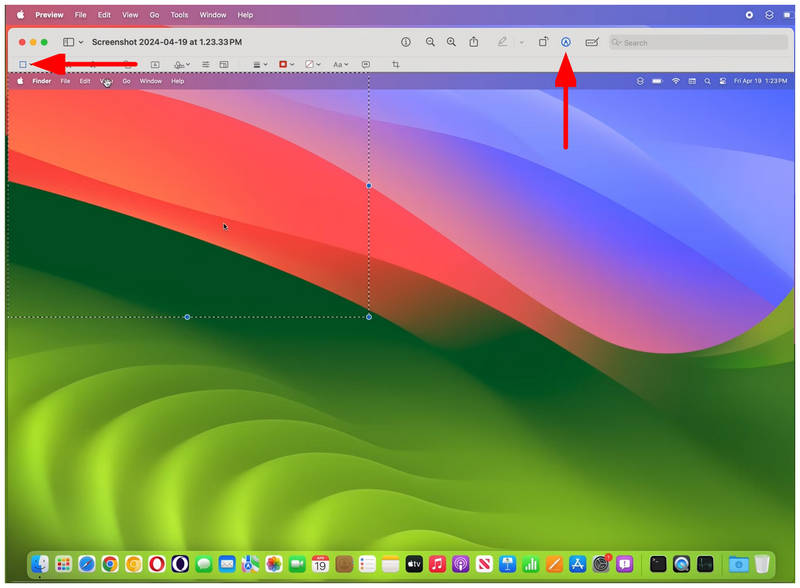
With the portion of the screen you want to crop now selected, select the Crop to Selection option to apply the crop adjustment.
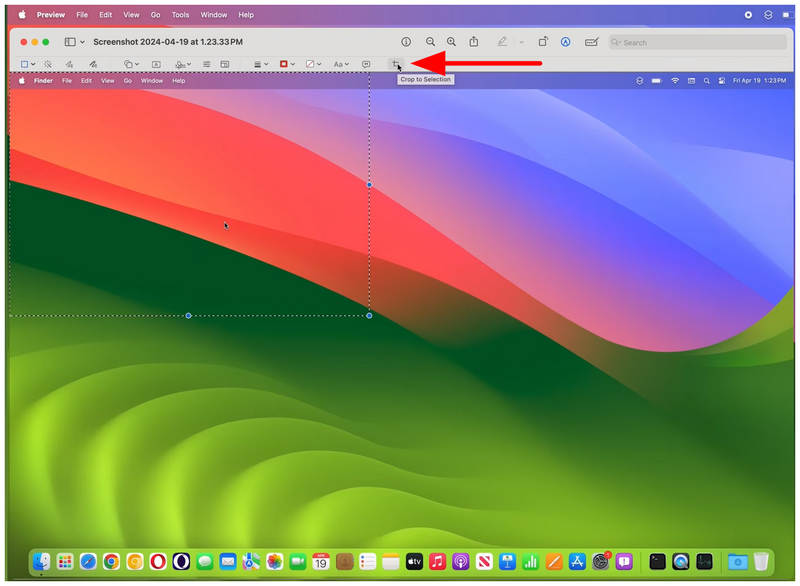
Although not as fast as keyboard shortcuts, the editing tools in Preview offer better control. As such, this is advisable for users who want to apply more advanced adjustments to their images. This is also the easiest way to take screenshots on Mac.
Part 2. Other Built-In Mac Tools to Crop Screenshots
With the two easiest options for cropping screenshots on Mac, let us now move on to the other built-in tools on macOS to learn how to take screenshots on Mac and crop images directly in these programs after capturing the screen.
Photos App Edit Mode
Since screenshots are saved as images, they can be opened in Apple’s Photos app, the gallery app for macOS and iOS. Fortunately, the Photos App has a dedicated Edit mode for cropping screenshots.
Open the Screenshot you took in the Photos App, then select the Edit button in the upper-right corner of the menu.
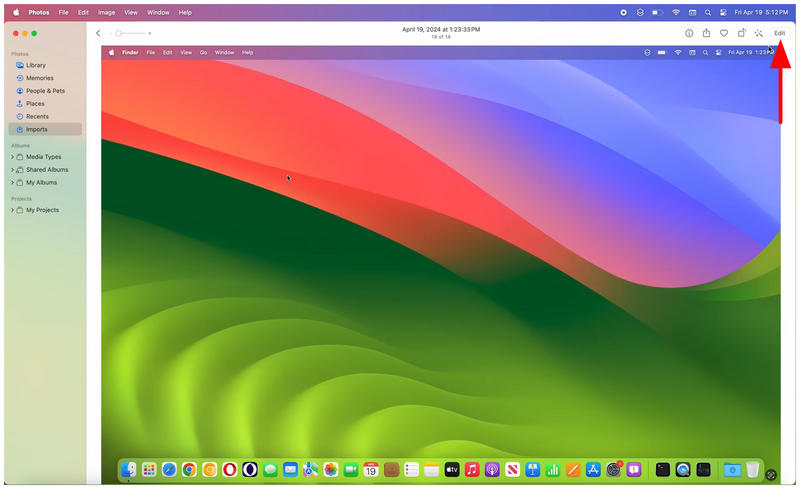
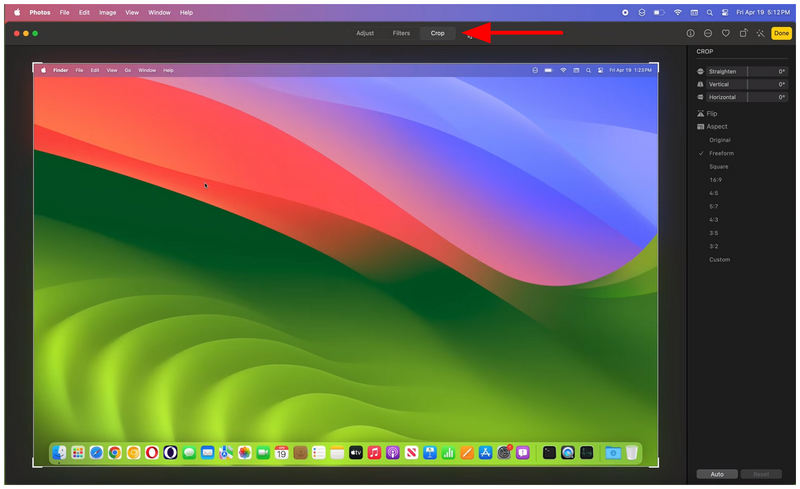
In the Edit menu, go to the Crop tab. Then, select the cropping mode option you want to use. You may also use the crop adjustment tool in the image preview to manually apply it yourself.
With the crop tool set to your preference, click Done to crop the image.
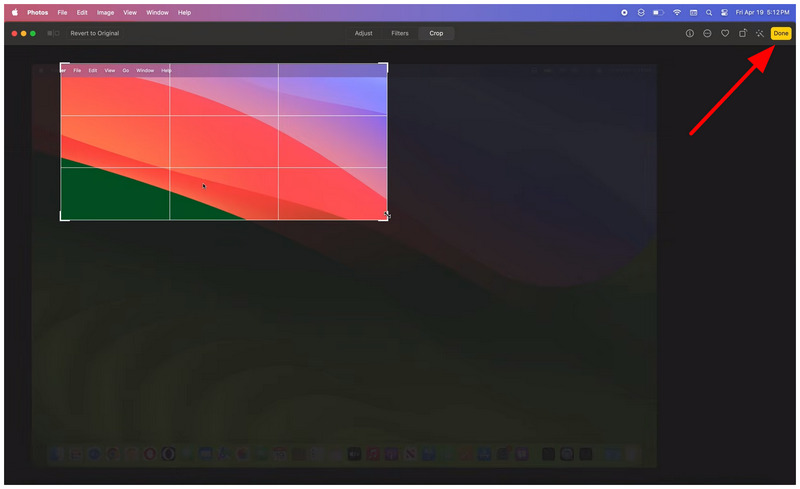
If you want more control over image cropping or plan to apply a specific aspect ratio, the Photos app is a good choice. Among the tools in this article, the Photos app offers the most extensive cropping tool. Since it is also available on mobile devices, you can also use the Photos app to edit screenshots taken on iOS.
Screenshot App
Finally, the last option we will discuss will be the Screenshot app. As its name suggests, this program is the exclusive screen capture tool of macOS. It is a direct counterpart to Windows’ Snipping Tool. As such, it also offers an essential editing tool which includes a Crop option.
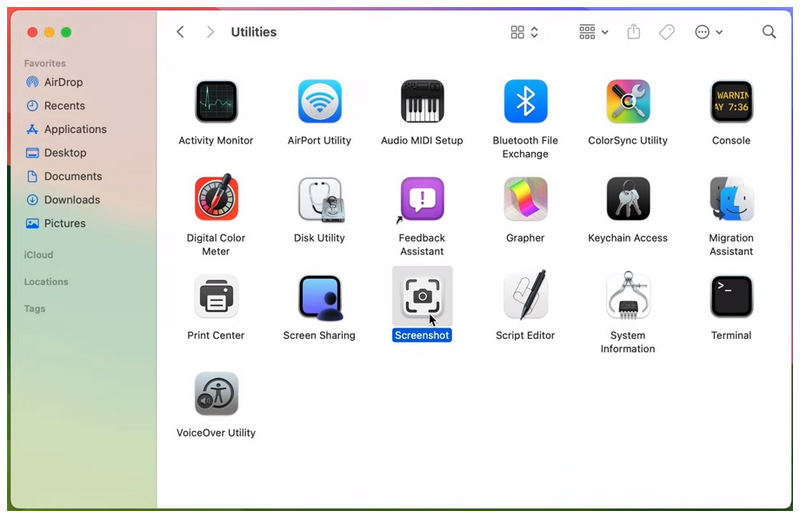
Open the Screenshot App.
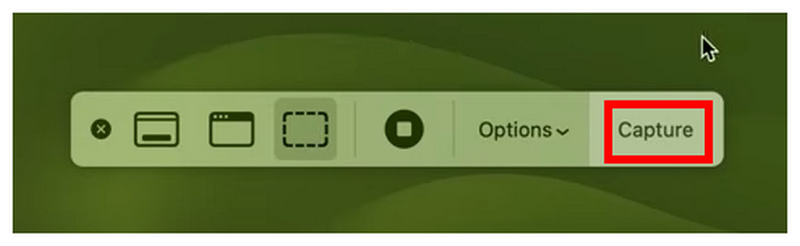
In the Screenshot App overlay, select the screen capture mode you want to use. Then click on the Capture option to take the screenshot.
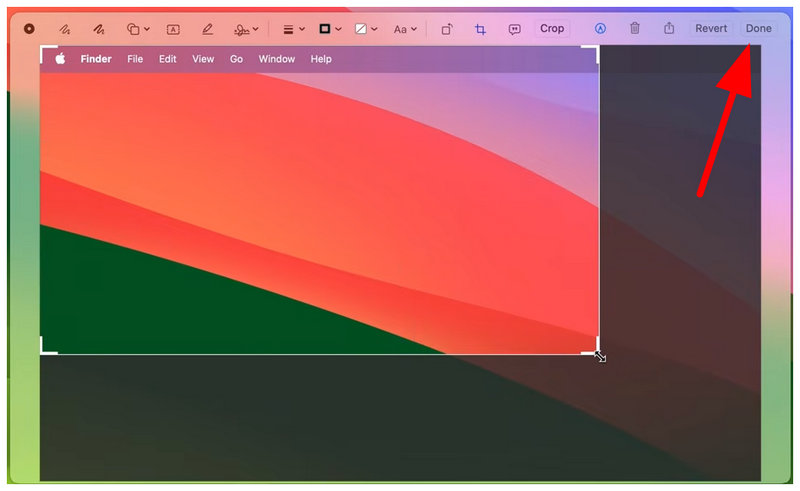
After you take a screenshot, the app will automatically open the image preview. In it, select the Crop option and adjust the crop tool to edit the image. Finally, click on Done to save the adjustment you have applied.
With all the screenshot cropping tools discussed in this article, let us now move on to the third-party option you can use to crop media files beyond static images.
Part 3. Crop a Video Clip or Screenshot Online with a Free Video Cropper
With the best options for cropping screenshots on Mac, let’s now move on to the tools you can use to crop video files, not just common images. This will be none other than ArkThinker Free Video Cropper Online.
Aside from generic screenshots, another way to share information quickly is to share screen recordings. Unfortunately, your screen recordings may capture information that is not meant to be shared, but this can be fixed by simply cropping the section containing the critical information.
To learn how to apply cropping adjustments to videos, make sure to read our guide on using the best video cropper tool online to start editing videos without any installation or complicated setup.
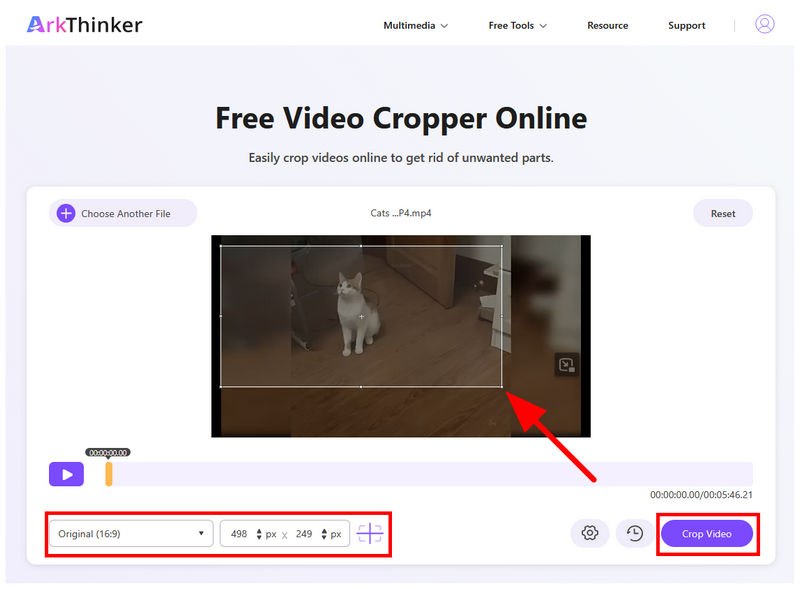
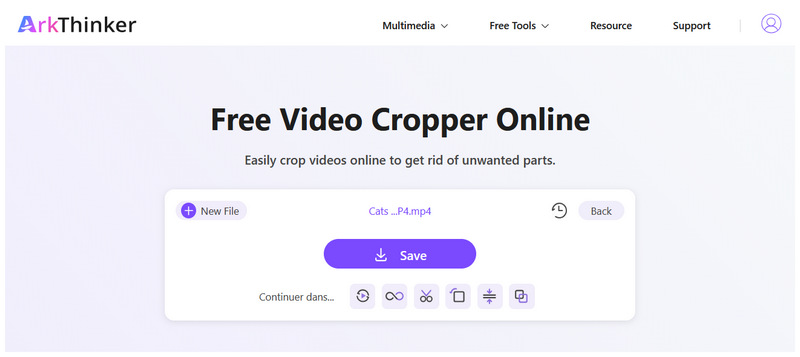
Go to ArkThinker Free Video Cropper Online’s website and select the Start Cropping Video button to upload the file you want to crop. Wait for the video to be uploaded.

With the video uploaded, you can crop it using the Cropping Tool in the preview section. You may also set a specific Aspect Ratio or Pixels for cropping. Once done, click on Crop Video to confirm.
Once the video has been cropped, you will be redirected to the next step. There, simply click on Save to download the cropped video to your device.
Part 4. FAQs About Cropping Screenshots on Mac
What is the easiest way to crop screenshots on Mac?
The best way to crop an image on Mac is via keyboard shortcuts. Among them, Shift + Command + 4 is the best. This can be used to crop the image directly during screen capture.
Can I use the Photos App to crop Mac screenshots?
Yes, you can. The Photos App has a dedicated crop option. It can be accessed in the Edit tab of the Photos app.
Is it hard to crop images on Mac?
No, it is not. Editing images on Mac is easy. There are even multiple options you can use based on your preference.
Can I use the Photos App to crop videos?
Yes, you can. Photos App offers basic video editing. One option includes basic aspect ratio editing.
Are there third-party tools to crop videos online?
Yes, there are. Online tools also have a unique advantage: they do not require any setup or installation. Among these programs, ArkThinker Free Video Cropper is a good option.
Conclusion
With the four easiest ways to crop screenshots on Mac, we hope that this article has provided our readers with useful information for basic photo editing, such as using the cropping tool on screenshots. When applying cropping adjustments to screen recordings and videos, we suggest using ArkThinker Free Video Cropper Online for optimal practicality and ease of use.
What do you think of this post? Click to rate this post.
Excellent
Rating: 4.8 / 5 (based on 558 votes)


