


Word Compress Images: My Go-To Tricks for Shrinking Word File Size
If you’ve ever tried sending a Word document packed with high-resolution photos, you probably know the struggle: the file takes forever to open, or worse, your email bounces back because the attachment is too large. I’ve been there - hitting send only to be met with that dreaded file size exceeds limit message.
That’s when I realized that learning how to compress pictures in Word wasn’t just a nice trick, but a real lifesaver. Whether you’re a student submitting assignments, a professional preparing reports, or just someone sharing family photos in a Word file, knowing how to reduce all picture size in Word can save you time, stress, and storage.

- GUIDE LIST
- Part 1. Why Do We Need to Reduce File Size in Word
- Part 2: How to Compress Pictures in Word
- Part 3: Best Word Image Compressor Alternative
- Part 4: Which Method is Better
- Part 5: Tips to Keep Your Word Lightweight
- Part 6: FAQs
Part 1. Why Do We Need to Reduce File Size in Word
Here are some of the most common reasons people look for Word document optimization:
• Slow document performance: Large, image-heavy Word files can lag or even crash. Nobody enjoys waiting for a file to load when you’re on a deadline.
• Email attachment limits: Many email providers cap attachments around 25MB. A few uncompressed images can push you over that limit quickly. So for sending the Word attachment file successfully, you need to compress images for it first.
• Cloud storage optimization: Services like Google Drive or OneDrive have limited free storage. A lighter document helps you save space.
• Collaboration efficiency: When you share a file with classmates, colleagues, or clients, faster upload/download times make everyone’s life easier.
In short, compressing photos in Word is about keeping things smooth and simple.
Part 2: How to Compress Pictures in Word
Microsoft Word has a built-in feature to compress images in Word without losing quality (too much). Here’s how I usually do it:
Open Your Word Document
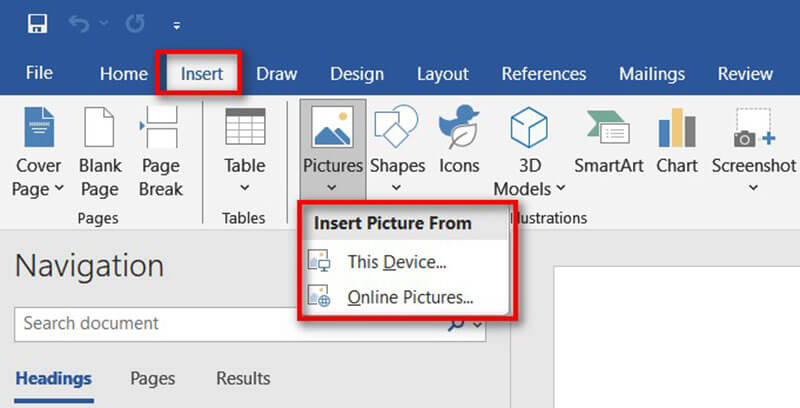
Start by opening the Word file that contains the images you want to compress. Or click the blank Word file, then click Insert tab at the top to select Insert to load the images you want to compress from your device or online pictures.
Select an Image
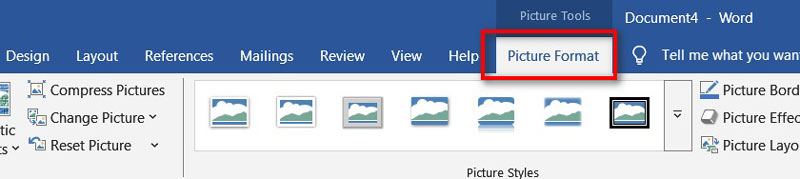
Click on any image in your document. This will activate the Picture Format tab at the top of Word.
Tip: You only need to select one image to access the compression settings—even if you want to compress all images.
Once the image is selected, look at the top ribbon and click on Picture Format (sometimes called Format depending on your version of Word).
Click Compress Pictures
In the Adjust group of the Picture Format tab, click on Compress Pictures.
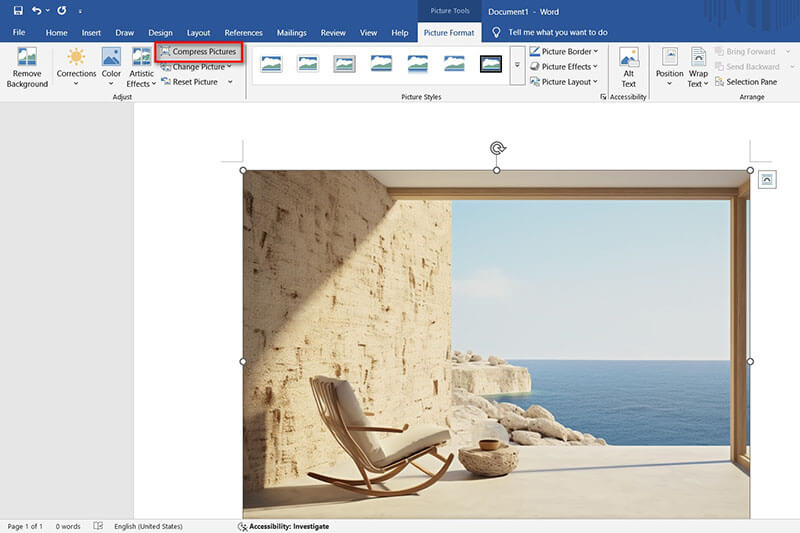
A dialog box will pop up with several options.
Here’s what you’ll see in the dialog box:
• Apply only to this picture:
Unchecked: Compresses all pictures in the document.
Checked: Compresses only the selected image.
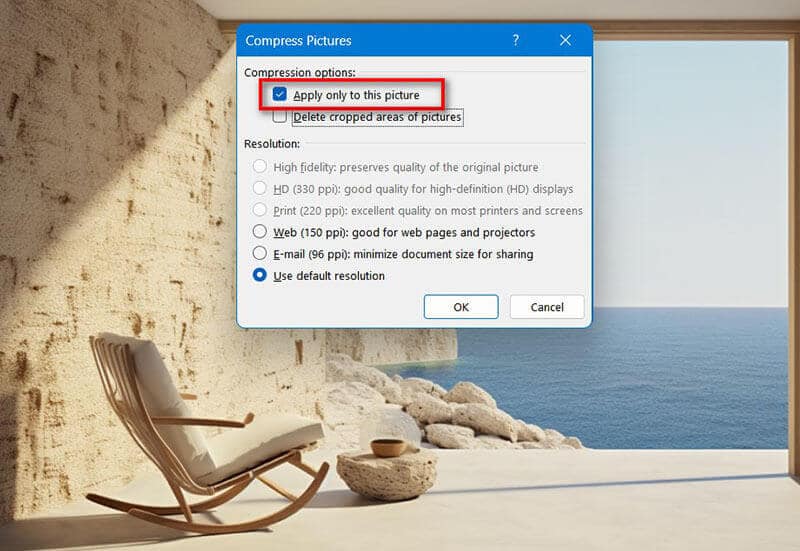
• Delete cropped areas of pictures:
Checked: Removes hidden parts of images you’ve cropped. This saves space.
• Resolution options:Choose the resolution based on how you plan to use the document:
Email (96 ppi) – Smallest file size, good for sharing.
Web (150 ppi) – Balanced quality and size.
Print (220 ppi) – High quality for printing.
HD (330 ppi) – Best quality, largest file size.
Tip: For school projects or email sharing, Email or Web resolution is usually enough.
Save Your Document
Once you’ve selected your settings, click OK. Word will compress the images based on your choices.
Save your file to lock in the changes. You’ll notice the file size is now smaller and easier to handle.
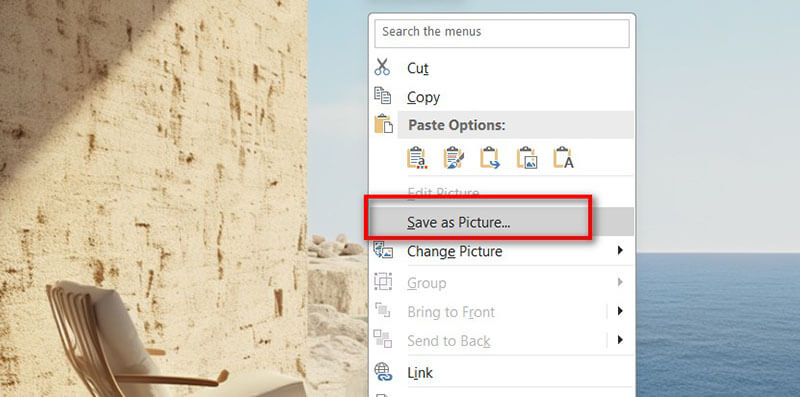
Save Compressed Images
If you want to save all the compressed images from your Word file to your computer, just right-click the image, then select Save as Picture. Then it will be located to your local destination folder.
From my experience, this works well for one-off documents, especially if you’re preparing to compress Word images for email. But there are some limits: you can’t always batch-process lots of images, and the compression isn’t as strong as dedicated tools.
Part 3: Best Word Image Compressor Alternative
When Word’s built-in feature doesn’t cut it, I often switch to an online tool like ArkThinker Image Compressor Online.
What is ArkThinker Image Compressor Online?
It’s a web-based tool designed to shrink images while keeping them sharp. Unlike Word’s default compression, ArkThinker offers more control and works well for multiple images at once.
Key Features
• Free to use with no software installation.
• Supports multiple formats (JPEG, PNG, GIF, etc.).
• Batch compression for several photos at once.
• Preserves image quality while drastically reducing size.
• Works directly in your browser (Windows, Mac, or even mobile).
Steps to use ArkThinker Image Compressor Online:
Visit ArkThinker in your browser
Whether you're lounging with your laptop or swiping through your phone, just pop open your browser and head over to ArkThinker Image Compressor Online. No installs, no hassle, and it’s all right there on the web, ready when you are.
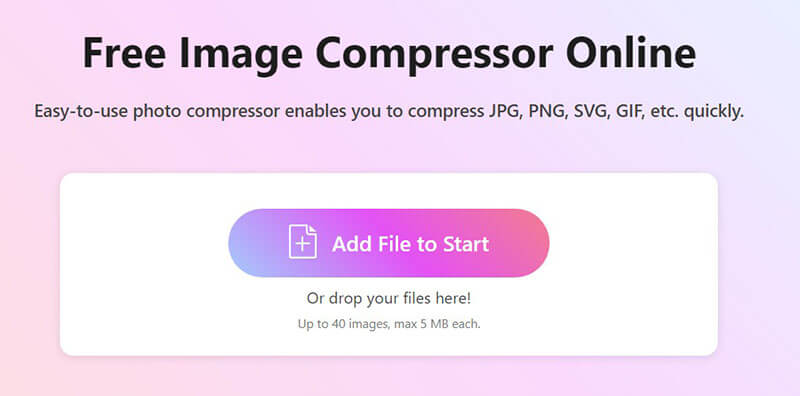
Upload your images
Tap the Add Files to Start button, or if you’re in the mood to show off your drag-and-drop skills, go ahead and drop your JPG or PNG files straight into the upload box.
You can upload up to 40 images at once, as long as each one’s under 5MB. Perfect for when you’ve got a whole batch to shrink down!
Compress and download your images
No extra clicks needed, and this free online tool will do it automatically. Once your images are compressed, you’ve got two ways to grab them:
• Download each one individually
• Or hit Download All to scoop them all up in a tidy ZIP file
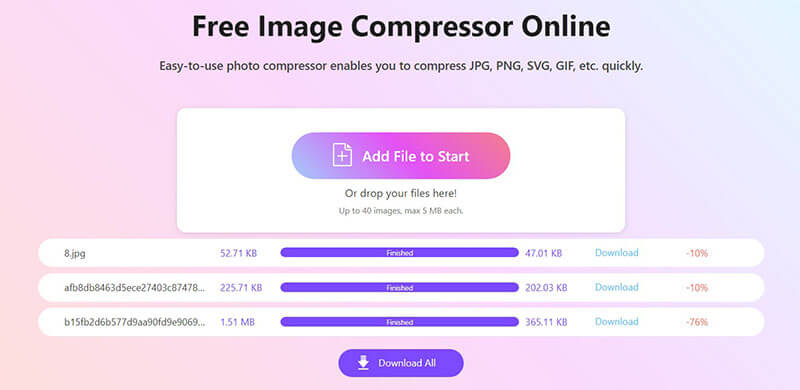
In my test, a 5MB photo was reduced to under 1MB without a noticeable drop in quality. That’s a big win if you want to shrink Word file size quickly.
Part 4: Which Method is Better
Here’s a quick comparison based on my personal testing:
For me, Word is great if I’m in a hurry, but if I’m working on a big project (like a group report full of charts and photos), ArkThinker is the best online image compressor for Word hands down.
| Word’s Built-in Compression | VS | ArkThinker Image Compressor Online |
|---|---|---|
| 5.2 MB JPG | Test Image Size | 5.2 MB JPG |
| 2.8 MB | Output Size | 0.9 MB |
| Instant (but one document at a time) | Time Taken | ~5 seconds per batch |
| No | Batch Conversion | Yes |
| Good, slightly blurry at low resolution | Quality Retained | Excellent, almost no visible loss |
| Quick fixes inside Word | Best For | Large projects, multiple images, higher compression |
Part 5: Tips to Keep Your Word Lightweight
Even with compression, a few habits can help you avoid bloated files:
• Use compressed formats: JPEG usually takes less space than PNG. If you have PNG or other types of images, just convert image to JPG firstly.
• Avoid copy-pasting screenshots: Instead, save them as files and insert them. Screenshots often carry unnecessary metadata.
• Use linked images: If you don’t need others to edit the images, linking instead of embedding can save a lot of space.
• Compress as you go: Don’t wait until the last minute. Compress images early to keep your file manageable.
Part 6: FAQs
Will compressing photos in Word ruin the quality?
Not necessarily. If you choose higher resolution options, you’ll barely notice the difference.
Can I compress all images in Word at once?
Yes! Just uncheck Apply only to this picture when using the Compress Pictures in Word tool.
Is ArkThinker Image Compressor Online safe?
Yes, it processes files online and doesn’t store your images permanently.
How do I compress Word images for email?
Either use Word’s built-in compression or compress images with ArkThinker before inserting them.
Conclusion
Large Word files can be a headache-slow to open, tricky to email, and heavy on storage. Thankfully, learning how to compress images in Word (or using a tool like ArkThinker Image Compressor Online) makes things a lot easier.
If you just need a quick fix, Word’s built-in option will help you reduce Word file size without much fuss. But if you want stronger compression, batch processing, and better quality, ArkThinker is the smarter choice.
Next time you’re stuck with a bulky file, give ArkThinker a try, and you’ll wonder why you didn’t start sooner!
What do you think of this post? Click to rate this post.
Excellent
Rating: 4.8 / 5 (based on 477 votes)