


Google Slides Loop Video: Using YouTube & Google Drive Video
Google Slides is a presentation tool developed by Google and part of the Google Workspace suite, similar to Microsoft’s PowerPoint. It's completely cloud-based and free to use. Because PowerPoint can be hard to access, users need to subscribe to the Microsoft 365 suite, making looping videos in PowerPoint impossible for some users. However, as Google Slides is basically a cloud-based version of PowerPoint, in this article, we will explore the Google Slides function specifically for looping video in Google Slides to determine if it is really capable of doing so.
Furthermore, this article presents a step-by-step guide, using YouTube and Google Drive videos to loop in Google Slides, with tips on how to ensure your videos loop during a web presentation. Thus, continuing to read this article will help you navigate your way around how to loop a video in Google Slides, but also present an alternative online video looper tool you may also use when you are having trouble with looping videos in Google Slides.

- GUIDE LIST
- Part 1. Can I Loop A Video in Google Slides?
- Part 2. How to Loop Video in Google Slides Using Format Options
- Part 3. Tips to Make Sure the Loop Works During A Live 'Published to Web' Presentation
- Part 4. Best Free Online Alternative
- Part 5. FAQs about How to Loop A Video on Google Slides
Part 1. Can I Loop A Video in Google Slides?
Is Google Slides really capable of looping a video? The straight answer is yes, it can. At first glance, a cloud-based presentation tool may seem inferior in functionality to a software-based one, but surprisingly, Google Slides makes it easy for users to loop a video on a slide.
Moreover, Google Slides simplifies video looping but can only loop videos via YouTube links or uploaded Google Drive files, which may require pre-uploading videos. While this poses a problem for users' videos, to ensure they can use their preferred videos to loop in their Google Slides presentation, they can just upload them to their Google Drive folder. To help you loop video in Google Slides, simply follow the steps below this section using a YouTube video link and a Google Drive Video.
Part 2. How to Loop Video in Google Slides Using Format Options
Using a YouTube Video
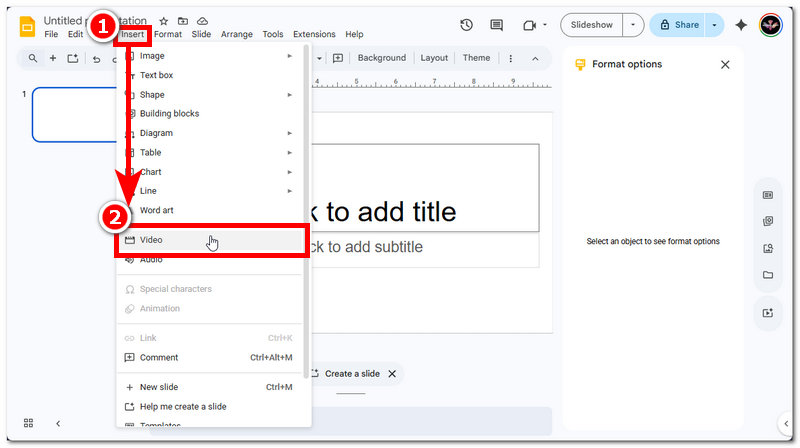
From your web browser, search for Google Slides and proceed to log in to your Google Account to create a blank Google Slides presentation. From there, click on the Insert from menu section situated on the above portion of your Google Slides screen, and from there, click on the Video to insert a YouTube video link.
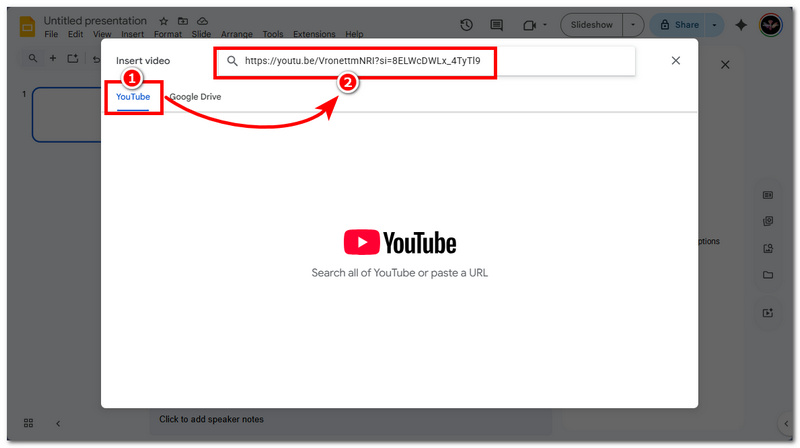
From the Insert Video menu, click on YouTube, and from the field space provided, paste the link of your YouTube video you want to use in your Google Slides to play in a loop.
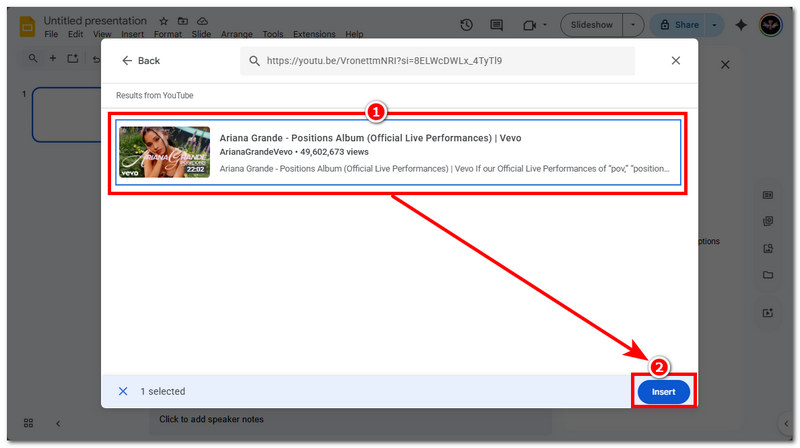
After pasting your YouTube video link, hit the Enter button, and from there select the YouTube video that appears on your screen and click Insert to proceed.
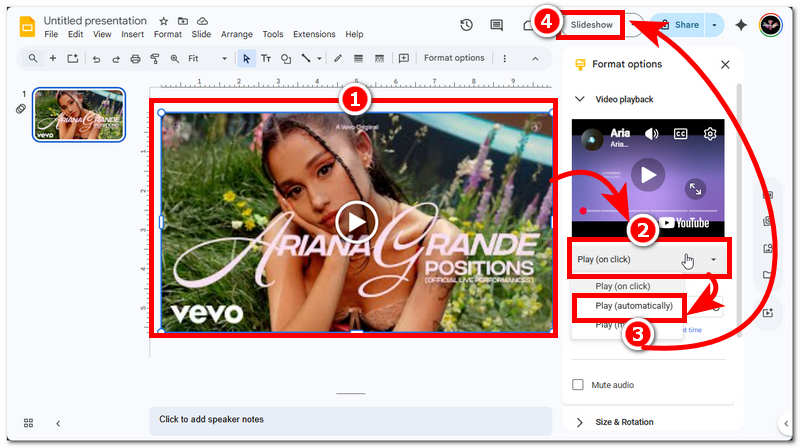
Your YouTube video will then appear on your Google Slides. What you do next is to click on the YouTube video to have access to the Format Option and from there set your video to Play Automatically, and once done, click on the Slideshow button on the upper part of your Google Slides screen.
Once you enter the Slideshow mode of your YouTube video in Google Slides, locate the three-dotted setting situated in the lower-left corner of the video. From there, click on the Auto-play setting, and from there, click on the Loop to make your YouTube video play in a loop once you open your Google Slides.

Using Google Drive Video
Open your Google Slides from your web browser, and once you manage to log in to your Google Account, you will be redirected to an empty slide. From there, click on the Insert, then Video to add the video you want to loop in Google Slides from your Google Drive.

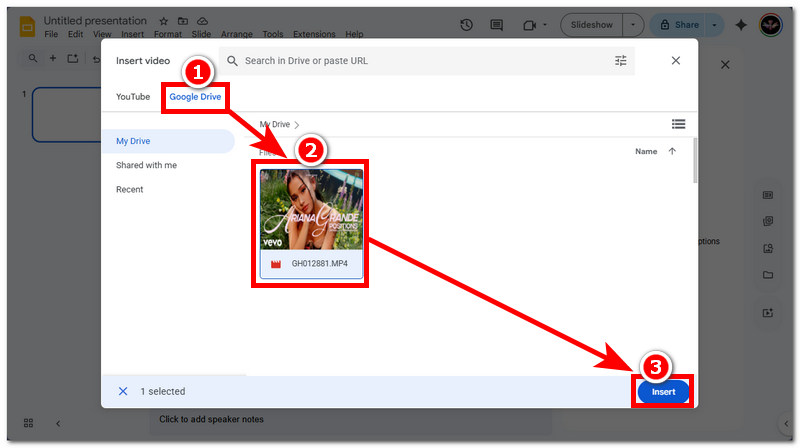
From there, click on the Google Drive section and from your Drive select the video you want to Insert in your Google Slides.
Take Note: Be sure to upload your video first to your Google Drive before doing all the steps.
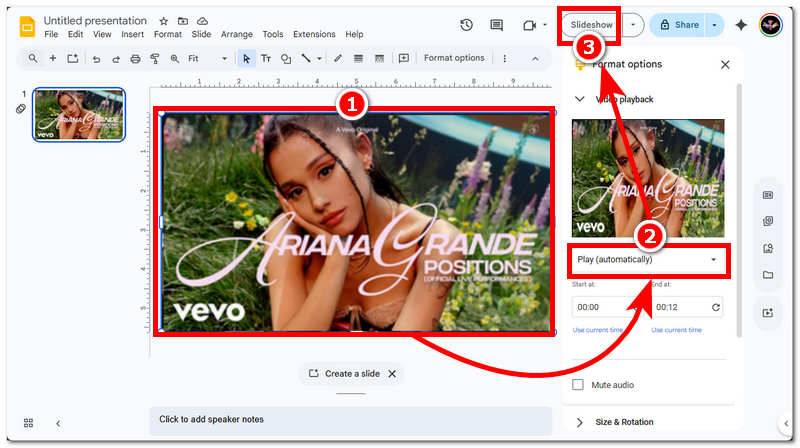
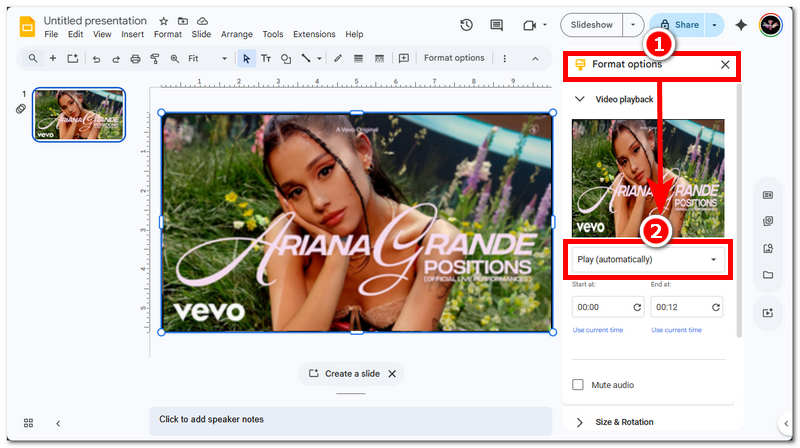
Once your video from Google Drive is loaded in your Google Slides, proceed to click on the video first to access the Format Option, and from the Format Options, set your video to Play Automatically, click on the Slideshow to proceed to the next step.
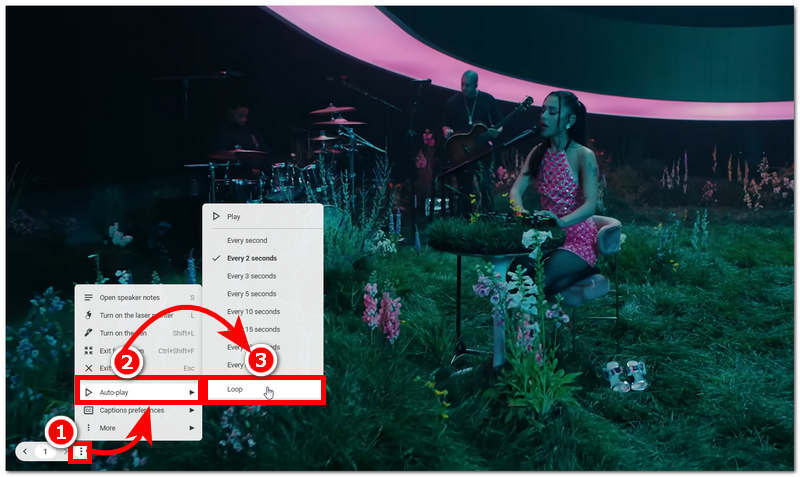
Once you are in the Slideshow mode, simply click the three-dotted setting located in the lower-left corner of your screen, and from there have your video Auto-play in Loop.
Part 3. Tips to Make Sure the Loop Works During A Live 'Published to Web' Presentation
The most important thing user should keep in mind is to ensure that their video loop in Google Slides will work when the published web presentation is to do the following:
- • The only thing user should never forget in the process of making their video to loop during web presentation is to set their video to Play Automatically. This setting is found in the Format Options by clicking the video in your Google Slides.
Take Note: We included this step above; thus, if you follow and read them thoroughly for both YouTube and Google Drive videos, you are sure to have your loop videos play in both published and web presentation automatically.
Part 4. Best Free Online Alternative
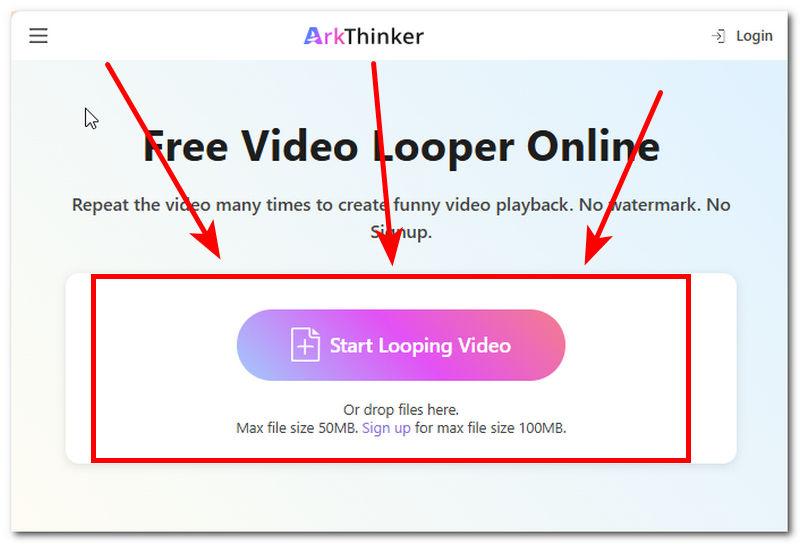
Pondering on the question of how to loop a video on Google Slides, surely the answer is that users should use Google Slides. However, what if the other person doesn’t have time to log in to their Google Account just to open their Google Slides video? While looping video in Google Slides is already easy, there is another method that's much faster and doesn’t require a login: an online video looper tool called ArkThinker Free Video Looper Online. ArkThinker is a web-based video looper tool that works with any type of video, with no video link required. Using ArkThinker Free Video Looper, simply drag a video file into the field to loop it without requiring a YouTube link.
How to use ArkThinker Free Video Looper Online
Go to the ArkThinker Free Video Looper Online official website.
Upload your video file you wish to loop into the field space, and wait for it to finish uploading.
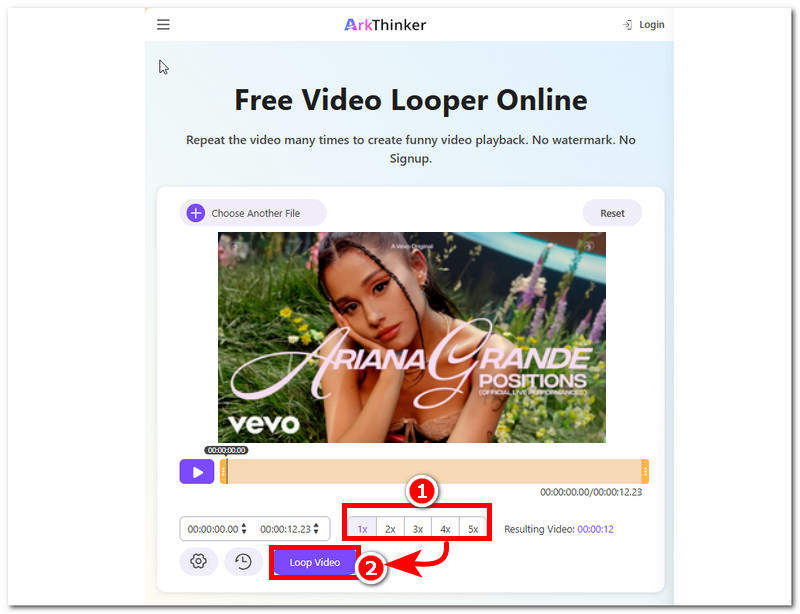
From the tool's interface, select the number of loops you want your video to do, then click the Loop Video button to start the process. Once done, your video will be saved as a looping video on your device.
Part 5. FAQs about How to Loop A Video on Google Slides
Will the video autoplay and loop at the same time?
Yes, your video in Google Slides should be able to autoplay and loop simultaneously as long as you enable the necessary settings.
Does looping work when presenting offline?
For Google Drive videos to loop when presenting offline, they must be cached or available for offline viewing. For YouTube looping videos, looping may not be possible, as they require an internet connection to play.
Conclusion
Google Slides is as functional as other presentation tools, especially in the video looping department. While it's a cloud-based tool, it proves it can also be used to make presentations with looping videos from YouTube links and Google Drive videos. This article has provided user knowledge about Google Slides' looping video capabilities, as well as a guide on how to get a video to loop on Google Slides.
What do you think of this post? Click to rate this post.
Excellent
Rating: 4.9 / 5 (based on 542 votes)