


Audacity Cut MP3 Guide: Cut, Split, and Trim Audio Clips
Audacity is a free-to-use software tool and an open-source audio editing and recording tool used for audio production and general music cleanup available for Windows, macOS, and Linux devices. Audacity is a beginner-friendly tool that is lightweight on devices to work with multiple audio tracks to perfection through its list of features and functions to edit audio files.
In this article, we will delve into how to use Adacity to cut audio files for pitch-perfection, specifically finding out three ways to perform cuts, splits, and trim your audio files in the program with a simplified step-by-step guide. In addition, you will also get introduced to a bonus audio trimming program if you want an alternative, faster, and easier processing audio editing tool to Audacity.

- GUIDE LIST
- Part 1. How to Use Audacity to Cut MP3?
- Part 2. Bonus: Easier Audio Trimming with ArkThinker Video Converter Ultimate
- Part 3. FAQs about How to Cut an MP3 on Audacity
Part 1. How to Use Audacity to Cut MP3?
Method 1: Using the Selection Tool to Cut and Delete
This method will teach you how to cut MP3 with Audacity and delete the parts you want to cut from your audio file.
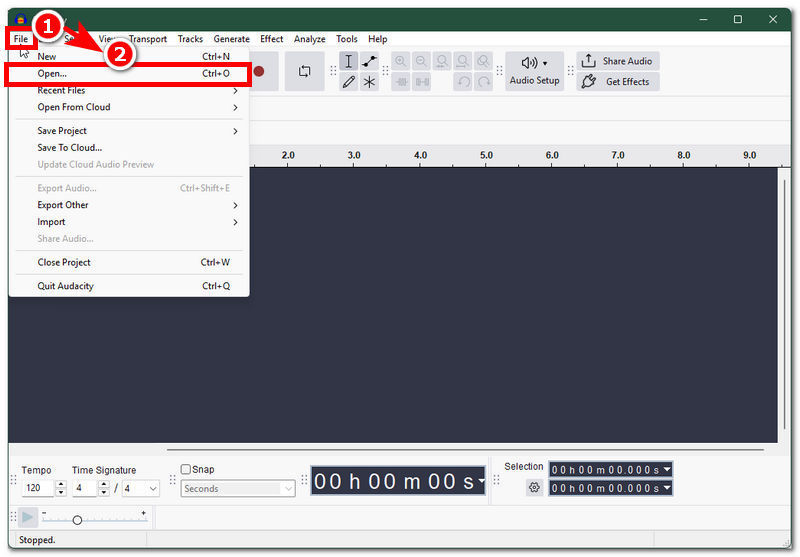
Open the Audacity software from your desktop device. Once you are in the software’s main interface, begin by loading your MP3 file you wish to cut and delete parts into the software by clicking on the File section in the upper-left corner of the tool. From there, click Open and select your MP3 file.

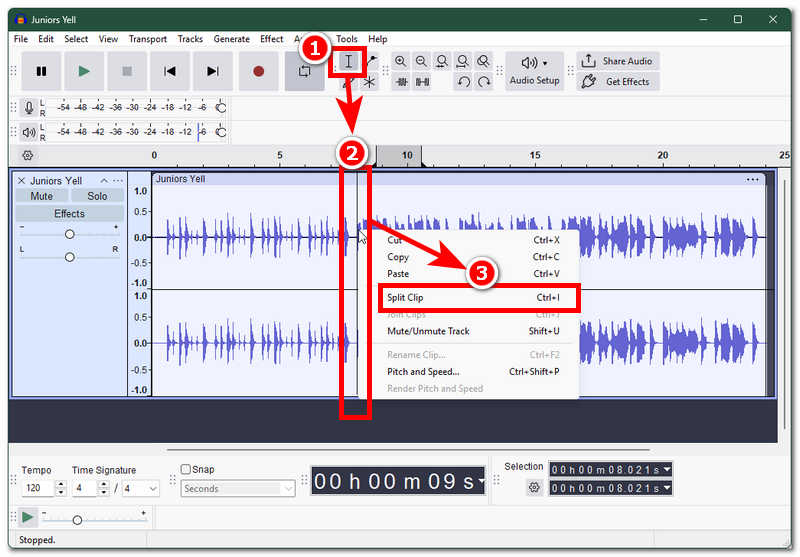
Once the audio file is loaded into the tool. Proceed by clicking on the Selection Tool button and from there head over to your file and tap on the part you wish to mark, there should be a line that will appear. From there, right-click and select the Split Clip function to proceed.
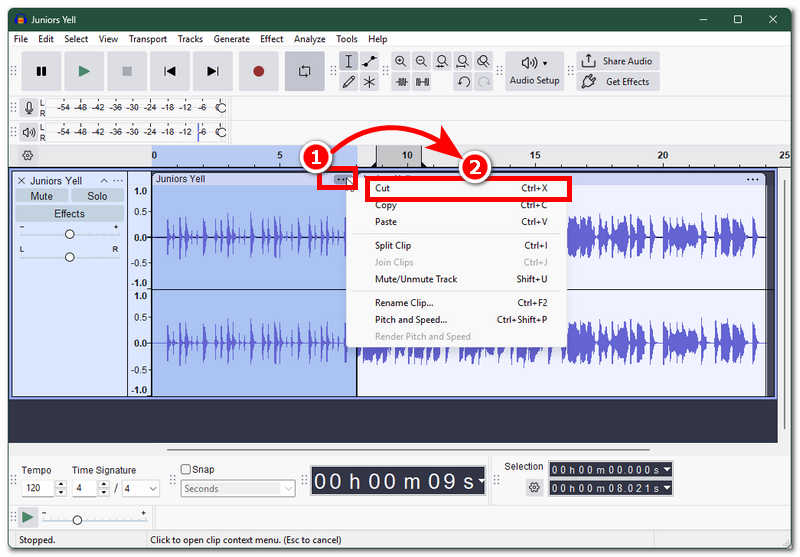
After splitting your audio clip into two parts, a three-dotted (ellipses) icon will appear in the upper-right corner of each audio clip. From there, select the audio part, then click on the three-dotted icon and select Cut to remove that audio part from your timeline.
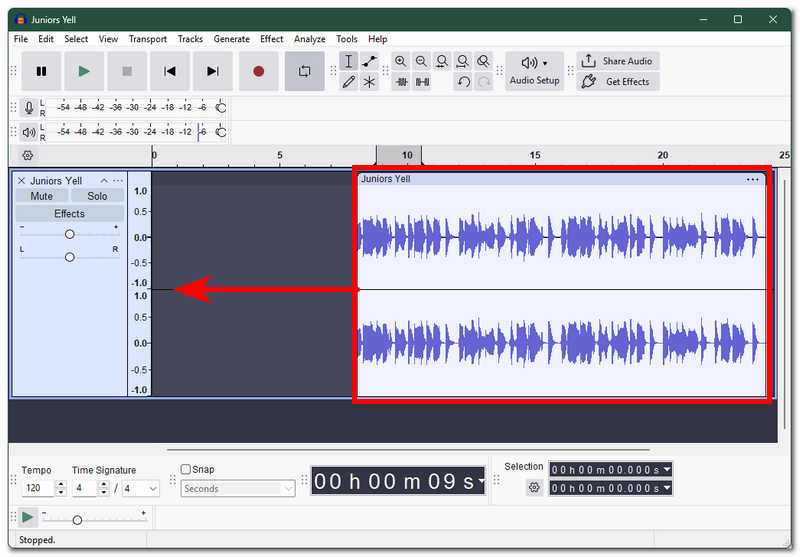
Lastly, after cutting out the parts you want to delete from your audio clip, simply drag your audio clip to the starting line to ensure that it fills the space from the one you just removed. And just like that, you have learned to cut and delete your audio clips using the selection tool.
Method 2: Splitting an MP3 Track into Multiple Parts
In this method, you will learn how to split your MP3 tracks into multiple parts.
In your desktop device, open your Audacity software and from there load your audio file into the software by clicking on the File and Open function located in the upper-left corner of the software.

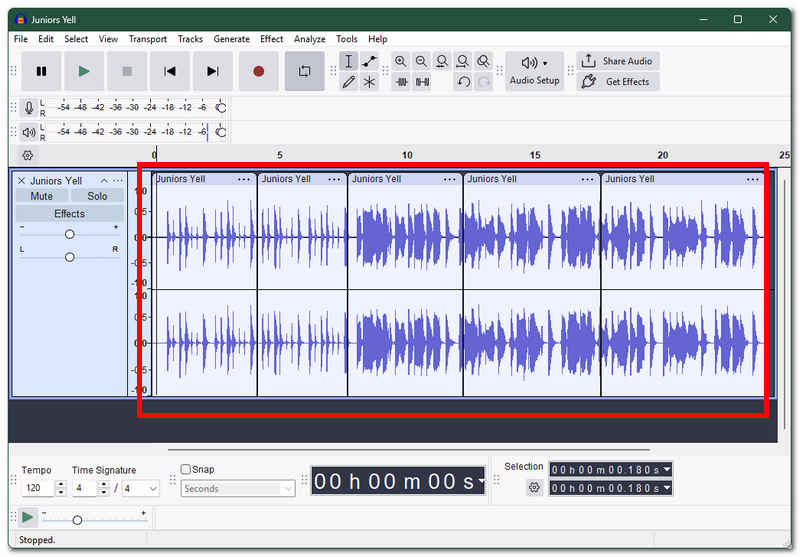
Once your audio file clip is loaded into the tool’s timeline, proceed by clicking on the Selection tool, from there simply select a part in your audio clip and right-click and select Split Clip or shortcut key Ctrl + I.

Finally, repeat the process multiple times in multiple parts of your audio clip, and just like that, you have learned how to split your audio tracks into multiple parts.
Method 3: Trimming the Ends of Your MP3 Audio
This method will show you how to trim your audio clip file using Audacity's built-in functions. This can also help you trim your video if you want.
Launch the Audacity program from your desktop device and from its main interface, proceed to upload your audio clip by clicking on the File > Open function situated in the upper left corner of the Audacity program.
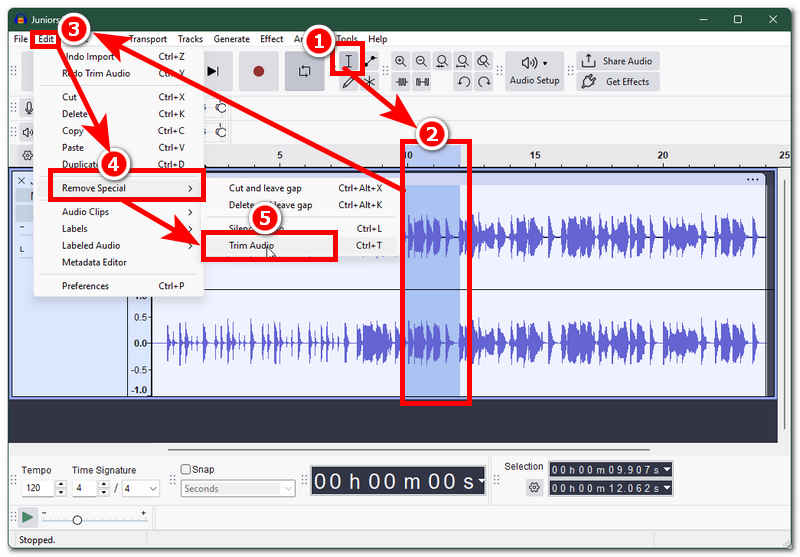
Once your audio clip is loaded into Audacity timeline, begin by clicking on the selection tool and then highlight your audio clip and drag your mouse across your audio clip to select the parts you want to trim from your audio clip.
Once you have selected or highlighted a part of your audio clip, navigate your way to the upper-left corner of your screen and click on the Edit > Remove Special > Trim Audio to finally trim the selected part of your audio clip.
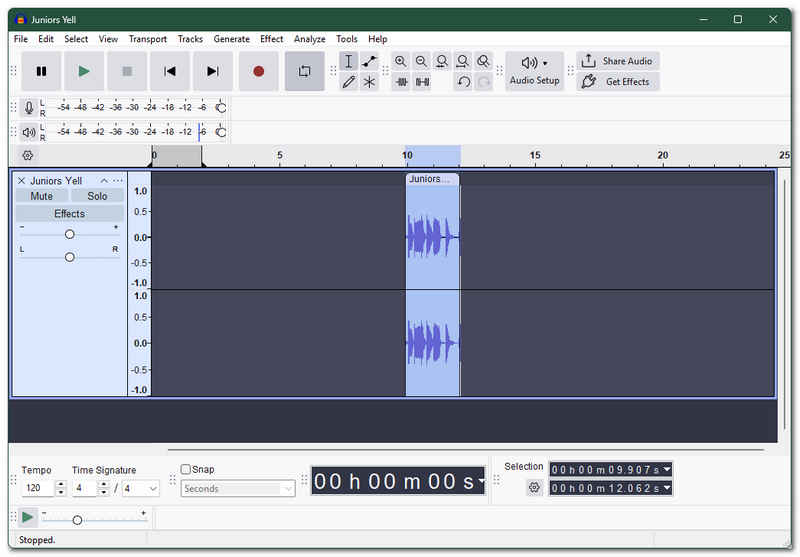
After trimming your audio, what’s left in your timeline is the trimmed part of your audio clip.
Part 2. Bonus: Easier Audio Trimming with ArkThinker Video Converter Ultimate
As a bonus method for effectively trimming your audio files to perfection is can also be done by a third-party software tool such as ArkThinker Video Converter Ultimate tool. This applies if you find Audacity quite complicated for you to trim, cut, and split your audio clips. What ArkThinker brings to the table is that it has a very straightforward and easy-to-navigate user interface, meaning that even novices and those new to such a tool can easily use the tool. In addition, ArkThinker also houses multiple video and audio editing tools, making it an all-in-one tool when in need of quick access to basic video and audio editing, such as audio trimming, cutting, splitting, and more.
Key Features:
- • Lightweight audio editing tool.
- • It’s a much easier-to-use tool.
- • An audio and video editing and enhancement tool.
- • Safe to use the audio trimmer tool.
- • High-speed export processing tool.
- • Retains high-quality export on video and audio files.
How to Use ArkThinker Video Converter Ultimate to Trim Audio
Open your desktop browser and head over to ArkThinker's official website, and download and install the Video Converter Ultimate from there.
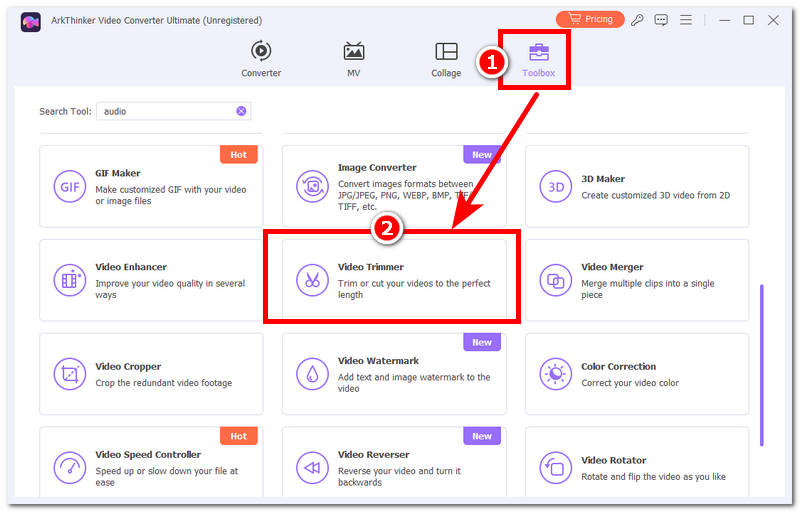
Once the software tool is installed on your desktop device, proceed to open the tool and from its main interface, head over to the upper part menu setting of the tool and from there click on the Toolbox.
Within the Toolbox, you will see all the features and tools ArkThinker offers for video and audio editing, and for trimming your audio clips. Select the Video Trimmer tool.
Once you click on the Video Trimmer tool, the program will then allow you to browse your media library to select the audio clip you wish to trim using ArkThinker. Once your audio clip is loaded into the tool, head over to the audio clip timeline and drag the trim rectangular area to your preferred trim, and once you are satisfied, click on the Export button to process and have your trim be saved on your desktop.

Part 3. FAQs about How to Cut an MP3 on Audacity
How to cut MP3 using Audacity ?
To cut an MP3 file in Audacity, the user should first use the selection tool and select the parts they wish to cut from their audio file through a shortcut key of Ctrl + X.
Will cutting in Audacity reduce audio quality?
No, cutting, trimming, and splitting of your audio clip files in Audacity does not reduce their audio quality. However, when exporting your audio files, ensure that you use the right export setting to avoid exporting a low-quality version of your audio clip.
Conclusion
Audacity, as an open-source audio editing program, is indeed a powerful and useful sound editing program available to all users. While this allows users free access to its service, navigating the actual software is not for everyone, even though it already has a clean and organized user interface; users with no background using such a tool may still find it overwhelming. If you are among those users, this article has listed three methods to use Audacity to cut audio files, as well as the inclusion of another versatile and functional all-in-one audio trimmer tool as an alternative tool for user convenience.
What do you think of this post? Click to rate this post.
Excellent
Rating: 4.9 / 5 (based on 701 votes)