


How to Change the Color of an Image: A Complete Guide for Beginners
Do you ever look at a photo and think, Ugh, that blue is just not right, or maybe you need to change the image's colour to match a specific aesthetic in your class presentation, a quick online share, or as an eye-catching screen graphic.? We've all been there! It’s frustrating when a single distracting shade ruins a perfect picture. But no worries, and learn to adjust and replace picture color to elevate your photography game. Whether you’re a total beginner or you’re ready to dive into the deep end of Adobe Photoshop, we've got you covered.

- GUIDE LIST
- Part 1: How to Change the Color of an Image in Photoshop
- Part 2: How to Change the Colour of an Image on Your Phone
- Part 3: How to Change Picture Color Online
- Part 4: Tips for Getting the Best Look
- Part 5: FAQs
Part 1: How to Change the Color of an Image in Photoshop
If you’re looking for precision and full control over how you change the color of an image, Photoshop is your go-to tool. As one of the most popular and powerful image editing programs, it offers a variety of options for modifying image colors. From subtle tweaks to dramatic changes, Photoshop can do it all.
Based on my personal experience, I love using Photoshop, but it can be overwhelming at first. However, once you get used to its interface, it becomes incredibly intuitive. Here are some of my favorite tools to replace an image's color:
Replace Color Tool
You can use this feature to select a color in your image and replace it with a new one. It’s fantastic when you want to change the color of a particular object or area without affecting the rest of the image. Just select the color you want to change, then pick the new one!
Go to Image > Adjustments > Replace Color.
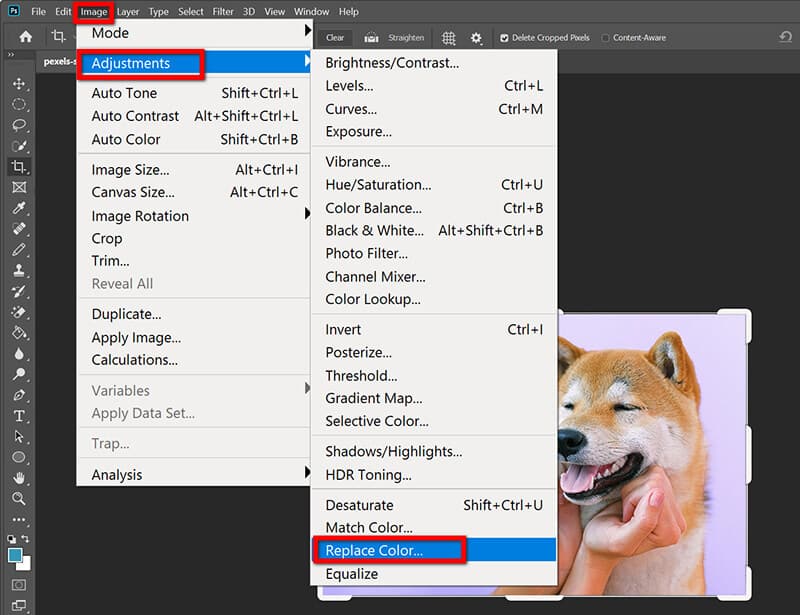
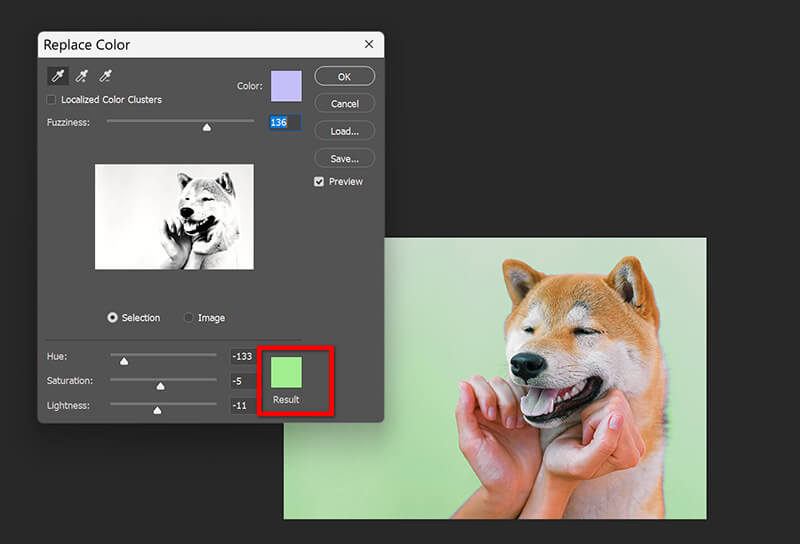
Use the eyedropper to select the color you want to change.
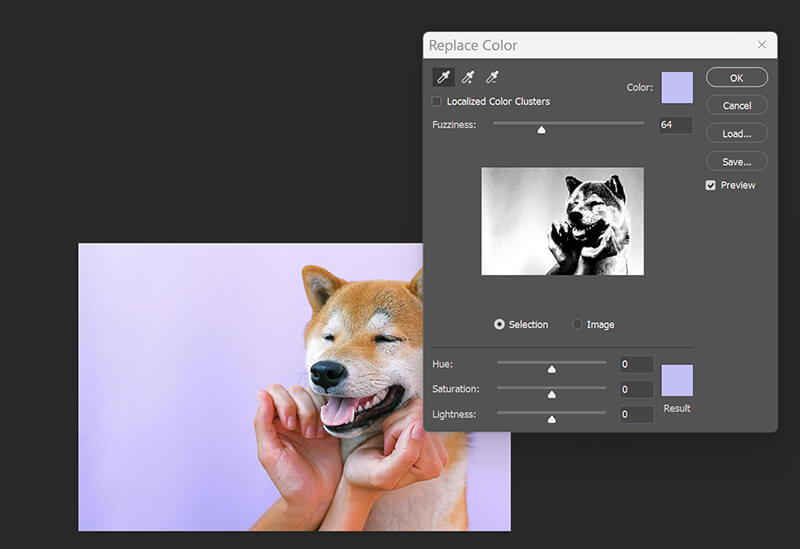
Adjust the fuzziness slider to fine-tune the selection.
Pick your new color and click OK.
If you want to change the background color of an image in Photoshop, just erase the background in Photoshop firstly.
Hue/Saturation Tool
The Hue/Saturation tool is a classic way to adjust an image's overall color balance. You can shift the hue of all the colors in the image, adjust the saturation to make the colors more vibrant or muted, and even adjust the lightness.
Click Image > Adjustments > Hue/Saturation (or just hit Ctrl/Cmd + U).
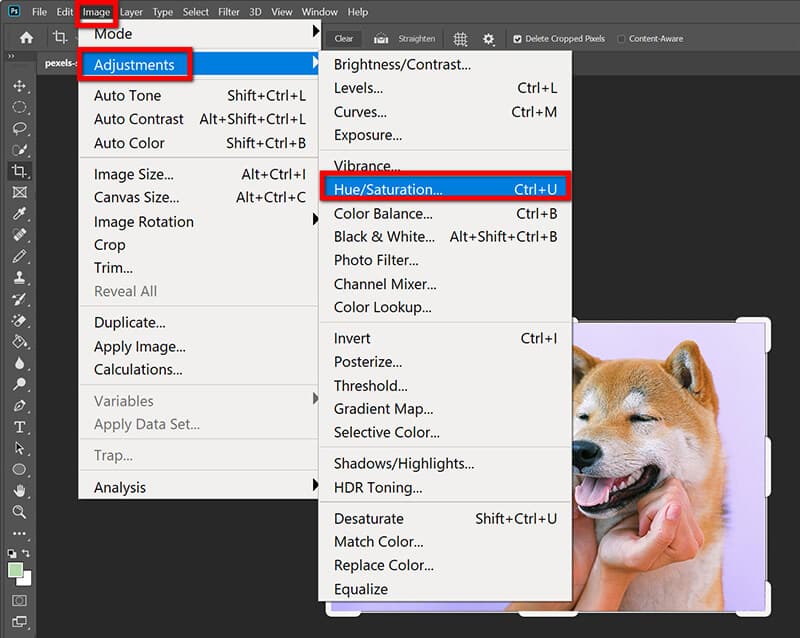
Under the dropdown menu, select your target-specific color channels (Reds, Yellows, Blues, etc.).
You can completely shift the color (Hue), intensify it (Saturation), or darken/lighten it (Lightness). This is what you use when you want to make an image color cooler, for free, in Photoshop.
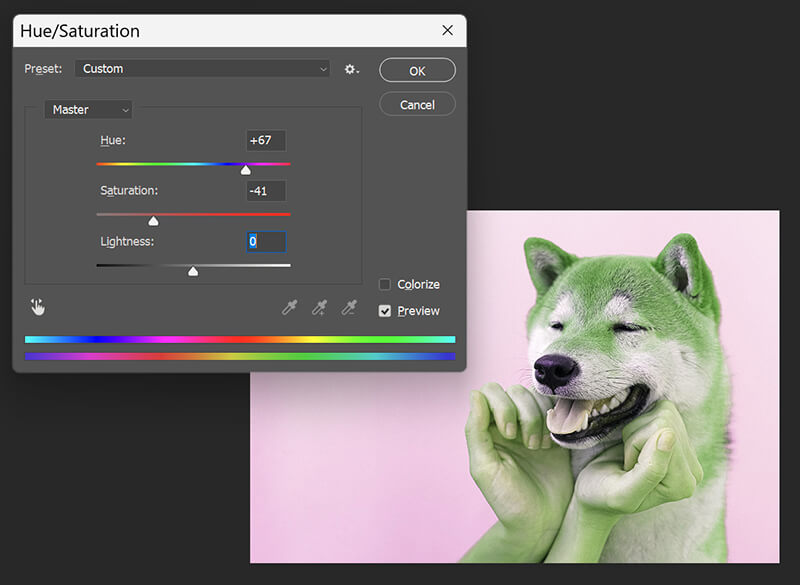
I love how quickly you can completely transform a photo's mood with this tool. However, I’ve found that it can sometimes be tricky to avoid unnatural-looking results, so I always try to make gradual changes.
Color Range Tool
If you want to change specific color ranges, the Color Range tool is a great option. This feature enables you to select image areas by color, letting you make precise adjustments to specific parts without changing the whole image. The only downside is that it might not always give you a clean selection, especially if the colors you want to adjust are similar to those around them in the image.
Turn to Select > Color Range.
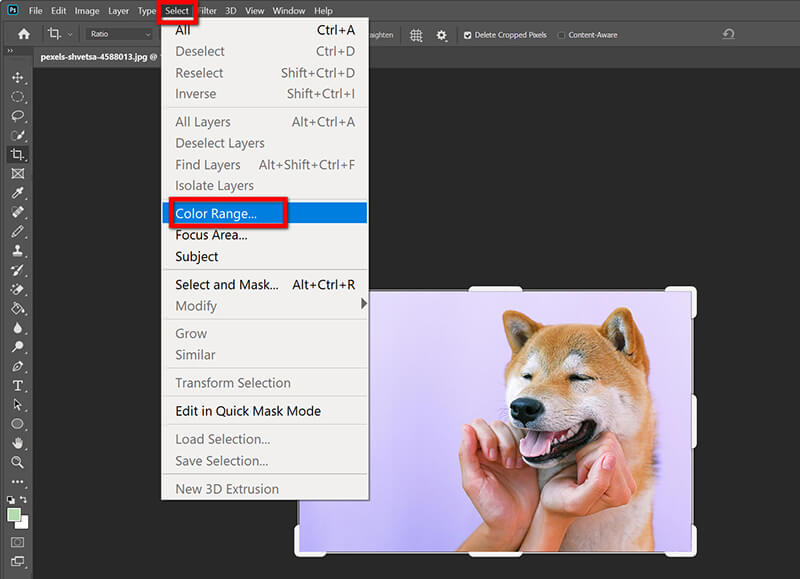
Use the eyedropper to pick your color. After that, adjust the fuzziness and click OK.
Apply a new color using adjustment layers.
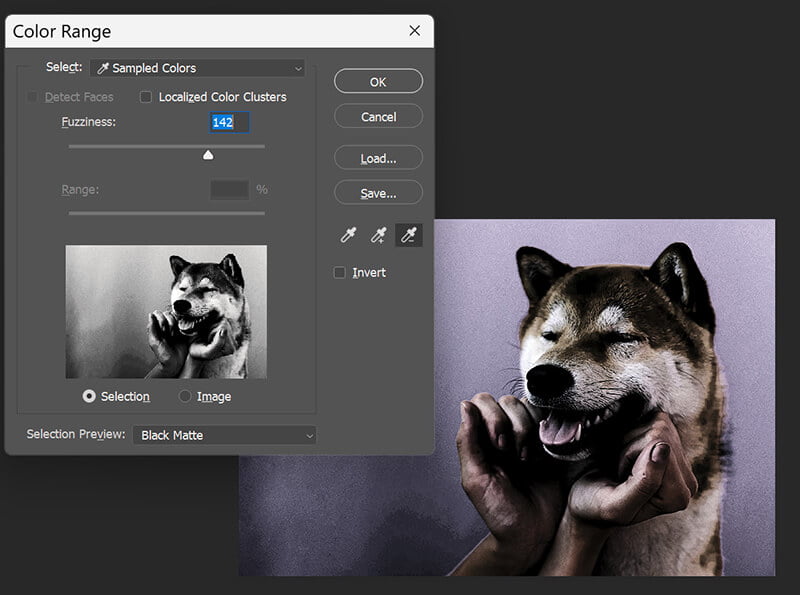
The Fuzziness slider can be tricky to master. If it's too high, your selection bleeds out; if it's too low, you miss half the area. There’s a learning curve to getting that perfect selection edge.
Brush Tool
For more manual adjustments, the Brush Tool can be used to paint over certain areas with the color of your choice. It’s like giving your image a custom paint job! This method is great for very specific color changes, but it can be time-consuming, especially with detailed or large images.
Click the New Layer icon (it looks like a square with a plus sign) in the Layers Panel.

Select the color you want to use from the Foreground Color swatch.
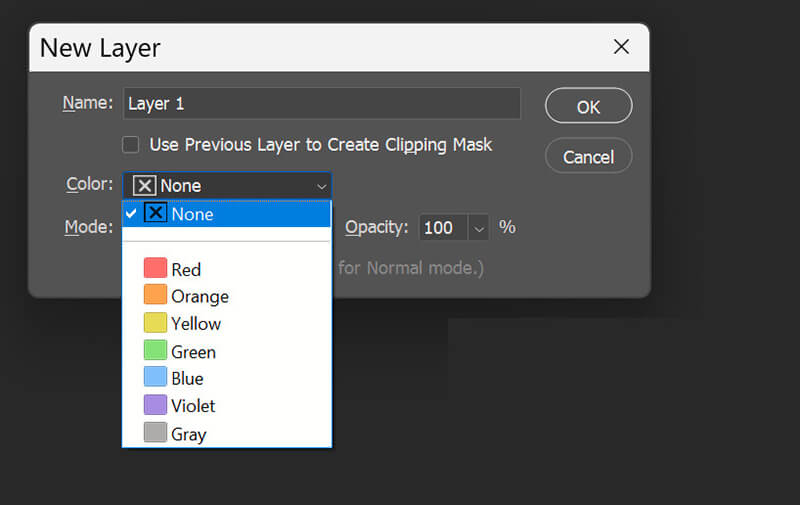
Select the Brush Tool (B) and paint over the part of the image you want to recolor. It will look like a solid, ugly block of color at this point!
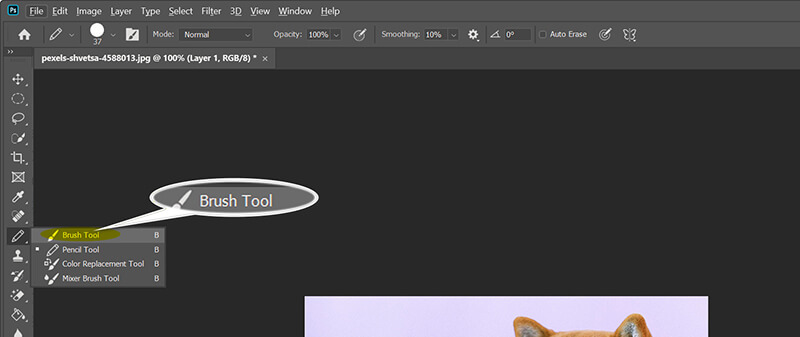
In the Layers Panel, change the Blend Mode of your new color layer from Normal to Color. This instantly blends the new color with the layer beneath it, using its lightness and shadow information.

Finally, add a Layer Mask to the color layer. Using a black brush, you can then carefully erase the color from any areas you want to keep visible, like sharp edges or bright highlights.
It’s messy. You have to be very precise with your brushing, and you need to spend time adding a Layer Mask to precisely clean up the edges, which can be time-consuming.
Part 2: How to Change the Colour of an Image on Your Phone
If you're on the go and need to change an image's color, there are plenty of apps that let you do so right from your phone. I personally use apps on both Android and iPhone for quick edits.
One app that I highly recommend is Snapseed. It’s available for both Android and iPhone, and it’s incredibly user-friendly. You can use it to adjust colors, apply filters, and even add overlays to create cool effects. The best part is that you don’t need a ton of experience to use it, making it a great choice for beginners.
For adjusting image colors, its Tune Image and Selective tools are unbeatable.
Start by tapping the plus icon to choose your photo. Next, navigate to the Tools tab.
Note: Before you adjust the image color, you can use the other tools to crop the image.
Tap Selective, then tap on the part of the image you want to change. You'll see a small pin.

Use two fingers to pinch and zoom the selection circle to cover only the area you want to recolor in an image.
Swipe up or down to cycle through different adjustments, then select Saturation or Warmth (which affects hue).
Swipe left or right to decrease or increase the color intensity, or make the image look cooler for free!
Finally, hit Export to save your beautifully recolored image.

One downside, though, is that some advanced tools require a subscription, though the free version still offers plenty of options.
Part 3: How to Change Picture Color Online
Not everyone has access to Photoshop, and maybe you don’t want to spend hours learning complicated software. Thankfully, several online tools let you change picture colors for free, right in your browser.
ArkThinker Free AI Image Upscaler Online
If you’re looking for a simple and free way to change the colour of an image, ArkThinker Free AI Image Upscaler is a good choice. This tool not only lets you upscale your images but also allows you to adjust image colors with ease. But its color-changing only works when you want to refine your face photo. It automatically adjusts image color to improve quality, and you cannot customize the photo's color.
Go to ArkThinker Free AI Image Upscaler via your browser on your computer or mobile phone. Click the Upload Photo button, then select the photo you want to enhance and color-correct.

Select an upscaling option (e.g., 2x or 4x). The AI will immediately begin processing. This process automatically works its magic, correcting the color and detail.
Once the process is finished, preview your image. You'll notice the enhanced details and much more vibrant, accurate colors. Click Save to export your optimized photo.

The AI-powered aspect means it does the hard work for you, instantly correcting poor color balance and making the image clearer and more vivid. It’s great for batch processing or fixing old, low-quality photos that need a total color overhaul. Because it's an upscaler, its primary focus isn't manual color shifting. If I need to change a red shirt to a blue shirt, this isn't the tool.
Canva
Canva is another excellent, user-friendly tool for changing the color of an image in Canva. This online platform is often used to create social media posts and graphics, and it also offers simple yet effective image editing tools. You can use Canva to adjust brightness, contrast, and saturation to make your image colors pop. I love how easy it is to use and how many features are available for free. One downside, though, is that some advanced color features are locked behind a paid subscription.
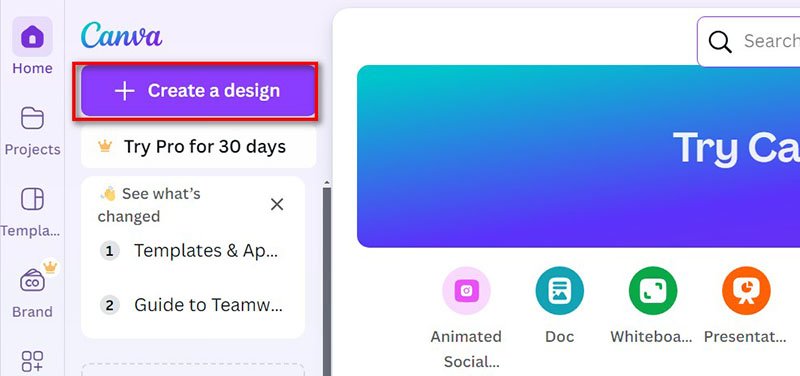
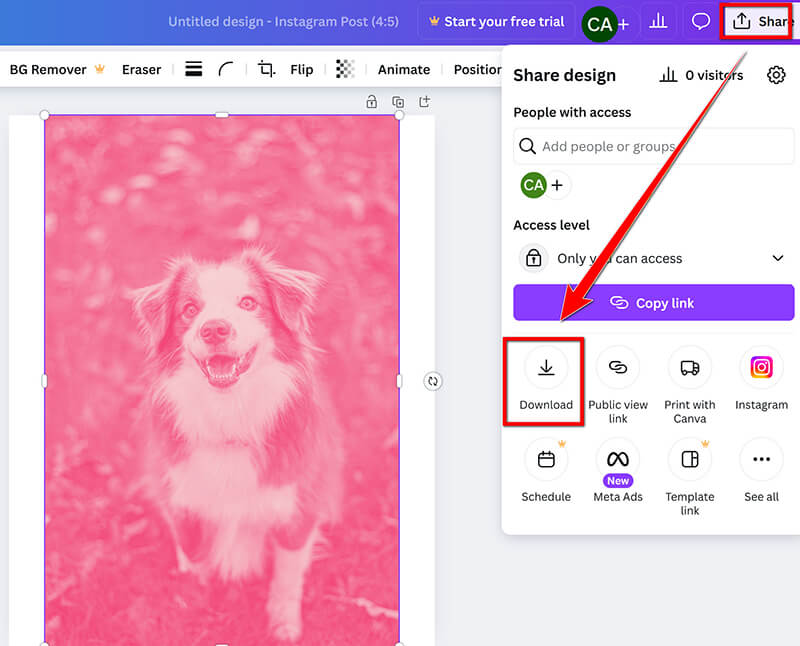
Open Canva and create a new design (e.g., Instagram Post). Upload your image and drag it onto the canvas.
Click the image and then click the Edit button (located in the top menu bar).
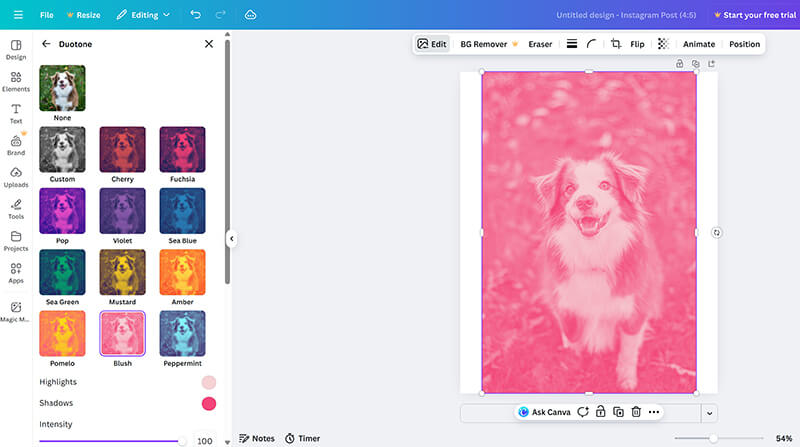
Scroll down the sidebar until you find the Effects section, and select Duotone.
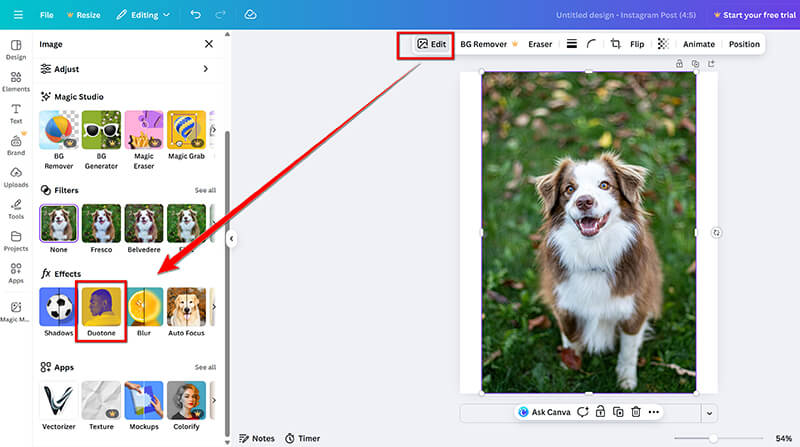
Scroll down the sidebar until you find the Effects section, and select Duotone.
Finally, click Share in the top right, then Download. After that, you need to select the output format and resolution for the color image. However, for the free version, you can export the 1080p image. If you need a higher resolution, you need to make the subscription, or upscale image to 4K by reading this post.
It’s incredibly fast and integrated into a full design suite. The Duotone effect is perfect for creating a trendy, single-color look, and you can change the picture color and text/elements simultaneously, which is a huge time-saver. However, the free version’s manual color adjustment controls are less sophisticated than Photoshop's. If you try to adjust image colors on a specific, small area, you might be disappointed by the lack of selection tools.
Part 4: Tips for Getting the Best Look
Now that you know how to change the colour of an image, here are a few tips to make sure you get the best results:
• Use Subtle Adjustments
When changing image colors, subtle changes often work best. Overdoing it can make your image look unnatural. Start with small adjustments and gradually increase them.
• Consider the Mood
Color can completely change the mood of an image. Warm tones (reds, oranges) create a sense of energy, while cool tones (blues, greens) tend to feel calm and relaxing.
• Don’t Forget the Contrast
Sometimes, simply adjusting the contrast can make your colors stand out more. Don’t be afraid to experiment with the levels until you get the perfect look.
• Use Layers
In Photoshop or any other advanced editor, use layers to adjust colors non-destructively. This way, you can always go back and tweak things if needed.
• Preview Before Committing
Many apps and software let you preview changes before you finalize them. Always use this feature to see how the colors look under different lighting conditions.
Part 5: FAQs
Can I change the color of an image for free?
Yes! There are several free tools, like Canva, ArkThinker, and Snapseed, that let you change an image's color without spending a dime. Some features might be locked behind a subscription, but basic tools are usually free.
How do I make an image color cooler for free?
You can cool down the colors of your image by adjusting its temperature within tools such as Canva or Photoshop. Simply lower the image's temperature, and you’ll see a cooler (bluer) tone emerge.
What’s the difference between Hue and Saturation?
Think of it this way: Hue is the type of color (Is it red? Is it blue? Is it yellow?). Shifting the Hue changes the image's colour from red to green. Saturation is the intensity of that color (Is the red super bright and vivid, or is it dull and grayish?). They work together to help you adjust image colors.
Conclusion
Changing the color of an image is a fun and creative process, and you don’t need to be a professional designer to do it. With choices ranging from Photoshop to mobile applications and various online tools, there's an option available for every requirement. By experimenting with different methods, you’ll learn how to adjust image colors, make them cooler, or recolor an image to fit your style. Just remember to take your time and enjoy the process. With practice, you’ll be able to give your images the exact look you want, whether it's a vibrant pop of color or a more subtle, calming tone. Happy editing!
What do you think of this post? Click to rate this post.
Excellent
Rating: 4.9 / 5 (based on 499 votes)