


Top 6 MacBook Snipping Tools: Built-in and Third-Party Apps
When using macOS computers, taking screenshots can be challenging since there are multiple ways to do so within the OS. The sheer amount of options may make choosing tricky and confusing for some users. In this article, we will aim to fix this problem by providing a detailed review of the six best MacBook snipping tools that you can use. We will provide a quick guide to the built-in options and offer a detailed review of the best third-party tools available on the market.

- GUIDE LIST
- Part 1. Does MacBook Have a Snipping Tool
- Part 2. Best MacBook Snipping Tool s (Third-Party)
- Part 3. How to Choose the Right Snip Tool for MacBook
- Part 4. FAQs About MacBook Snipping Tools
Part 1. Does MacBook Have a Snipping Tool
Yes, there are. In fact, the supply of snipping tool MacBook shortcuts on the operating system is abundant. With that in mind, we will provide our readers with a full guide on the most commonly used screenshot modes to take screenshots on Mac.
To learn how to take a full screenshot, a window screenshot, and open the screenshot tool, please read our guides below.
Full Screen Capture (⌘ + Shift + 3)
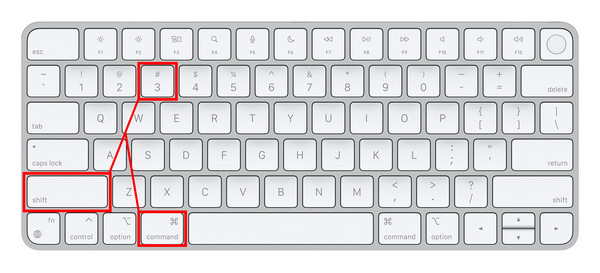
The most straightforward option to capture a screenshot on a Mac is to take a picture of the entire screen. If you wish to use this option, press Command + Shift + 3. This mode is ideal for sharing entire webpages, a menu of software, or sharing samples of gameplay.
Window Screenshot (⌘ + Shift + 4)
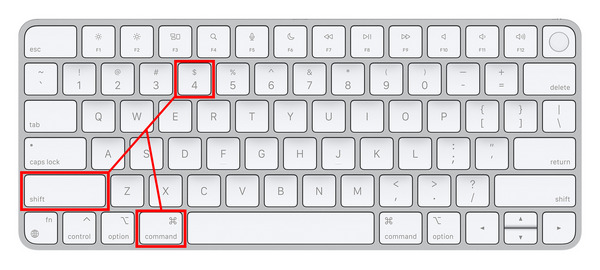
If you wish to hide the taskbar of your Mac computer when taking a screenshot, you may use the combination of Command + Shift + 4. Using this shortcut, you will only capture the current window of the software you are in. When using browsers, only the window will be captured, and your taskbar will not be affected. This is ideal for user security and privacy.
Open Screenshot Toolbar (⌘ + Shift + 5)
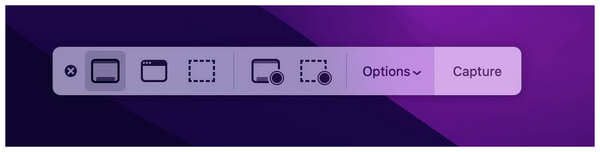
With more experience and familiarity using screenshots on Mac, you can now open the Screenshot Toolbar by pressing the Command + Shift + 5 combination. This menu will open all the screenshot and screen recording options available by default on your computer. Here, you can use Fullscreen Screenshot, Window Screenshot, Screenshot Portion of the Screen, Full Screen Recording, and Partial Screen Recording.
Once you have learned how to use the Snipping Tool on your MacBook using the mode of your choice, you can then access the image by default in the Desktop screen of your computer. Simply locate the PNG file on your desktop with a file name starting with 'screenshot', followed by the date when you captured it.
Part 2. Best MacBook Snipping Tool s (Third-Party)
ArkThinker Screen Recorder
When selecting a third-party screenshot software, consider checking both its screenshot capabilities and other available features to ensure that your choice will be practical beyond its screenshot function. As such, ArkThinker Screen Recorder should be one of your top picks.
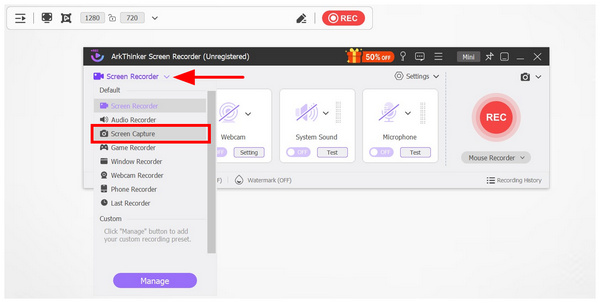
Although developed as a video record tool for computer displays, ArkThinker Screen Recorder is versatile enough to feature an exclusive Screen Capture tool that functions well as a MacBook snipping software with built-in annotation and essential image editing options.
When using the program to take a screen capture of the screen, you have access to multiple annotation editors, such as the rectangle tool, brush tool, text tool, blur tool, and callout marker. Together with these editing options, the software also offers more advanced screenshot modes, such as scrolling screenshot, screen portion capture, full-screen capture, and image pinning.
With these features now discussed, considering ArkThinker Screen Recorder as a direct upgrade to the built-in MacBook snipping tool is not far-fetched.
To learn more about the software, please download it using the provided link. Then, review its main features, pricing plans, pros, and cons below.
Main Features:
• Captures watermark-free screenshots for easier file sharing and posting.
• Offers built-in image editing tools for screen-captured images.
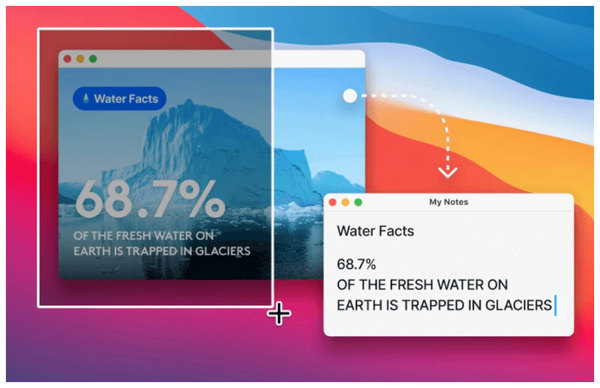
• Smart pin-to-screen function to easily use screenshots as digital sticky notes.
• Equipped with a screen recorder that captures desktop activity videos in HD.
• Equipped with both system audio and a microphone recorder for practical audio or video recording.
Pricing: Free - $19.96
- Built-in editing and annotation tools for captured images.
- Offers a practical screen pinning function to easily access information from screenshots.
- It can record screen activity with both system and microphone audio.
- The free version has slightly limited features.
TextSniper
Aside from learning how to use Snipping Tools on a MacBook, the importance of learning to screenshot on computers is amplified by the practicality of OCR (Optical Character Recognition) apps that can convert text from images into written text. Among macOS options, TextSniper is the most popular tool that can perform such a function.
If you are having trouble with flat image files with huge texts that you cannot copy and paste, specialized snipping tools such as TextSniper are the best option. Aside from texts, it can also read coded images, such as barcodes and QR codes.However, be mindful when using the tool since it was designed to be a one-dimensional software. It specializes in OCR technology, but it cannot work as a regular screen capture tool.
Main Features:
• Optical Character Recognition (OCR) feature for easily converting image information into text.
• Bar Code and QR Code reader for reading coded data.
• Text-to-speech feature for converting texts into voice recordings.
Pricing: $7.99
- Fast reading and an effective OCR feature.
- Functions well offline.
- Optimal software for extracting texts from PDF and images.
- One-dimensional since it only functions as a text-extracting tool.
- It does not offer built-in editing and annotation tools.
- Does not offer a free version.
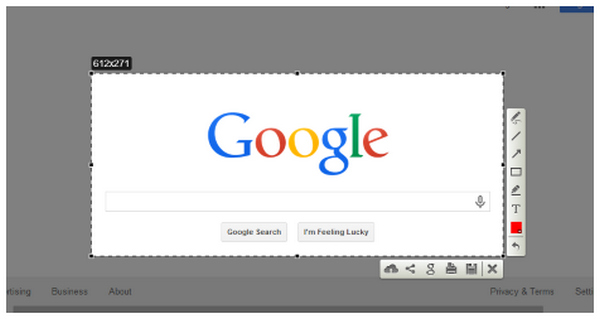
LightShot
Since the second option we provided works better as a text encoder rather than a screenshot tool, let us now proceed to one of the best options for downloading a snipping tool for MacBook Air: LightShot.
Unlike the previous options, LightShot is exclusively developed as a screenshot tool, with no additional features. This made the program very lightweight in terms of performance and installation size.
Despite that, it lacks more compelling features if you want something more practical and versatile. The tool also suffers from performance issues on the latest macOS versions, according to user reviews.
Main Features:
• Offers full-screen and selected area screenshots.
• Built-in annotation tools.
• Highly customizable hotkeys.
Pricing: Free
- Free to use and lightweight installation size.
- Easy to understand and well-designed menu.
- Advisable for quick captures and file sharing.
- Its annotation tools are too basic.
- No screen recording function.
- Faces performance issues on later macOS versions.
Capto
For users who prefer premium software, Capto is the most popular paid option among MacBook snipping tools. Its higher price tag was incentivised by the program’s advanced recording, screenshot, and editing tools.
This makes the software an ideal option if you anticipate a professional career that involves frequent recordings and screen captures. Unfortunately, the same can be said for casual users since the program might be an overkill if you only want to take a screenshot and nothing more.
Main Features:
• Equipped with advanced screenshot modes.
• Also available for iPhone and iPad devices.
• Built-in image and video editor tools.
Pricing: $29.99
- Functions as an all-in-one tool for capturing images, videos, and managing files.
- High-quality video and image editing tools.
- Optimal for organizing video, image, and other media files.
- Its video and image editing tools are subpar compared to traditional editors.
- It saves captured images locally, which makes online collaboration tricky.
- It has an expensive pricing plan.
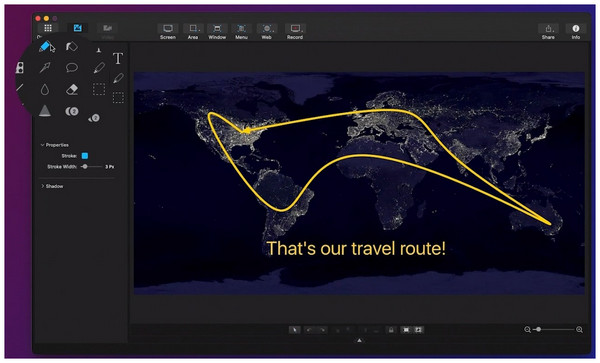
CleanShot X
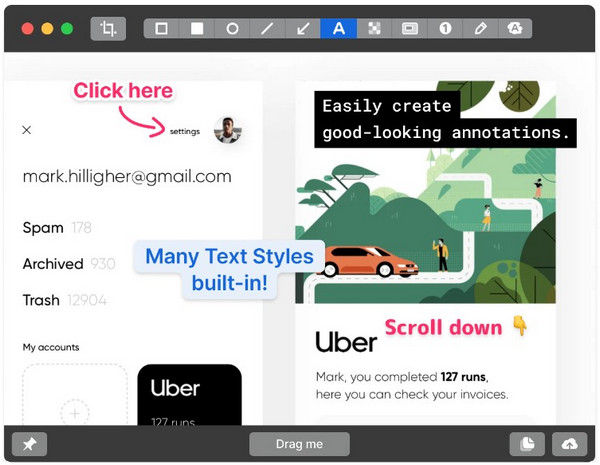
We will wrap up this article review with one of the most popular third-party screenshot tools for Mac computers, CleanShot X. Similar to Capto, this program was also developed as a premium option, equipped with advanced screenshot, screen recorder, and editing tools.
However, the tool sets itself apart by providing premium cloud-storage services. Despite these benefits, the program suffers from a higher price tag. It can only be enjoyed by paying a monthly subscription fee or with a steep one-time payment option, especially for screenshot software.
Main Features:
• All-in-one screenshot and screen recorder tool.
• Built-in image annotator feature for advanced image editing.
• Built-in cloud-storage services.
Pricing: $8.00/Month - $29.00 One-time payment
- Highly optimized and built exclusively for macOS.
- Offers more advanced features than basic screenshot programs.
- Highly customizable shortcuts and settings.
- Paid software, and it does not offer any free version or trials.
- Its advanced features might be overkill if you only want to take a screenshot of your display.
- Its annotation tool has efficiency and quality of life issues.
Part 3. How to Choose the Right Snip Tool for MacBook
Image Quality
When choosing snipping tools, ensure that the captured images maintain their original quality or at least do not experience a noticeable decline in quality. Since screenshots are usually meant to convey information, their quality holds significant importance.
Screenshot Modes
Check if your third-party option to take a Mac screenshot offers more modes than the default options available on a MacBook. In this case, Scrolling Screenshot mode is a good basis if the third-party tool is worth using, since it is absent from the snipping tools of Mac.
Stability and Performance
Finally, ensure that your option is fully optimized or, at the very least, runs smoothly on Mac computers. If the program you use struggles with a simple screenshot, you can safely assume it will not be reliable for more advanced uses, such as screen recording.
Part 4. FAQs About MacBook Snipping Tools
Does MacBook have a snipping tool ?
Yes, it has. MacBook offers a built-in snipping software. It also covers most basic screenshot modes like full screen, window, and screen portion.
Is the snipping tool on a MacBook good enough?
Yes, it is. This is true especially if you only want basic screenshots. However, more advanced modes like scrolling screenshots are not available on Mac.
Can you capture a scrolling screenshot on a Mac?
No, you cannot. The regular snipping tool of Mac does not offer a scrolling screenshot. You should use third-party options like AkrThinker Screen Recorder.
Are third-party screenshot tools worth it?
Yes, they are. However, it will be greatly influenced by your intended use. Advanced screenshot tools might be overkill if you only want to capture the full screen or a portion of it.
Do screen recording and screenshots on a Mac affect its performance?
Yes, they do. Especially screen recordings since they record a video of the screen. Screenshots, on the other hand, do not affect the performance too much.
Conclusion
Now that we have reviewed the most reliable and popular snipping tools for Mac, from built-in tools, free software, and all the way to premium options, we hope that this article has provided you with useful insight about which screenshot options are best for macOS computers. For an easier time choosing the best for your needs, we highly recommend the most versatile option featured in this article, with ArkThinker Screen Recorder, which can be downloaded using the link below.
What do you think of this post? Click to rate this post.
Excellent
Rating: 4.8 / 5 (based on 486 votes)