


How to Take a Screenshot on Chromebook with or without Keyboard
This guide intends to show you how to take a screenshot on a Chromebook for various purposes. A Chromebook is a laptop that runs ChromeOS, which is an operating system developed by Google. It is more affordable than traditional laptops and MacBook Pro, so Chromebooks are popular in the education market. Besides, these devices are light and most apps must work with an internet connection. That makes it a bit different from traditional laptops when taking screenshots.

- GUIDE LIST
- Part 1: Recommendation: Easy-to-Use Screenshot Tool
- Part 2: How to Use Quick Settings to Take Screenshots on Chromebook
- Part 3: How to Use Toolbar to Take Screenshots on Chromebook
- Part 4. How to Use Shortcuts to Take Screenshots on Chromebook
- Part 5: How to Take Scrolling Screenshots on Chromebook
- Part 6. FAQs about Taking a Screenshot on Chromebook
Part 1: Recommendation: Easy-to-Use Screenshot Tool
Sometimes, it is not an easy job to take screenshots on Chromebooks due to the light design, especially for beginners. Fortunately, ArkThinker Screen Recorder can help you resolve this problem. It integrates pro-level features in a way that everyone can learn in a few seconds without technical skills. For advanced users, it offers lots of custom options to create the desired effect.
- Take screenshots with a single click.
- Offer smooth experiences with hardware acceleration.
- Come with bonus tools, like screenshot editing.
- Capture everything on your screen and save it in videos.
How to Take a Screenshot on Your Chromebook in One Click
Install the screenshot tool
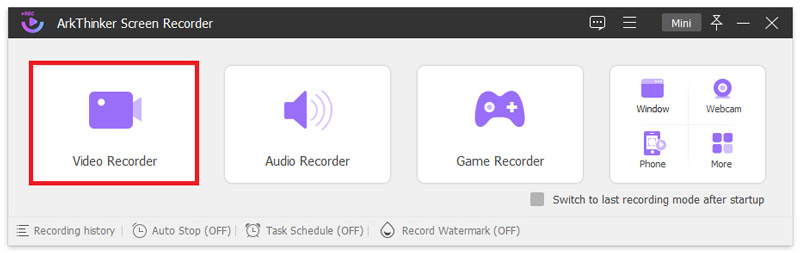
Download and install the easiest screenshot tool on your Chromebook. If you encounter problems when installing the software directly, try Google's Chrome Remote Desktop or Parallels Desktop for ChromeOS. They allow you to use Windows software on Chromebooks. Then launch the tool, and choose Video Recorder.
Take a screenshot on Chromebook
Locate the upper right side, click and expand the Screenshot button with a camera icon. Then you will get three options on the context menu.
To screenshot the entire screen, select Screen Capture, and click on your screen. If you want to capture a specific area, select Screen Capture, and draw on the desired area with your cursor.
The Scrolling Windows option is used to take a scrolling screenshot on your Chromebook, such as capturing a full webpage or a window longer than your screen.
The Popup Menu Capture option enables you to screenshot a pop-up menu on your desktop.
After that, you will be presented with a toolbar. Here you can add paintings and text to the screenshot. When you are satisfied, click the Save icon to export the screenshot or hit the Copy icon to send it to your clipboard.
Part 2: How to Use Quick Settings to Take Screenshots on Chromebook
Since ChromeOS 89, users can take screenshots on Chromebook using the Screen Capture tool from Quick Settings. For average people, the built-in tool is the easiest way to get the job done if you just want to capture an entire screen, a window, or a specific area.
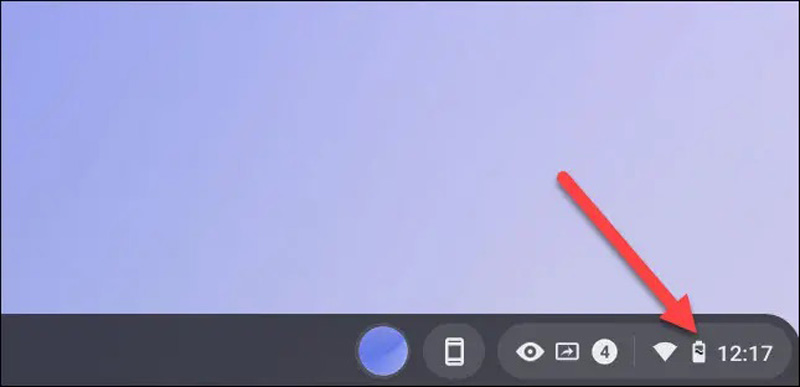
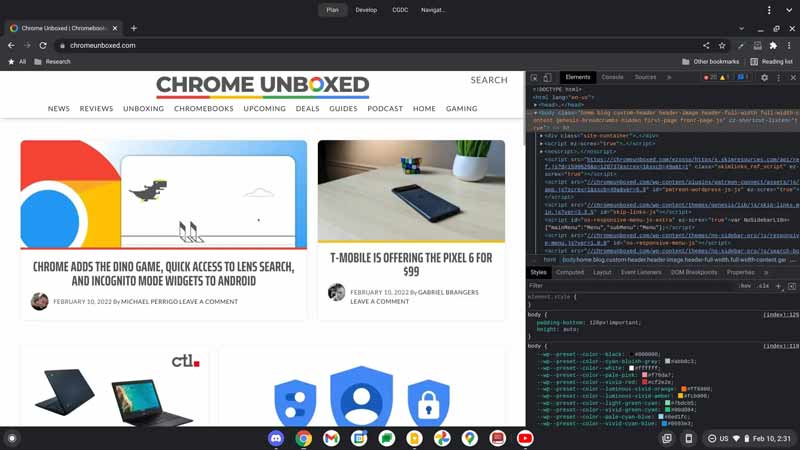
Locate the bottom right corner of your screen, and click the clock on the taskbar. That will open the Quick Settings panel.
If you cannot see Screen Capture, press the arrow icon to expand the whole Quick Settings panel.
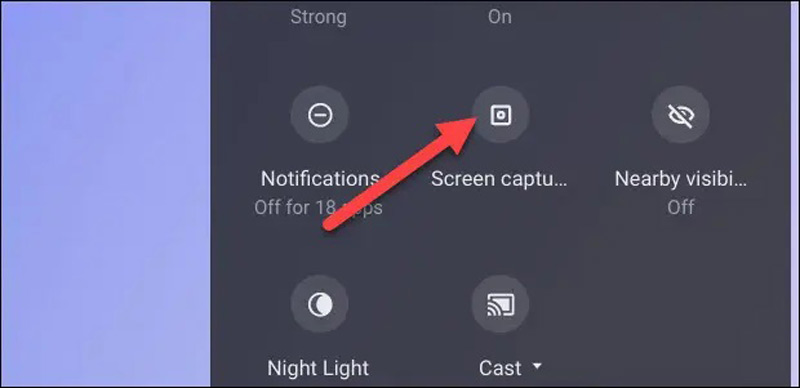
Then choose the Screen Capture option and you will see the Screen Capture toolbar at the bottom of your screen.
Note: If you cannot find Screen Capture in your Quick Settings panel, press Ctrl + Alt + Show Windows keys on your keyboard at the same time. That will bring the Screen Capture toolbar too.
Part 3: How to Use Toolbar to Take Screenshots on Chromebook
When you see the Screen Capture toolbar, you may get confused. There are several buttons on the toolbar, but you do not understand what they can do exactly at all. So, let's learn how to screenshot on Chromebook without a Windows key.
There are three sections on the toolbar. Click the Gear icon on the third section to open the menu list. Here you can change the output folder. By default, the screenshots will be saved to the Downloads folder on your Chromebook.
Locate the first section and make sure to highlight the Screenshot button with a camera icon. If you select the camcorder icon, it will record your screen and your activities on the desktop.
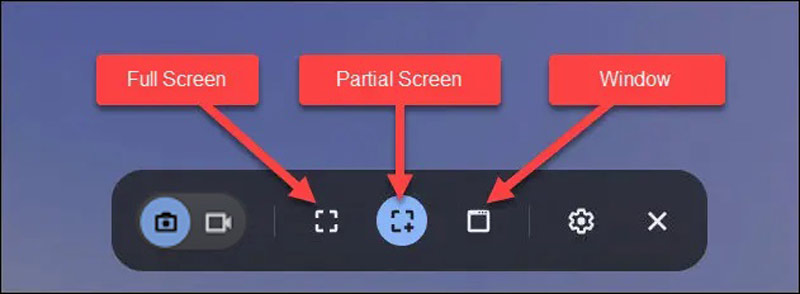
Next, move to the second section, and select a proper mode:
Full Screen: click anywhere on your screen to take a screenshot of the full screen.
Partial: lick and drag your cursor to select the desired portion of your desktop, and select Capture.
Window: Hit the window that you want to screenshot on your desktop.
Then you can find the screenshot in your Downloads folder or the directory that you set.
Note: The Screen Capture toolbar is just a simple way to take screenshots on Chromebook laptops. This way is available to Chromebooks from Dell, HP, Samsung, and more. However, it lacks important features, like image editing. Moreover, you have to update to the latest ChromeOS to use this feature. This feature cannot take scrolling screenshots on your Chromebook.
Part 4. How to Use Shortcuts to Take Screenshots on Chromebook
Shortcuts are another quick way to take screenshots on a Chromebook. Similar to traditional laptops and MacBooks, Chromebooks come with keyboards too. However, they use different button combinations from Windows and macOS.
Open the desired app, webpage, or anything that you want to save on your desktop.
Press Ctrl + Show Window keys on your keyboard to take a full-screen screenshot immediately. The screenshot will be sent to your Clipboard.

If you want to take a partial screenshot, press Ctrl + Shift + Show Window together. Then drag your mouse over the target area, and click Capture.
Press Ctrl + Alt + Show Window if you want to capture a window. Then click the desired window.
Part 5: How to Take Scrolling Screenshots on Chromebook
As mentioned previously, both the built-in shortcuts and Screen Capture toolbar cannot take scrolling screenshots on Chromebooks. In other words, you have to capture a long webpage or window with extra or third-party apps. The good news is that Chrome comes with developer tools for this job. Moreover, there are extensions for scrolling screenshots too.
Way 1: How to Take a Scrolling Screenshot in Chrome
Google Chrome is the built-in browser on Chromebooks. It is far more than a simple web browser. There are lots of advanced features that are hidden behind the developer tools menu including screenshots. If you use your Chromebook for daily tasks and are not familiar with the advanced features, follow the steps below to take a scrolling screenshot on your Chromebook.
Open the webpage that you want to save in your Chrome browser.
Press the Ctrl + Shift + I keys on your keyboard at the same time. Then you will see the source code pane on the right side. Next, press the Ctrl + Shift + P keys together. That will open the Run command menu.
Type in screenshot next to the Run command, and you will be presented with all commands about screenshots. Click on the Capture full size screenshot option.
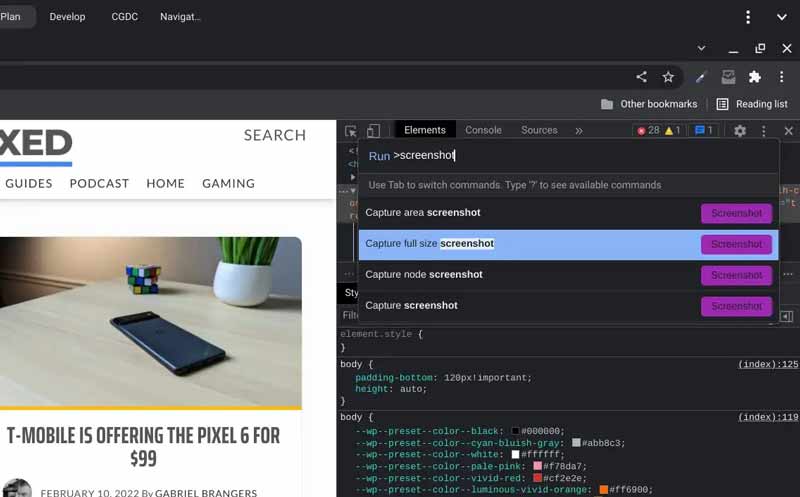
Then your Tote will light up indicating that something has been downloaded to your Chromebook. You can find the scrolling screenshot in your Downloads folder.
Way 2: How to Take a Scrolling Screenshot with Chrome Extension
For beginners, the developer menu seems complex. If you intend to take a scrolling screenshot on your Chromebook, you can also use a Chrome extension. There are lots of screenshot extensions for Google Chrome. We use Markup Hero as an example to show you how it works.
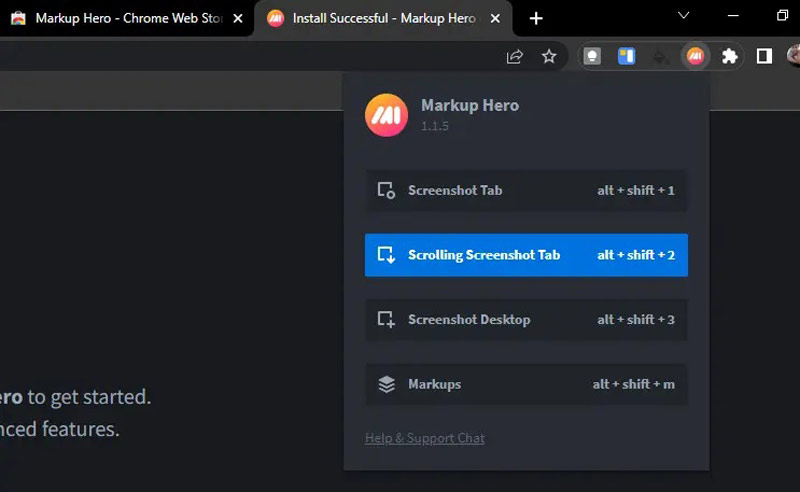
Visit the Chrome Web Store in your Chrome browser, search for Markup Hero, and click Add to Chrome to install it. Then you will see the thumbtack icon that appears on the upper right side of your browser.
Create a new tab in your browser, and access the target webpage.
Click the Markup Hero icon, and you will see three options. Choose Scrolling Screenshot Tab and the webpage will start scrolling down.
As long as the screenshot is done, the extension will open a new Chrome tab and display the scrolling screenshot. The extension also provides a slew of image editing tools. Here you can download the screenshot or share it directly.
Bonus Tip: Where Screenshots Go on Chromebook
If you take a screenshot on your Chromebook with the Ctrl + Show Window combination, it will be copied to the clipboard. You can paste it to other apps.
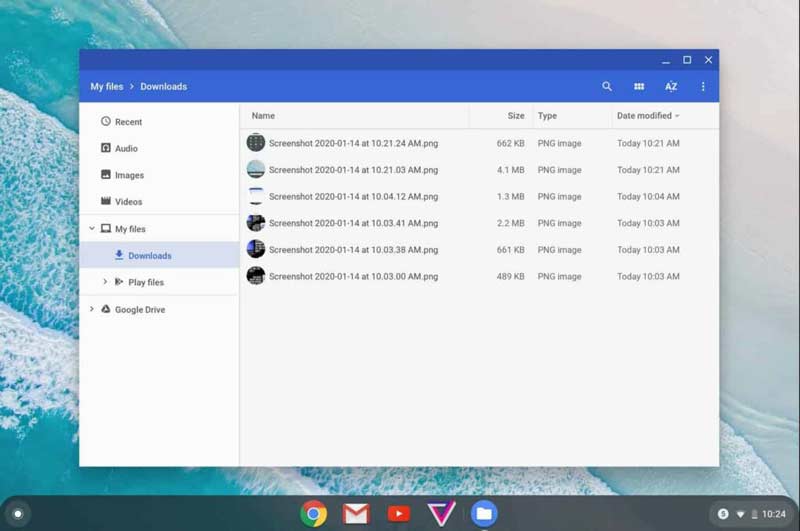
The Screen Capture bar will save your screenshots to the Downloads folder. The screenshots are listed here in PNG format. The name indicates the date and time corresponding to the moment a user captures it. If you intend to change the output destination, click the Gear icon. Here you can change the location according to your preferences.
The screenshots of webpages are usually saved in the Downloads folder too.
Most third-party screenshot applications allow users to decide the output folders after taking screenshots on Chromebook. ArkThinker Screen Recorder, for instance, enables you to set the output folders on the Preferences dialog. You can open it by hitting the Settings icon in the main interface.
Part 6. FAQs about Taking a Screenshot on Chromebook
How to delete screenshots on Chromebook?
If you have taken single or several screenshots by mistake, you can delete them easily. Head to the Downloads folder or the directory that stores your screenshots. Select a screenshot with a single click on it, and press the ALT + Backspace buttons on your keyboard at the same time.
Is it possible to take a screenshot on Chromebook without Ctrl?
Without a keyboard, you can still take screenshots on your Chromebook. The Screen Capture tool is hidden in the Quick Settings panel. It enables you to capture a full screen, take a partial screen, or record a window. Moreover, you can use a third-party screenshot tool on your Chromebook.
Why won't my screenshots save on my Chromebook?
Firstly, check the Downloads folder. When you encounter an error, change the location. On the Screen Capture toolbar, click the Settings icon, and click Select folder to modify the directory. Alternatively, you can upload your screenshots to Google Drive directly on your Chromebook. So that you can save local space and access these screenshots on any device.
Conclusion
This guide has demonstrated how to take a screenshot on a Chromebook in a variety of situations. The shortcuts are a quick way to capture the full screen or a portion of your desktop with your keyboard. If your Chromebook does not come with a keyboard, you can use the built-in Screen Capture toolbar to complete the job. It is accessible in the Quick Settings pane. The developer menu on Chrome helps you capture a full webpage without extra applications. ArkThinker Screen Recorder is the best option for beginners and average people. More questions? Please leave a message below.
What do you think of this post? Click to rate this post.
Excellent
Rating: 4.9 / 5 (based on 380 votes)
Find More Solutions
Concreate Tutorial to Record Zoom Meetings on Desktop or Mobile 3 Easiest Ways to Record Minecraft Gameplay on Windows and macOS 7 Best VCR/VHS DVD Recorders and DVD Recording Software Best Camera Recorder Recommendations: Software and Hardware What Is TikTok Voiceover and How to Do a Voiceover on TikTok XRecorder Review, Pros, Cons, and Best XRecorder AlternativeRelative Articles
- Edit Image
- Comprehensive Tutorial about Taking Screenshots on Windows Computer
- Concrete Tutorial to Take a Screenshot on MacBook Pro/Air or iMac
- Best GIF Editor Tools Suitable to Any Computers and Devices
- How to Make GIF from Images on Desktop and Mobile Phone
- Quick Steps on How to Add Text to a GIF Using Caption Maker Tools
- Add Music to GIF: Incorporate Music to Your GIF After Converting
- GIF Resizer: Ultimate Tools to Resize Your Animated GIF
- [6 Tools] How to Set a GIF Loop Change and Play It Forever
- GIF Cutter: How to Cut GIF with Easy and Fast Methods
- Easy Guidelines on How to Trim a Video on Snapchat