


How to Take Screenshots on Dell, HP, Lenovo, and Other Windows
There are many reasons that you need to take a screenshot on Windows. For instance, you need to capture a software bug and ask for help from technical support. When publishing an application, the developer has to demonstrate how it works. Game players use screenshots to explain the strategies. Anyway, this guide shows you how to do the job on your PC or laptop from Dell, HP, Lenovo, and more.

- GUIDE LIST
- Part 1: Introduce Windows Screenshot Keyboard Shortcut
- Part 2: How to Screenshot a Specific Area on Windows
- Part 3: How to Take Scrolling Screenshots on Windows
- Part 4: How to Take a Whole Screenshot on Windows
- Part 5: How to Take a Screenshot on Windows with Third-Party Tool
- Part 6: FAQs about Taking a Screenshot on Windows
Part 1: Introduce Windows Screenshot Keyboard Shortcut
The basic way to take a screenshot on Windows is a shortcut. No matter you are using a PC or a laptop, you can find a screen print key on your keyboard on most machines. This way applies to Windows 11/10/8/7/Vista/XP as well as screenshots on Dell, HP, Levono, and more.
| Shortcuts | Screenshots |
|---|---|
| Print Screen | Take a screenshot for entire screen and send to clipboard |
| Win + Print Screen | Print screen and save it in the Pictures folder |
| Alt + Print Screen | Screenshot an active window and send to clipboard |
| Win + Shift + S | Open Snip & Sketch on Windows 10 or Snipping Tool on Windows 11/8/7 |
| Volume Up + Power | Screenshot on Surface Pro 8 and predecessors |
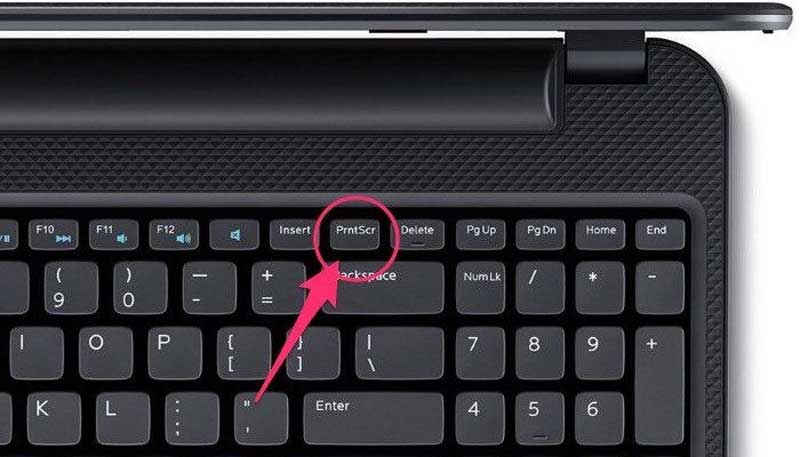
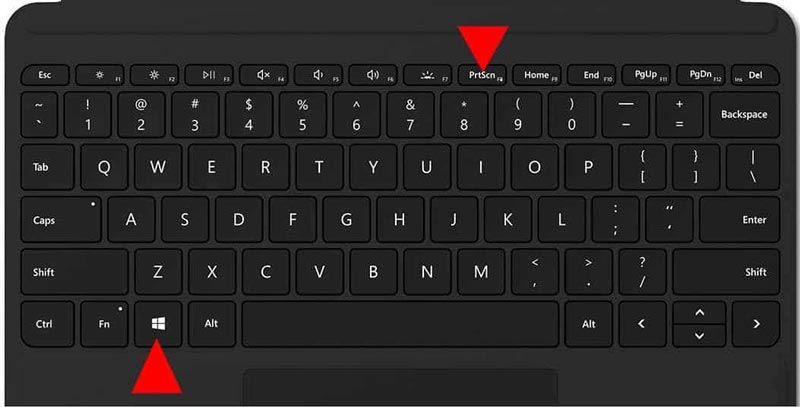
The Print Screen is a bit different on various PCs. The variants include PrtScn, Print Scr, PrtSc, PrntScr, PrntScn, and more. On some machines, the Print Screen key is combined with another functionality. You need to hold the Fn key while pressing the Print Screen key to take a screenshot on Windows. If you cannot find the Print Screen button at all, press Fn and Insert keys.
Part 2: How to Screenshot a Specific Area on Windows
As you can see, the shortcuts cannot take a partial screenshot on Windows. Of course, you can print the entire screen to your clipboard, paste it to MS Paint, and crop the image. In fact, Windows comes with a dedicated application to do the job. However, it works differently on the old and new systems.
How to Take a Partial Screenshot on Windows 8.1/8/7
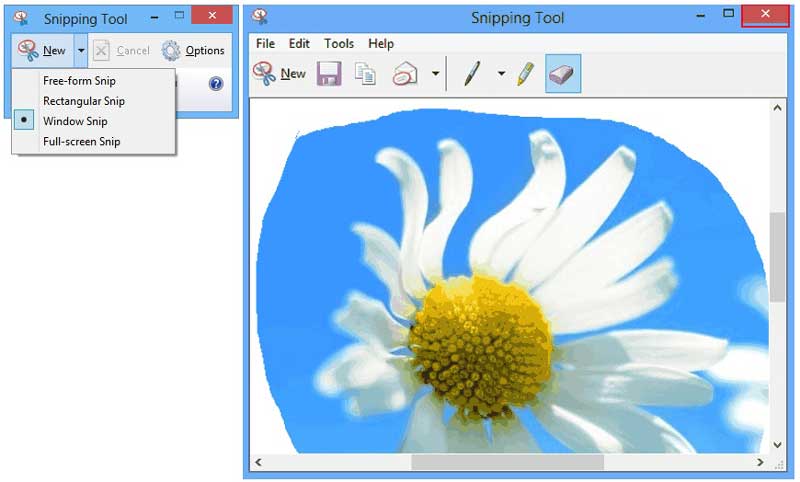
Go to the Start menu, find and open the Snipping Tool if you want to take a partial screenshot on your PC.
If you want to change the custom options, click the Options menu on the top menu bar, and set it according to your preferences. Hit OK to confirm it.
Click the downward icon next to the New menu, and select an appropriate mode. Here we choose Rectangular Snip. The Free-form Snip is used to capture an irregular shape.
Next, use your cursor to enclose the desired area on your screen. Once you release your mouse, you will be taken to the editor window. Here you can draw on the screenshot.
At last, click the Save menu to save the snip to your hard disk. Or press the Copy menu to copy the snip to your clipboard or hit the Email icon to send the screenshot to your friend via email.
How to Snip a Screenshot on a Specific Area on Windows 10
Press the Win + Shift + S keys on your keyboard at the same time.

Then you will be presented with the Snip & Skitch tool on the top of your screen, and your screen is masked. The first icon is Rectangular Snip mode, the second icon is Free-form Snip mode, the third is Window Snip mode, and the last is Full-screen Snip mode. To snip a screenshot on a specific area on Windows 10, choose the Rectangular Snip icon.
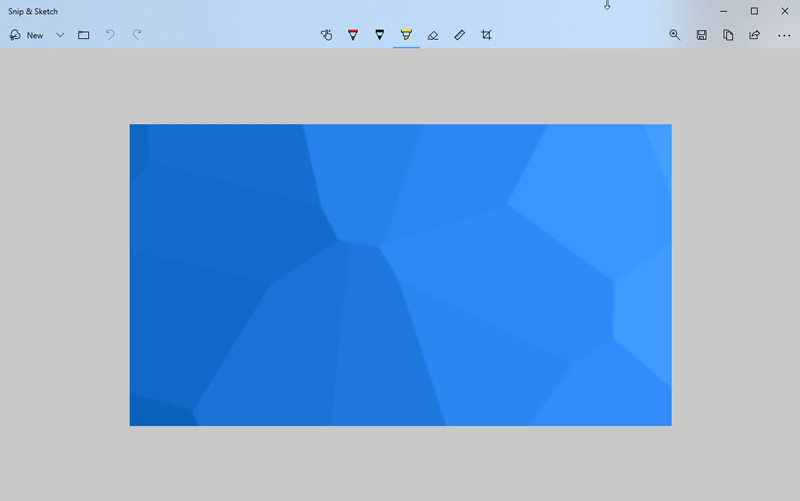
Draw on the desired area, and you will be taken to the Snip & Skitch window. On the top of the window, you can find several tools to add paint to the image or crop the snip.
When you are satisfied, click the Save, Copy, or Share icon on the top right side and export the screenshot.
How to Screenshot a Specific Area on Windows 11
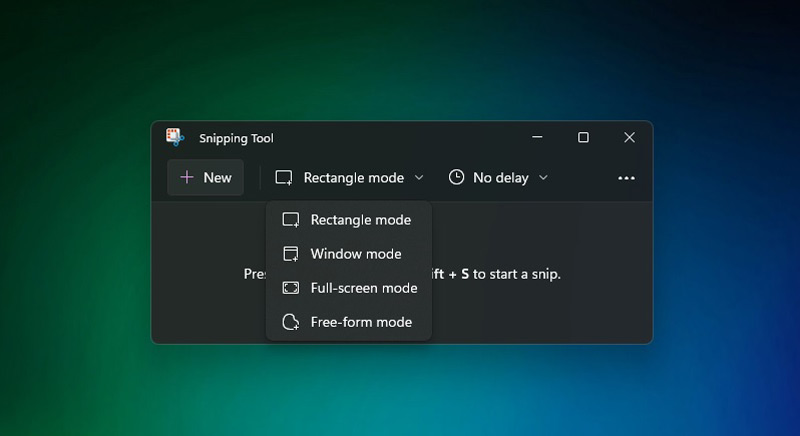
Microsoft combined the earlier Snipping Tool with Snip & Sketch on Windows 11. Therefore, you can screenshot a specific area by hitting Win + Shift + S keys on your keyboard.

Now, you will get a choice to screenshot a specific area on Windows 11 using a rectangular selection or freehand selection. The last two icons are used to capture a window or full-screen capture.
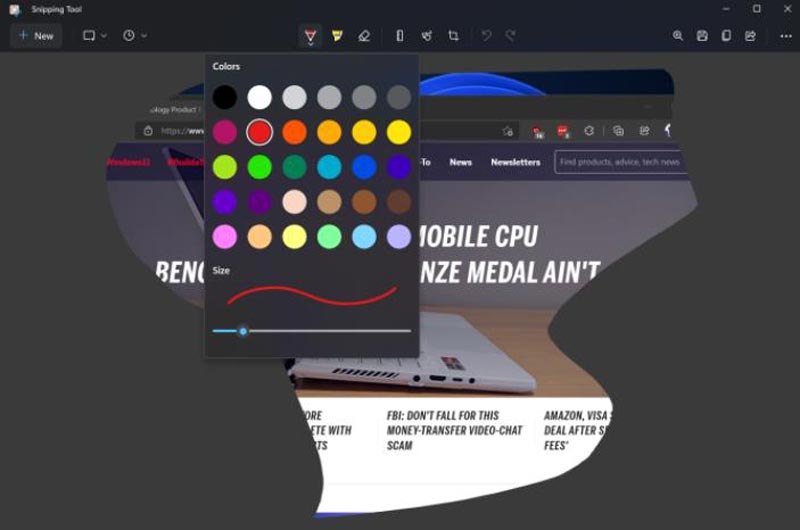
Draw with the cursor to select the desired area. If you use freehand selection, make sure to click over the target area. Once you release the cursor, you will see a thumbnail of the screenshot in the lower right corner.
Here you can paste the screenshot to another application directly. To edit the screenshot or save it as an image, click on the thumbnail. Then you can mark up the image with the pen or highlighter tool, or crop it.
Finally, save or share the screenshot with the menu at the top right corner. If you want to get more editing features, paste the screenshot to MS Paint, Paint 3D, etc.
Part 3: How to Take Scrolling Screenshots on Windows
Unfortunately, the built-in shortcuts and Snipping Tool cannot take a scrolling screenshot on Windows. There are two cases, scrolling screenshot of a webpage or scrolling screenshot of software on your desktop.
How to Take a Scrolling Screenshot on Windows by Edge
MS Edge is the pre-installed web browser on Windows 11/10. It comes with the webpage capture feature, which allows you to take scrolling screenshots for entire web pages without extra software.

Open your Edge browser, and navigate to the webpage that you want to save.
Click the Camera icon at the upper right corner, or click the Options button with a three-dot icon and choose Web Capture, or right-click on the webpage and choose Web Capture. Then select Capture full page to take a scrolling screenshot immediately.
Next, you can draw on the webpage with the Draw tool.
Click the Save icon and export the long snip to your disk or hit the Copy icon to copy it to your clipboard for use in another application.
How to Take a Scrolling Screenshot on PC Using ShareX
To take a scrolling screenshot for a window on a PC, you need a third-party tool. ShareX, for example, is an open-source project. So, everyone can use it to take a long snip without paying a penny.
Install the freeware and Windows will add the app to the system tray. Open the target application or webpage on your desktop.
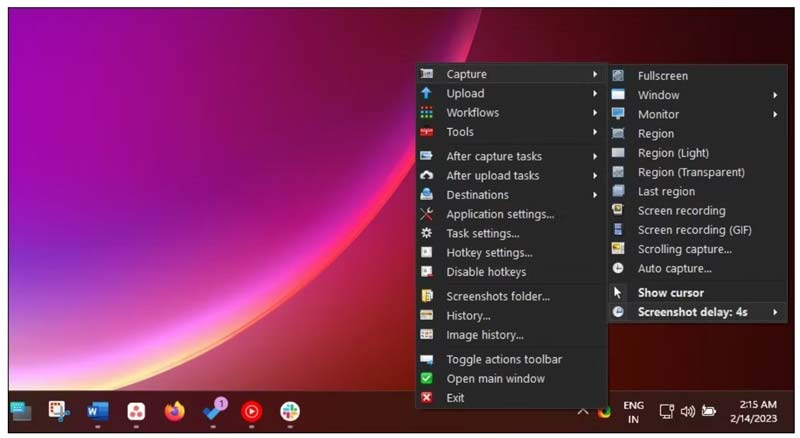
Right-click the ShareX icon in the system tray, select Capture, and click Scrolling Capture.
Select the target window. Then configure the options in the Before capture and After capture sections on the Scrolling capture dialog based on your preferences.
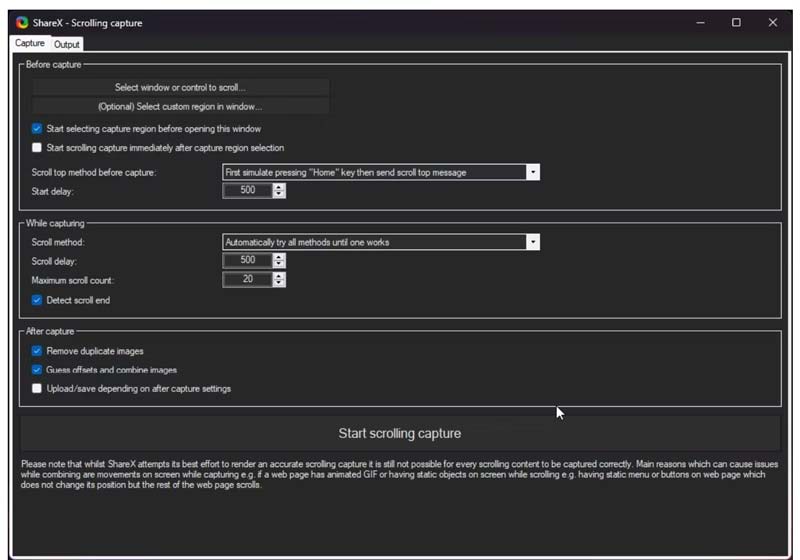
Next, click on the Start scrolling capture button and the freeware will work immediately. Then you will be taken to the preview dialog. Here you can retouch the screenshot.
At last, click on the Upload/Save button, enter a filename, and hit Save. By default, the screenshot will be saved to C:UsersusernameDocumentsShareXScreenshots.
Part 4: How to Take a Whole Screenshot on Windows
Microsoft has introduced several ways to print a whole screenshot on Windows. In other words, you do not need to use a third-party tool to capture everything on your desktop.
Way 1: How to Take a Whole Screenshot with the Shortcut
The Print Screen key is the easiest way to take a whole screenshot on Windows. Once you press the key on your keyboard, the screenshot will go to your clipboard. Open MS Word or MS Paint, and press Ctrl + V to paste the screenshot. So that you can edit it here.
To save the full screenshot as an image, press Win + Print Screen keys together.
This way is available to Windows 11/10/8/8.1/7/Vista/XP.
Way 2: How to Screenshot the Entire Screen with the Snipping Tool
Press Win + Shift + S to open the Snipping Tool. On Windows 10, the combination will open Snip & Sketch tool.
Choose the Full-screen Snip or Full-screen mode to capture the full screen.
Then you will be presented with the preview window. Here you can crop unwanted areas, or draw on the screenshot.
Next, save, copy, or share the screenshot.
Way 3: How to Capture a Whole Screenshot by Game Bar

Press Win + G keys on your keyboard to open the Game Bar on Windows 11/10.
Click the Camera icon on the Capture panel to screenshot the full screen.
Then it will be saved to the Videos/Captures folder under the user folder.
Part 5: How to Take a Screenshot on Windows with Third-Party Tool
Since Microsoft keeps improving Windows, users may be confused when taking a screenshot. The alternative solution is using a third-party tool, such as ArkThinker Screen Recorder. It is a one-stop solution to take any screenshot on PCs.
- Screenshot any area on your desktop with one click.
- Come with an image editor and custom options.
- Integrate a wide range of bonus features.
- Available to Windows 11/10/8/7 and Mac OS X 10.12 or above
Here are the steps to take a screenshot on a PC:
Take a screenshot
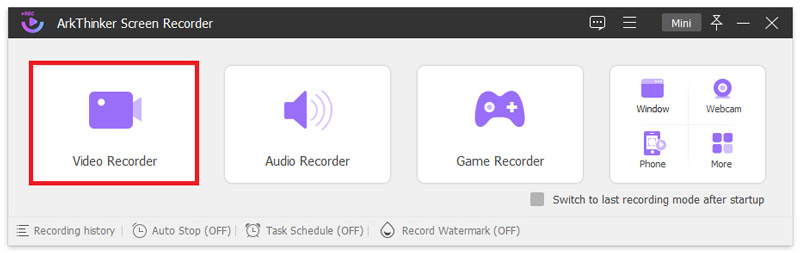
Open the screenshot tool after you install it on your PC. Click the Video Recorder button to enter the main window. Then click and expand the Screen Capture button with a camera icon, and choose an appropriate mode, like Screen Capture, Scrolling Windows, or Popup Menu Capture.
Save the screenshot
After screenshotting, you will be taken to the editor window. Here you can add shapes, lines, text, and more to the image. To save the snip, click the Save or Copy button.
Part 6: FAQs about Taking a Screenshot on Windows
Where does my screenshot go on Windows?
Once you press the Print Screen key on your keyboard, a screenshot will be sent to your Clipboard. If you press Win + Print Screen, the image will be saved to the Pictures/Screenshots folder directly.
Can I take a screenshot on Windows 10 without a keyboard?
Yes. The Snip & Sketch is a pre-installed app to take screenshots in a variety of modes on Windows 10 without a keyboard.
Where to find the Print Screen key?
The Print Screen key is usually located on the upper right side of the keyboard next to the F12 key.
Conclusion
This guide has told you how to take a screenshot on Windows 11/10/8.1/8/7/Vista/XP. Following our post, you can capture a full screen, an active window, a scrolling screenshot, a long webpage, and more. ArkThinker Screen Recorder is the best option for average people. If you encounter other questions about this topic, please contact us by leaving a message below.
What do you think of this post? Click to rate this post.
Excellent
Rating: 4.9 / 5 (based on 210 votes)
Find More Solutions
How to Screen Record with Audio on Windows 11/10/8/7 PC Top 6 Lecture Recorder Apps & Software for Mobile and Desktop Users Concrete Tutorial to Do Voiceover on PC and Mac like Professionals iTop Screen Recorder: Capture Screen Activities & Create Videos Detailed Guide to Record Screen or Videos on Mac Computers AZ Screen Recorder: Screencasting Application for Android DevicesRelative Articles
- Edit Image
- Best GIF Editor Tools Suitable to Any Computers and Devices
- How to Make GIF from Images on Desktop and Mobile Phone
- Quick Steps on How to Add Text to a GIF Using Caption Maker Tools
- Add Music to GIF: Incorporate Music to Your GIF After Converting
- GIF Resizer: Ultimate Tools to Resize Your Animated GIF
- [6 Tools] How to Set a GIF Loop Change and Play It Forever
- GIF Cutter: How to Cut GIF with Easy and Fast Methods
- Easy Guidelines on How to Trim a Video on Snapchat
- Easiest Ways to Shorten a Video on Different Devices
- 3 Ways to Add Text to Video Using Online and Offline Tools