


How to Enhance GIF Quality to Make Your GIFs Crisp and HD
GIFs are one of the most popular forms of digital content, used in everything from social media to memes. But if you've ever tried to share a GIF and noticed it's blurry or pixelated, you know the frustration of a low-quality animation. When you're trying to enhance a GIF for a project, social media, or just to make it look better for friends, improving its quality can be easier than you think.
In this guide, I’ll share the best 3 ways to enhance GIFs, improving their quality, increasing their resolution, and even making them HD, so your GIFs are never blurry again.

- GUIDE LIST
- Part 1. The Best Way to Enhance GIF: Deep-Dive Quality Control
- Part 2. 2 Free Ways to Enhance GIF Quality Online
- Part 3. FAQs
Part 1. The Best Way to Enhance GIF: Deep-Dive Quality Control
When you need serious firepower to fix a truly terrible GIF, or if you're starting with a video you want to convert to an impeccable, high-quality GIF, a dedicated desktop tool is the way to go. It might sound intense, but hear me out: the amount of control you get is worth it, especially when trying to enhance GIF files for professional projects or presentations.
I first stumbled upon ArkThinker Video Converter Ultimate while looking for a robust way to handle video conversions. Still, its built-in GIF-making and enhancement features are where it really shines. It's an all-in-one multimedia toolkit that goes far beyond simple conversions. It has a dedicated Video Enhancer feature that can upscale your existing GIF to a higher resolution, reduce video noise, and generally optimize the image. For anyone serious about making an HD-quality GIF from scratch, this is your secret weapon. The interface is clean, making what seems like a complex process surprisingly user-friendly, and it feels less like a professional studio and more like a powerful app built for regular users.
Here is my go-to process: taking a high-resolution GIF and converting it.
Upscale GIF to High Quality with Video Enhancer
First, download this GIF enhancer for Windows or Mac.
Open the software and head straight for the Toolbox tab, then select the Video Enhancer tool.

Upload the GIF that you want to make less blurry. Then, you will find 4 options to improve your animated GIF image: Upscale Resolution, Remove Video Noise, Reduce Video Shaking, and Optimize Brightness and Contrast
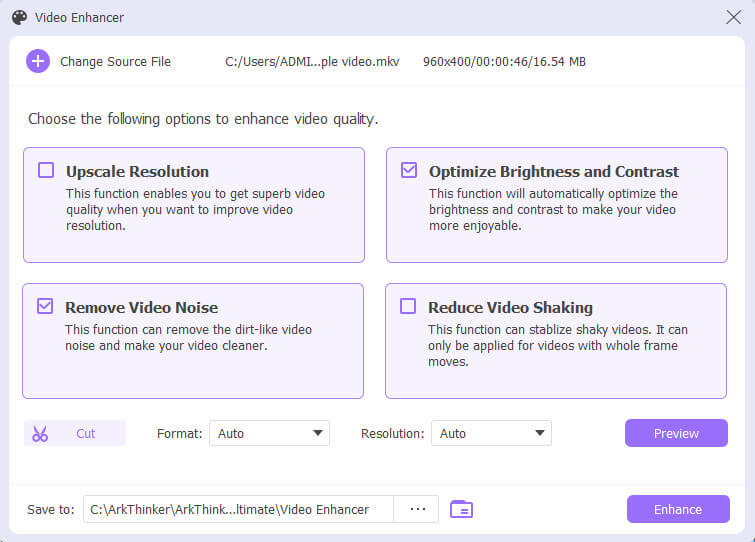
Here, I always tick the Upscale Resolution box to improve GIF quality by increasing its dimensions. I also check Optimize brightness and contrast, and Remove video noise to clean up any graininess. If your GIF is low quality due to movement, just tick the Reduce Video Shaking box.
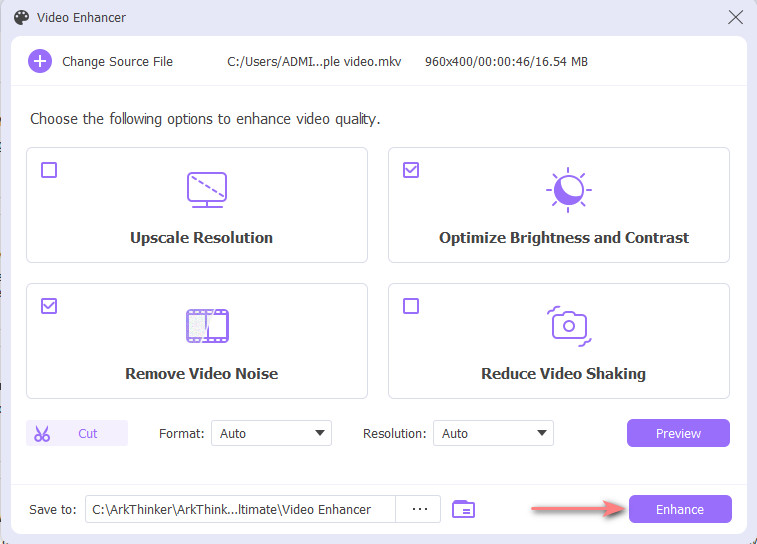
Once the enhancement is complete, select the video file as the output format, then click the Enhance button to start the process.
Note: This feature requires you to select a video format, such as MP4 or MOV, and then use this tool to convert the video to a GIF.
Now it is done, letting AI automatically improve GIF quality.
Enhance GIF Quality by Adjusting Resolution and Frame Rate
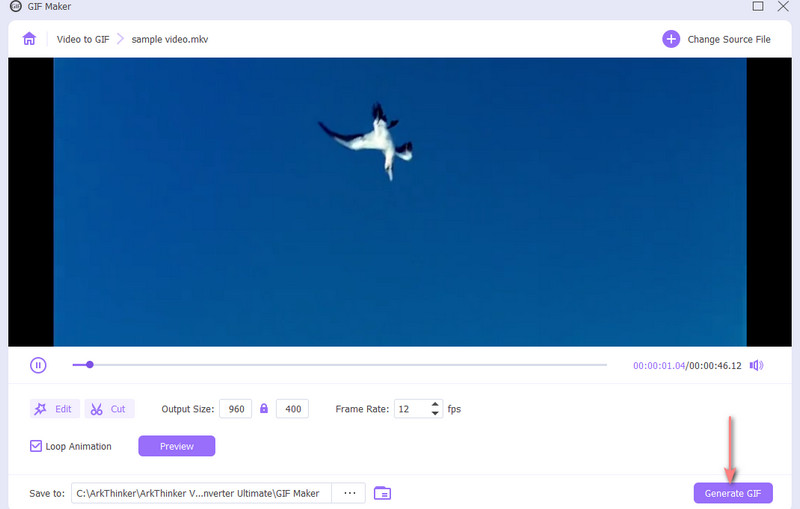
In addition to the settings, you can use its GIF Maker tool to create HD GIFs by adjusting the output resolution and frame rate.
Go to the GIF Maker under Toolbox. Select Video to GIF, and upload your GIF video file.

In the GIF Maker, this is where you can significantly improve GIF quality. I set my desired Output Size (resolution) and, most importantly, adjust the Frame Rate (FPS). A higher FPS (like 24) makes the GIF smoother, but also increases file size. I usually aim for a balance, often settling around 15 FPS for fast-paced action.
Click the Generate GIF button, and the software quickly processes the high-quality animation. The GIF result is consistently sharper, less blurry, and a clear step above most online conversions.
This tool is a superb GIF maker and enhancer for quality enthusiasts. My favorite part is the dedicated Video Enhancer feature, which is something you just don't find in a basic high-quality GIF converter. It allows you to fundamentally fix a blurry source before conversion. The desktop speed is also a major plus, especially when dealing with larger files. However, its limitation is that you have to output a video file and then convert it back to GIF, which adds an extra step.
Part 2. 2 Free Ways to Enhance GIF Quality Online
Sometimes you just need a quick fix for an existing GIF without downloading anything. Fortunately, there are incredible free GIF enhancer tools available online that can help you improve GIF quality without spending a dime.
1. CapCut Online Video Editor
CapCut started as a fantastic mobile video editor, and its online version is now a powerhouse for quick and creative edits, including improving GIFs. What makes CapCut a great free enhancement GIF tool is its focus on visual effects and frame-by-frame precision, which helps maximize quality.
Since CapCut is fundamentally a video editor, my process involves making the GIF from a video clip or uploading an existing GIF and treating it like a short video.
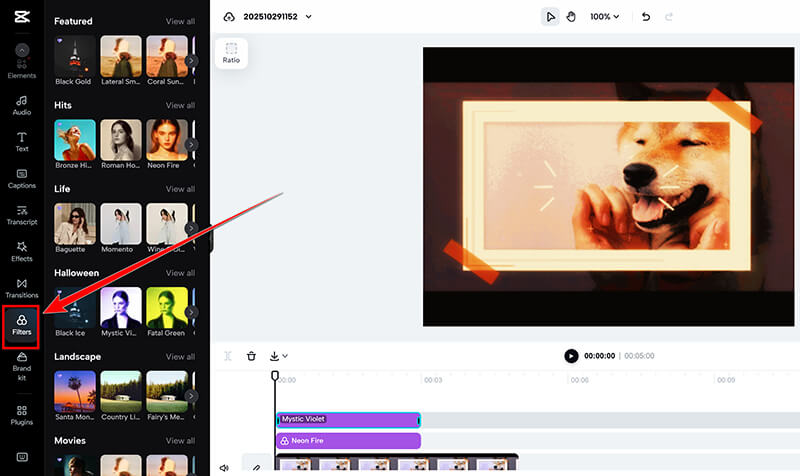
Visit the CapCut website, sign in, and start a new project. Then select Video. Upload your GIF to the timeline.
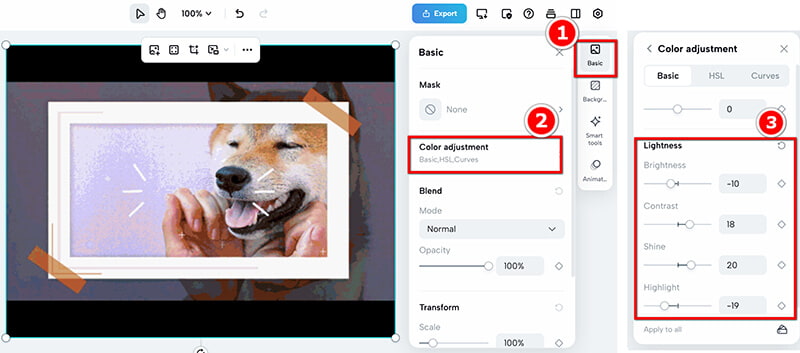
Click on the clip in the timeline and go to the Adjustments tab on the right, where you can select Basic > Color adjustment.Use the Sharpen and Contrast sliders to bring out details and make the GIF look crisp.
You can also experiment with Filters and Effects to give the animation a more polished, professional feel.
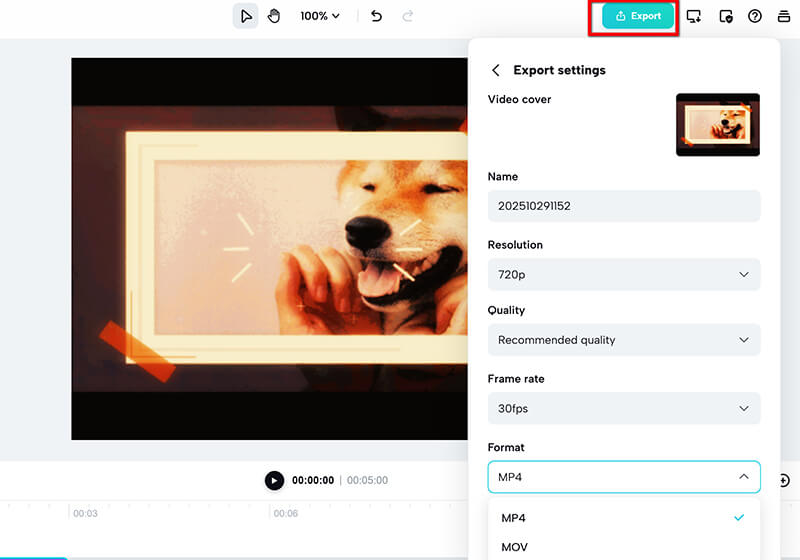
When it's time to export, click the Export button. CapCut only exports video (MP4/MOV). Make sure to set the resolution to the highest available (e.g., 1080p) and the frame rate to a smooth value, like 30 fps.
After that, you can then use a GIF converter tool to convert that high-quality video file to a GIF.
CapCut is the best free option for users who want creative control. It’s less of a simple GIF enhancer and more of a full editing suite. However, for the final step, it cannot always export the GIF at the desired resolution, requiring a second conversion. The interface is feature-rich, which can be overwhelming for a total beginner.
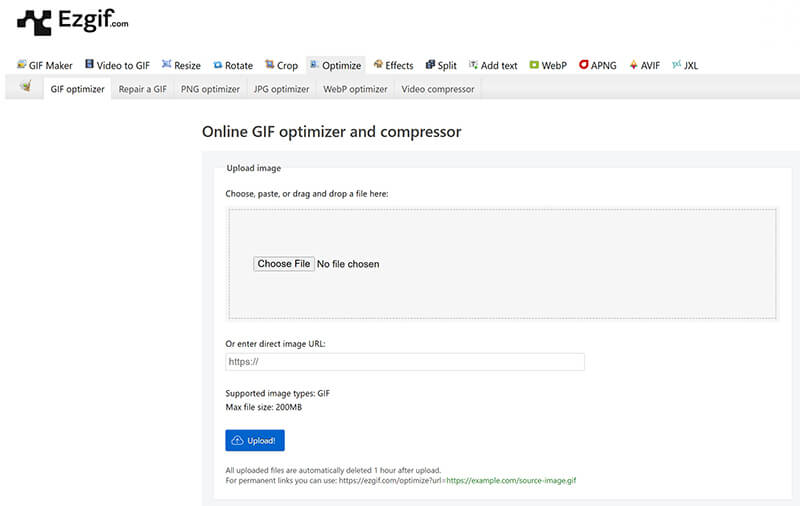
2. EZGIF Optimizer
EZGIF is a veteran of online GIF tools, and it's fast, simple, and features a dedicated Optimizer that's fantastic for reducing file size while keeping the look clean. This is one of the best tools for learning how to make a GIF less blurry by managing compression.
My typical use for EZGIF is for compression and color management, which can dramatically affect how clear the GIF looks online.
Navigate to the EZGIF website and select the GIF optimizer tab. Upload your GIF file. This freeware supports GIFs up to 200 MB.
The first option I try is Lossy GIF Compression. I usually start by setting the compression level to around 30-40. The tool then creates a new, smaller file. By making the file smaller, you ensure it loads faster, which often feels like better quality on a website or social feed.
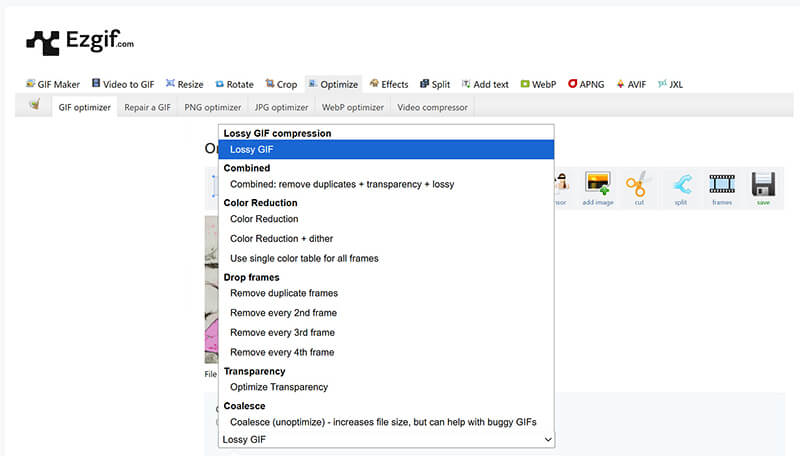
If the file is still too big, you can try the Color Reduction option. GIFs are limited to 256 colors. Reducing this palette (say, to 128 colors) can shrink the file size, and sometimes, the dithering applied to compensate can make complex areas look surprisingly better.

After optimizing, download the new GIF file. If the compression was too aggressive and made the GIF fuzzy, just go back a step and try a lower compression level.
EZGIF is the quickest and most straightforward free online high-quality GIF converter for optimization and compression.
However, the site is older and ad-heavy, not as sleek as CapCut. The enhancements are mostly about optimization and compression, and they won't magically add detail that wasn't there to begin with.
Part 3. FAQs
What are the ideal dimensions for an HD GIF?
The final dimensions for a high-quality GIF depend on where you’re posting it. For most social media and web use, anything between 480p (640x480) and 720p (1280x720) is considered HD for GIFs. Avoid anything over 1000 pixels wide unless the platform specifically supports it, as it will likely be automatically downscaled and compressed, resulting in a blurry GIF.
Is a GIF converter tool better for quality than an online enhancer?
Generally, yes. A desktop high-quality GIF converter (like ArkThinker Video Converter Ultimate) can leverage more processing power and offer greater control over critical settings such as frame rate, resolution, and pre-enhancement tools. Online enhancers are great for quick fixes, but the dedicated software is superior for creating a truly optimized, make GIF HD file from a video source.
Why are GIFs blurry?
GIFs often appear blurry because they use limited color palettes and compression to keep file sizes small, which reduces image clarity. Additionally, resizing or converting low-resolution videos into GIFs can cause pixelation and loss of detail.
Conclusion
The era of the fuzzy, blocky GIF is officially over. Whether you use the deep-dive power of a desktop GIF enhancer like ArkThinker Video Converter Ultimate or the quick, free online solutions like CapCut and Ezgif, you can easily enhance GIF images and output newly minted HD animations!
What do you think of this post? Click to rate this post.
Excellent
Rating: 4.9 / 5 (based on 495 votes)