


Detailed Guide on How to Make Split Screen in Premiere Pro
Adobe Premiere Pro is the industry-leading video editing software that can help to edit videos and create professional productions. When you need to create a split-screen video, you may wonder if you can split screen in Premiere Pro.

This post will tell you how to make a split screen in Adobe Premiere Pro. Moreover, an excellent Premiere alternative is recommended for you to better create side-by-side videos.
- GUIDE LIST
- Part 1. Split Screen Premiere Pro
- Part 2. Best Premiere Pro Alternative to Split Screen
- Part 3. FAQs of How to Do Split Screen in Premiere Pro
Part 1. How to Make Split Screen in Adobe Premiere Pro
Adobe Premiere Pro is equipped with a split-screen effect to make a multi-screen video easily. You can download Premiere Pro from the official Adobe website and free use all its features for seven days. When you get Premiere installed on your computer, you can follow the steps below to create a side-by-side video.
Open Adobe Premiere Pro and add both videos to create the split screen. You can use the drag-and-drop feature to import them, place them onto the timeline, and make a new sequence.
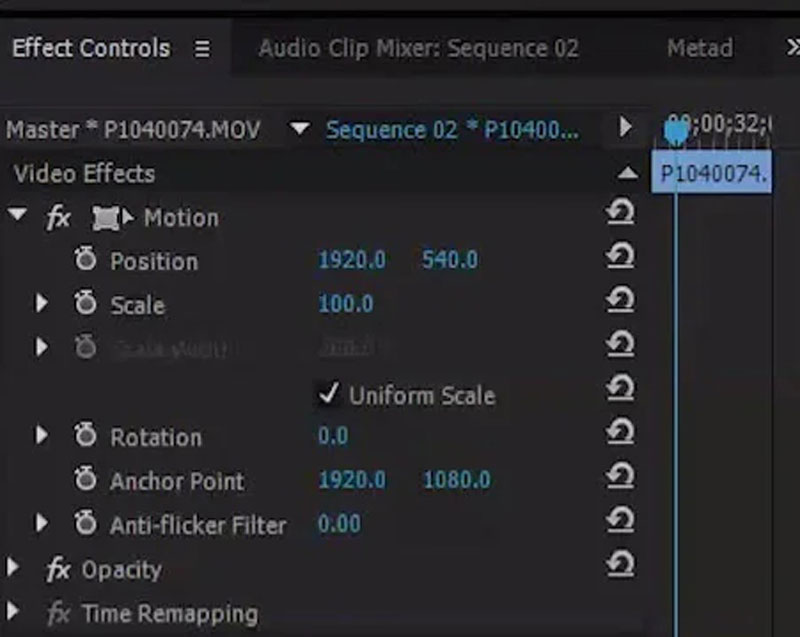
Click and highlight one video clip in the timeline. Go to the Effects Controls panel and locate the Motion option. Now you should adjust the settings for the video position. You can change the number 960 to 1920 in the position category. You can view the created side-by-side video in the preview window.
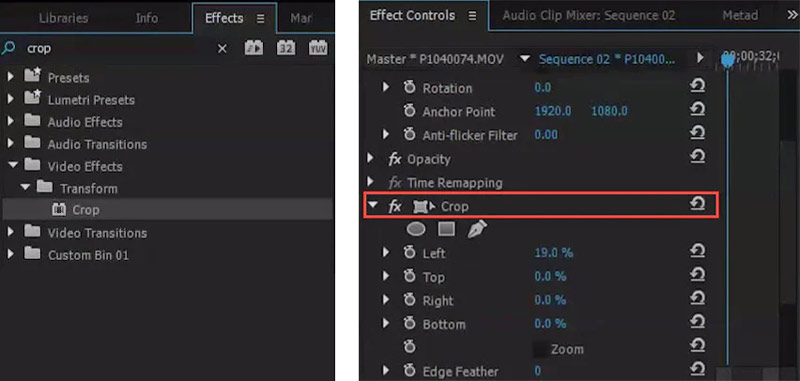
Click the Effects tab and find the Crop effect under the Transform section. You can drag the crop function to the timeline and put it on the top of your video clip. Then you can go to the settings of crop effect and adjust the split screen in Premiere Pro. You need to crop the right and left sides of the video to get satisfied with its alignment.
You can use similar steps to edit the second video clip and adjust its position and crop settings. Doing so allows you to put two video side by side and create a split-screen video in Premiere Pro. After that, you can click the top File menu and select the Save As option to export your created split-screen video.
Note that when you make a split screen in Premiere Pro, you should make both videos share the same length. You can adjust their alignment to ensure that your videos have the same period.
Part 2. Best Premiere Pro Alternative to Do Split Screen
If you are not satisfied with the split-screen effect in Adobe Premiere, you can try using the best Premiere Pro alternative, Video Converter Ultimate, to create multi-screen videos. It has a unique Collage feature for you to make the split screen. It supports all commonly-used video formats, including MP4, MOV, AVI, FLV, M4V, MKV, and others. You can free download this Premiere Pro alternative and take the following guide to do split screen.
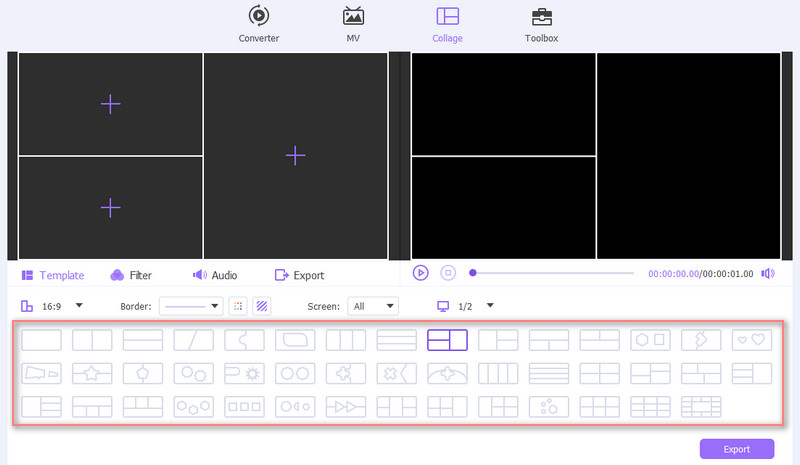
Launch this split-screen video maker on your Windows PC or Mac. Click the Collage tab to access various video collage templates. Here you can select a suitable template to create your split-screen video.
When you pick your preferred layout, you can import your videos by clicking the + icon. This Premiere Pro alternative also allows you to create a split-screen video with images.
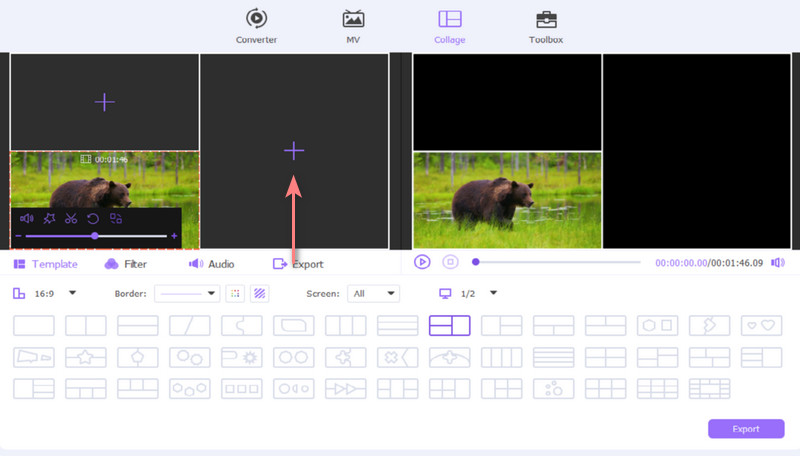
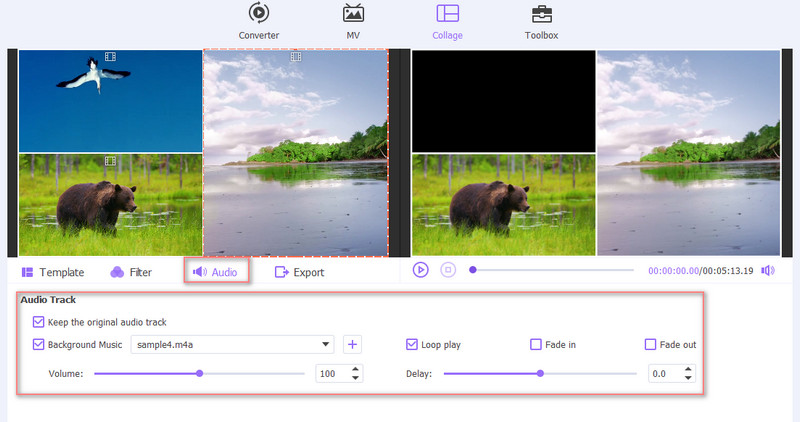
After loading video clips, you can preview your created multi-screen video directly. You can apply different filters, add background music, and do other operations to optimize it.
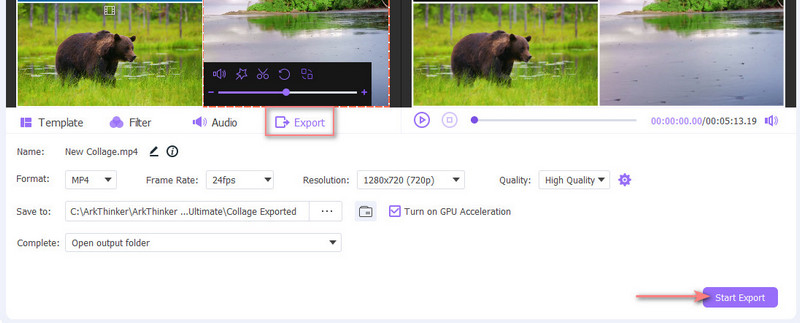
Click the Export button and customize various output video/audio settings based on your need. After that, you can follow the instructions to store your split-screen video.
Part 3. FAQs on How to Split Screen in Adobe Premiere Pro
Can iMovie make a split-screen video on Mac?
Yes. iMovie is pre-installed on Mac and can help you create multi-screen videos with ease. When you add your videos to iMovie, you can choose its Video Overlay Settings above the preview window and use the Split Screen feature to make a side-by-side video on your Mac.
What are Premiere Pro supported video formats?
As one of the most professional video editors, Adobe Premiere Pro supports all commonly-used video formats, including MP4, MOV, AVI, M4V, VOB, WMV, MXF, 3GP, M2TS, MTS, and more.
How to split a video in Premiere Pro?
Open Adobe Premiere Pro, import your video clip and drag it onto the timeline. You can choose the Razor tool from the panel beside the timeline and then click the video part you like to split. You can also use its Current-Time Indicator to split a video in Premiere Pro.
Conclusion
This post mainly talked about making a split screen in Premiere Pro. You can get a detailed guide to do split screen. Moreover, a great Premiere Pro alternative is recommended to make multi-screen videos better.
What do you think of this post? Click to rate this post.
Excellent
Rating: 4.9 / 5 (based on 148 votes)
Find More Solutions
How to Make a Video Collage on iPhone and Android Phone How to Make a Slideshow or Video Collage for Facebook 5 Best Collage Makers to Collage Video with Music Quickly Create a Video Collage for Instagram Reels [Mobile & Desktop] 2 Ways to Use iMovie to Split Screen on Mac and iPhone 5 Video Collage Apps for Mac, Windows, iPhone, and AndroidRelative Articles
- Edit Video
- Best Picture-in-Picture Video Editing Method For Creators
- How to Add Tags to Images, Videos, Music, and Documents
- 3 Apps to Blur Videos on iOS/Android, Computer, and Online
- Check Top 5 Metadata Viewers for Videos, Audio, and Photos
- How to Edit Video File Metadata on Computer and Mobile Phone
- 5 Video Collage Apps for Mac, Windows, iPhone, and Android
- Concrete Tutorial to Do Split Screen on TikTok for Beginners
- 2 Ways to Use iMovie to Split Screen on Mac and iPhone
- Top 5 Side-by-Side Video Apps for Beginners [iOS/Android]
- Create a Video Collage for Instagram Reels [Mobile & Desktop]