


How to Split Audio in Audacity: Come to Know the Steps Provided
There are situations in which you need to cut, trim or split some parts of your track. Because it may have parts you do not need. The track is too long, which causes full storage. Or, you may want to create another clip. Therefore, you will need an application capable of cutting or splitting your track. Through that, you only retain the necessary parts of your track and remove the parts you do not need.
This post will provide helpful information on how to split a track in Audacity and split your audio track using that program. Also, it provided a program that can use by beginners to cut their audio track in an easy procedure. In addition, the programs provided are helpful to both professional and beginner editors. To get started, proceed with the following information.
- GUIDE LIST
- Part 1. How to Cut Audio in Audacity
- Part 2. Easier Method to Cut Audio for Beginners
- Part 3. FAQs about Trimming and Splitting Audio Track
Part 1. How to Cut Audio in Audacity
Audacity is an easy-to-use program, multi-track audio editor, and recorder. This program allows you to record your audio in a live set-up, copying and splicing your track, mixing your sounds, and cutting your audio track. Audio and video producers, podcasters, and vloggers commonly use this program. On top of that, this program is capable of trimming and splitting your audio track. Also, this program is free to access. This part will provide an insightful process on how to trim and split track using the steps provided.
1. How to Trim
Suppose you want to trim your audio track to reduce the length of the track. Trimming your audio track allows you to remove some parts of your audio from the beginning or end of your track. To know how to trim audio in Audacity, proceed with the steps provided.
First and foremost, install and download Audacity to your desktop. Finish the installation process and launch it to open the program.
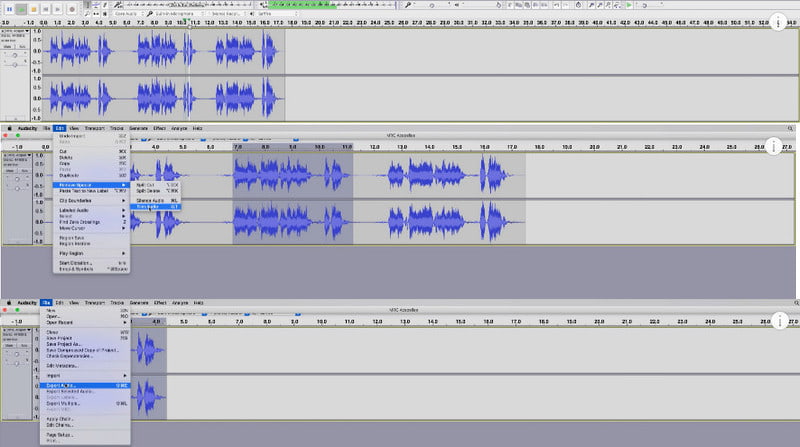
On the program's top menu bar, click the File button. And proceed to click the Import below Export to place your audio track on the timeline.
Find the Selection Tool, and press F1 on your keyboard to choose the part of your audio track that you do not want to be removed. To trim the beginning or end parts of your audio track, click the Edit button on the top menu bar. On the applied list of the button, proceed to click Remove Special, then on Trim Audio to finally remove it. After that process, your wanted audio will be left and remain.
Once you are done, click the File button on the top menu bar, and proceed on Export Audio or Export as MP3 to save the edited version to your folder.
2. How to Split
In addition, you can still count on this program if you want to split tracks. It helps you separate your audio track without removing or throwing away any parts of your audio track. In addition, it allows you to create multiple clips and manipulate those close on your own. Audacity can split your audio track in an easy and best possible process. To know on how to split a track in Audacity, follow the steps provided.
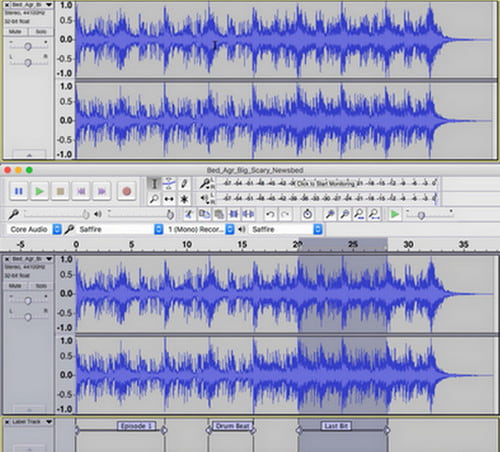
Navigate to the Edit button on the top menu bar. On the applied list of the button, click the Clip Boundaries and then Split. After that, a vertical dark line will appear on your audio track.
Grab the Time Shift tool and use it to move from each separate clip around the timeline. In addition, you can also drag your audio track between the clips, put it into a new track, or delete them together.
Once done, click the File button that you can see on the top menu bar, and click Export to save your project.
Part 2. Easier Method to Cut Audio for Beginners
If you are looking for an application that does its job of cutting audio, you can count on ArkThinker Video Converter Ultimate. This program is easy to master because it only has a user-friendly interface that professional editors and beginners can use. In addition, not only it has a user-friendly interface, but it also has numerous editing tools and features you can rely on. It allows you to convert your audio and video files, has plenty of ready-made themes, and allows you to create a collage. Additionally, this application allows you to cut your audio in easy ways. To get started, proceed with the steps provided.
Download and Install
First and foremost, download and install and launch the program. After that, open the program to start cutting your audio.
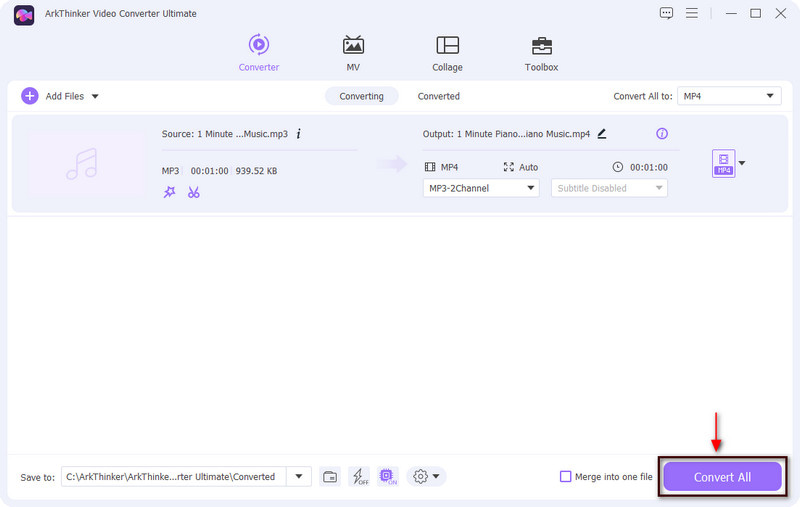
Upload Your Audio Track
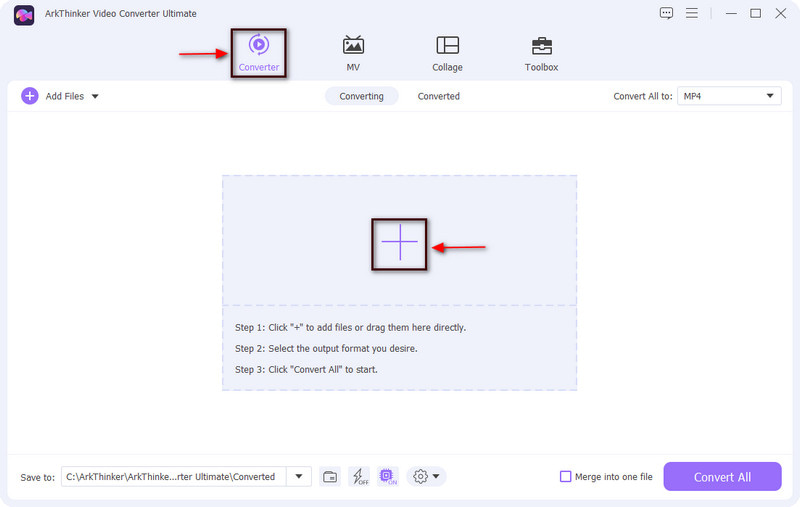
On the main interface of the program, on the top menu bar, click the Converter tab. On your screen, you will see the (+) icon. Proceed to click that to upload your audio track.
Navigate the Scissors Icon
Once your audio file track is placed on the screen, click the Scissor icon to start cutting parts to your audio. Once you click that, an additional screen will appear.
Cut Your Audio Track
On the additional screen of the program, you will see the preview screen. Also, add a segment, copy and create a new segment, reset, and play-in and play-out buttons. Drag your cursor to the play-in and play-out to cut parts to your audio file. Remove the beginning or end parts by placing your cursor on the end points of your audio track.
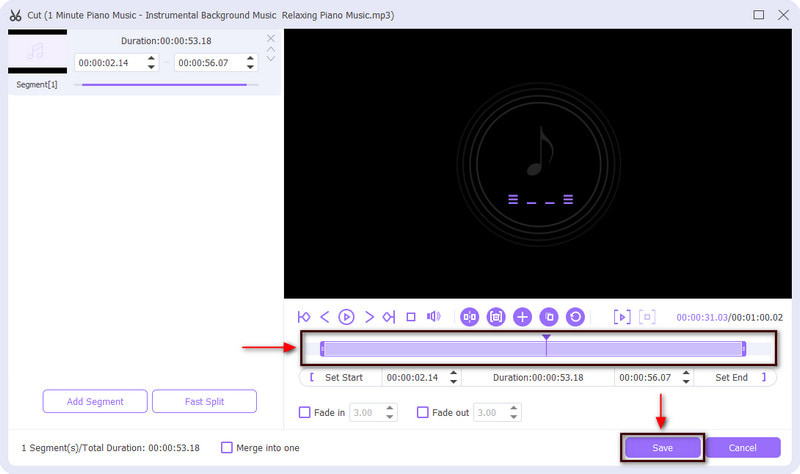
Save Your Audio Track
Once you finish the cutting process, click Convert All to save your audio track file. And it will save to your preferred location in your file folder. From there, check the cut version of your audio track.
Part 3. FAQs about Trimming and Splitting Audio Track
What is trimming in sound editing?
Trimming is removing blank space or dead air from your audio track. You can remove the beginning or end part of your audio track.
What is the purpose of a split track?
It is a stereo audio track where the left and right channel has something others do not have, called Split Track. Singers commonly use this, as it helps them to hear how the song should sound.
Does Audacity improve sound quality?
Audacity can improve the quality of your audio and ensure that your audio track only has a little noise.
Conclusion
The above applications above will help you trim and split your audio tracks. It will just take you a few minutes to accomplish that. If you want to learn how to trim audio in Audacity and how to split audio in Audacity, consider following the steps above. Aside from that, if you are a beginner and want to cut your audio track, rely on Video Converter Ultimate. This program will help save your time cutting some parts of your audio track.
What do you think of this post? Click to rate this post.
Excellent
Rating: 4.9 / 5 (based on 239 votes)
Find More Solutions
4 Easy Methods to Edit Audio Files on Windows and Mac 4 Easiest Ways to Change and Edit Audio Volume on PC and Mac How to Combine 2 or More Audio Files on Different Devices How to Compress Audio Files Without Losing Sound Quality How to Trim a Video and Cut out Parts of a Video on iPhone 4 Methods that Let You Make Video 2X Faster at EaseRelative Articles
- Edit Audio
- Audio Cutters: Reliable Offline and Online Tools to Cut Audio Files
- How to Replace Audio in a Video On Different Devices 2022
- How to Clip Audio in Audacity, WMP, iMovie, Online, Trimmer
- 4 Easiest Ways to Change and Edit Audio Volume on PC and Mac
- 4 Easy Methods to Edit Audio Files on Windows and Mac
- How to Compress Audio Files Without Losing Sound Quality
- How to Combine 2 or More Audio Files on Different Devices
- 5 Best Music Tag Editors for iPhone, Android, PC, and Mac
- Add Album Art to MP3 on Windows, Mac, iPhone, and Android
- Best Ringtone Cutters to Individualize Your Phone Calls