


How to Add/Remove Watermark to Photos on iPhone: 3 Easy Methods Compared
Our iPhones are now capable cameras that record priceless moments. However, there may be a concern when posting photos online. What if your photo is abused without credit? By demonstrating ownership, watermarking offers an extra degree of security, akin to a little digital shield. This guide covers how to watermark photos on iPhone pictures in three easy ways and how to remove watermarks using an online tool. We'll look at using the built-in editing features on your phone, learn how to customize your experience with watermarking apps, and even expose you to some free internet options for when you're on the road. You may share your iPhone photographic masterpieces with confidence, knowing that they are safeguarded in these ways!

- GUIDE LIST
- Part 1.How to Watermark Photos on iPhone- Photos App, Fotor, iLoveIMG
- Part 2. Comparison of the Three Methods
- Part 3. How to Remove Watermarks from Photos for iPhone Online with Arkthinker Watermark Remover
- Part 4. FAQs about Adding and Removing Watermark from Photos on iPhone
Part 1.How to Watermark Photos on iPhone- Photos, Fotor, iLoveIMG
Do you want to keep your gorgeous iPhone pictures safe from cyber theft? The solution is watermarking! Three methods are covered in this post on how to add watermark to photos on iPhone. We will examine the Photos app's built-in editing features, as well as well-known tools like Photos, Fotor, and iLoveIMG. Let's get started and protect your iPhone photography!
Method 1. Photos App
It's thrilling to share your gorgeous iPhone pictures with the world, but you might be afraid of them getting stolen. Like a little signature, watermarking gives an extra layer of security while asserting ownership of your creation. The best part? You don't need to install complex apps! This tutorial shows how to watermark photos on iPhone from the Photos app. Let's get started and save your beautiful photography!
Locate the picture you wish to watermark in your Photos app, then press it to make it accessible. Find the edit button.
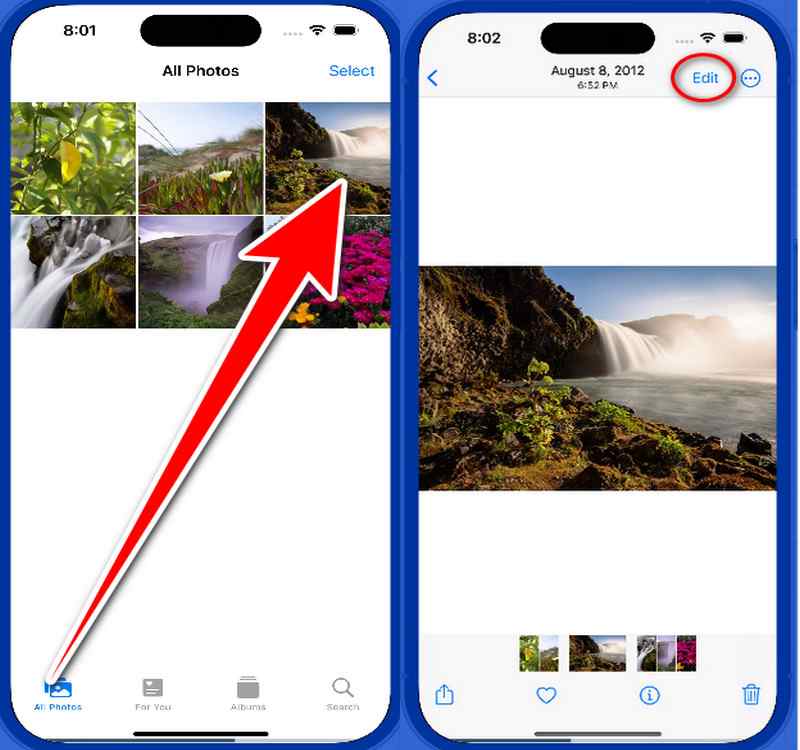
Search for the pen inside of it. The Markup tools are now accessible. Select Text by tapping the Plus button to add your watermark to the picture straight away.
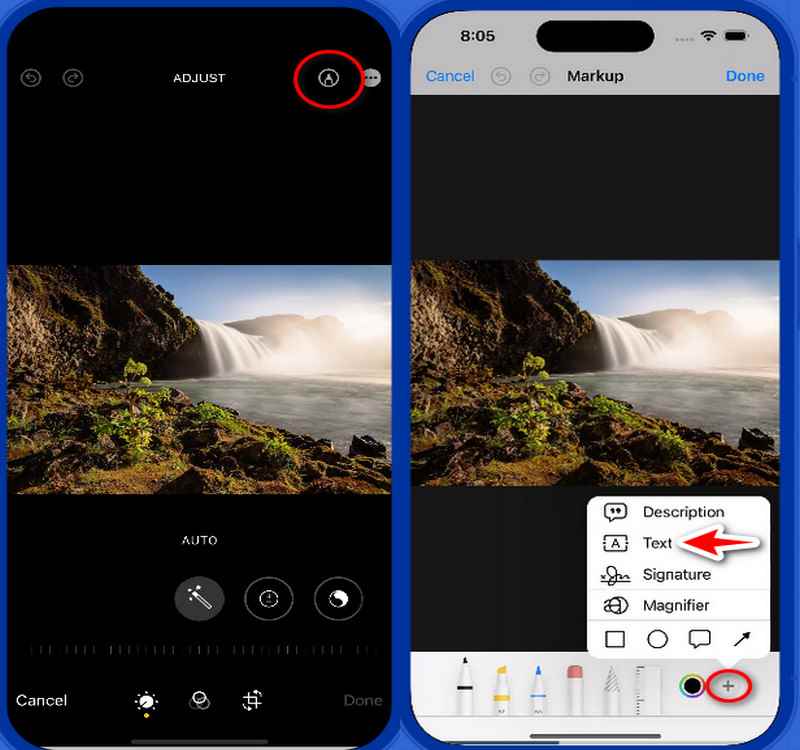
Your text or signature can be dragged and dropped anywhere on the image. You may also adjust the opacity, color, and size of the watermark by using the editing tools at the bottom.
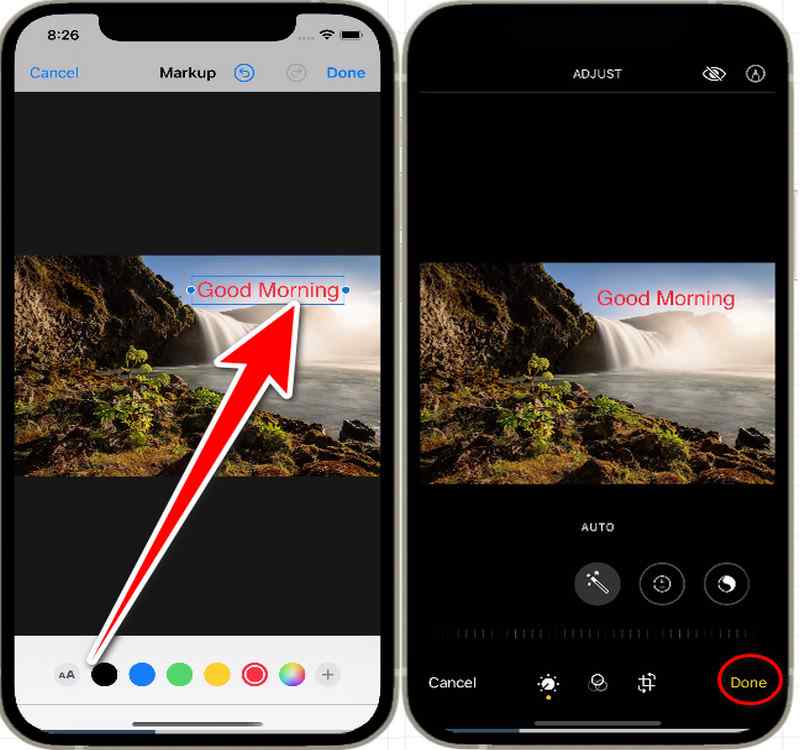
Tap Done in the upper right corner if you're satisfied with the positioning and appearance of your watermark. In doing so, a fresh image of the watermarked photo is saved.
The Photos app offers more than you think. Apart from watermarking your photos, it also enables you to cut video clips on iPhone using its built-in trimming tool.
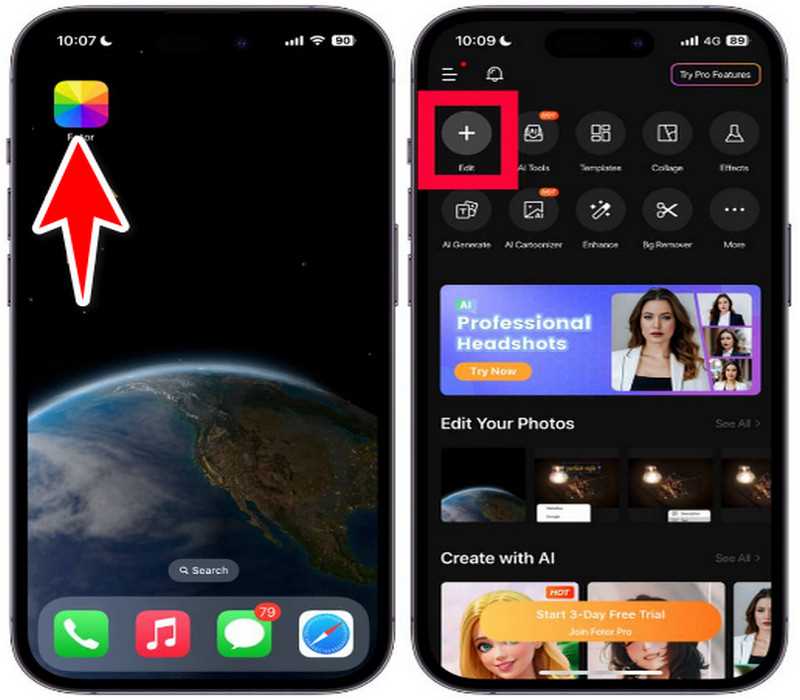
Method 2. Fotor
Social network photo sharing from your iPhone is a terrific way to build relationships, but what happens if someone takes your creations? Fotor provides an easy-to-use solution! This introduction explains how to add watermark to photos on an iPhone using Fotor, a free online photo editing application. With the help of Fotor's user-friendly interface, we'll walk you through the process of turning your iPhone photos into protected masterpieces. Prepare to let your imagination run wild and share your pictures with confidence, knowing that a custom watermark will defend them!
Use Your iPhone to Visit Fotor. On your iPhone, launch Safari or your favorite online browser. Go to the Fotor website to access it.
To upload your photo, click the open image button. Check out Fotor's editing capabilities after your photo has been submitted.
Select Text from the editing menu by clicking on it. You can type any text you want here, altering the font, size, color, and opacity. Your text watermark or logo can be dragged and dropped anywhere on the image. To get the desired effect, change its size, rotation, and transparency using the editing tools.

After you're satisfied with the watermark's positioning and appearance, tap save in the upper right corner.
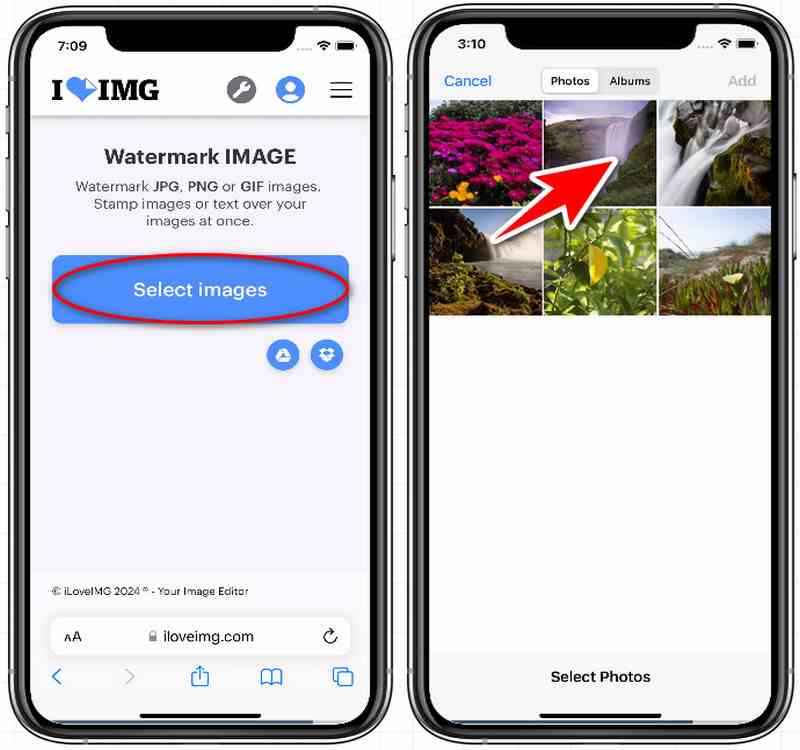
Method 3. iLoveIMG
Sharing your iPhone photos online is a fantastic way to showcase your skills, but the risk of someone claiming them as their own can be disheartening. This introduction explores how to add watermark to photos on iPhone in iLoveIMG, a free online tool, that empowers you to add a personalized watermark to your iPhone photos in just a few clicks. We'll guide you through the process, transforming your iPhone snaps into protected masterpieces all within iLoveIMG's user-friendly interface. Prepare to let your creativity run wild and share your pictures with confidence, knowing that a unique watermark made with iLoveIMG will protect them!
On your iPhone, launch Safari or your favorite online browser and search for the online tool. Tap on the Select Images button. You'll see options to upload your photo.
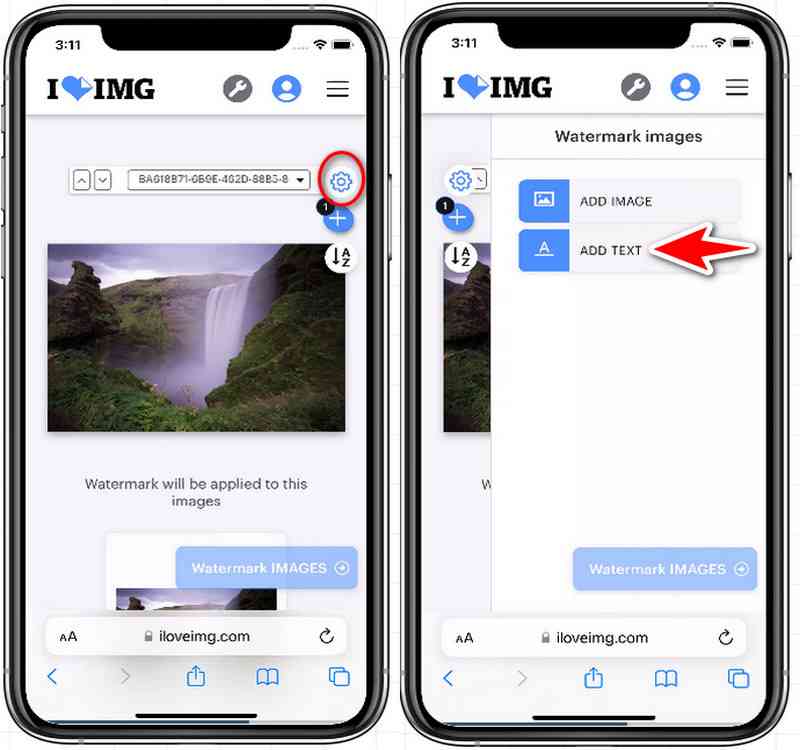
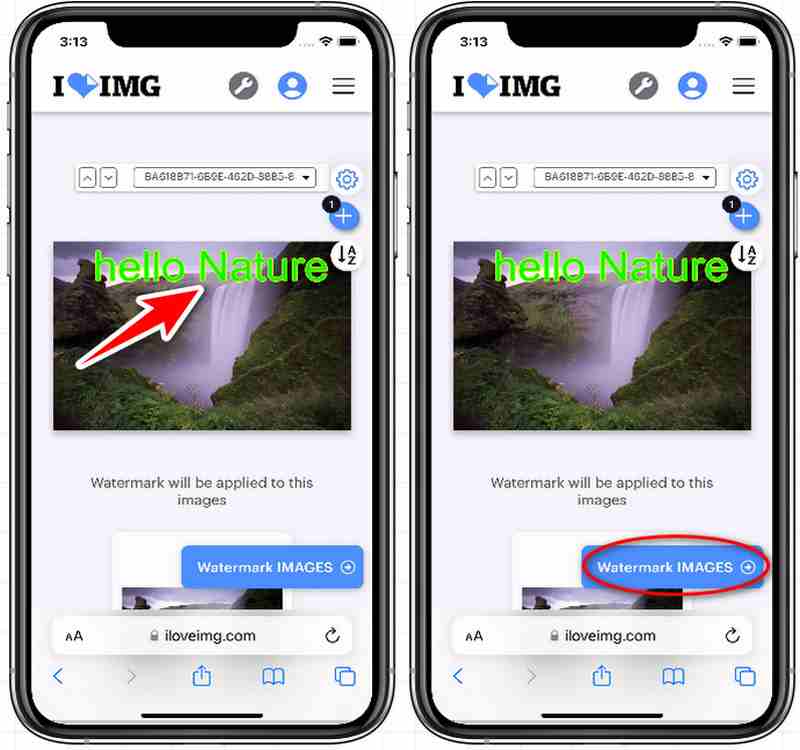
To enter the text you want, Tap Add Text. Its font, size, color, and opacity can all be changed with the editing tools included.Drag and drag it where you want it on your image. For best placement, use the editing tools to change its size, rotation, and transparency.
After processing your photo, iLoveIMG will show the watermarked version. To save the watermarked picture back to the storage on your iPhone, tap Download.
Part 2. Comparison of the Three Methods
A signature-like degree of security is added by watermarking your images to prove who owns them. How can you pick the best method for watermarking your iPhone pictures, though, with so many options available? This tutorial compares three widely used approaches side by side: the built-in Photos app, the free web application iLoveIMG, and the Fotor photo editor. By assisting you in selecting the approach that best meets your objectives, the following table lists the salient characteristics of each method:
| Feature | Photos App | Fotor | iLoveIMG |
|---|---|---|---|
| Availability | Pre-installed on iPhone | Web-based tool | Web-based tool |
| Cost | Free | Free (basic) | Free (basic) |
| Watermark Type | Text or signature | Text, logo | Text, logo |
| Customization | Limited (font, color, opacity) | High (fonts, colors, effects) | Moderate (font, color, opacity) |
| Offline functionality | Yes | No | No |
| Ease of use | Very easy | Easy | Easy |
| Best for | Basic watermarking | More customization | On-the-go-watermarking |
Part 3. How to Remove Watermarks from Photos for iPhone Online with Arkthinker Watermark Remover
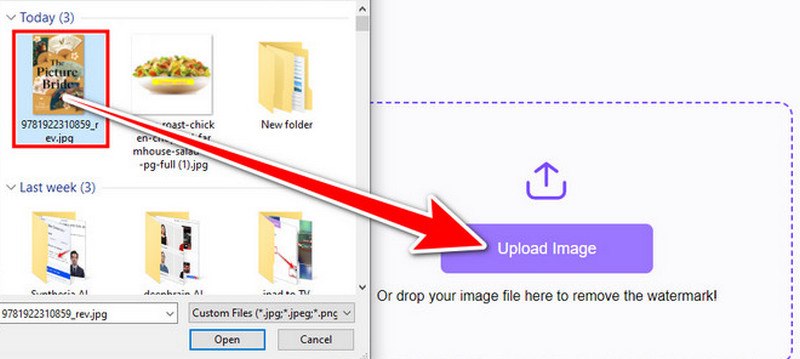
Imagine turning images with unsightly watermarks into crisp, well-defined works of art. With the help of artificial intelligence (AI), ArkThinker analyzes the watermark and successfully removes it. This tutorial introduces you to ArkThinker Watermark Remover, a free web application that allows you to quickly and easily remove watermarks from iPhone pictures! We'll go over how to remove watermarks from photos on iPhone using ArkThinker to turn pictures with unsightly watermarks into crisp, readable works of art. Prepare to give your photographs a fresh perspective and realize their full potential!
On your iPhone, launch Safari and click the link to go directly to the ArkThinker Watermark Remover tool page. In the middle of the page, click the Upload Image button.
To remove a watermark, gently outline the desired area with your finger using the Brush or Laso tool. The effects of the removal are better the more exact you are.
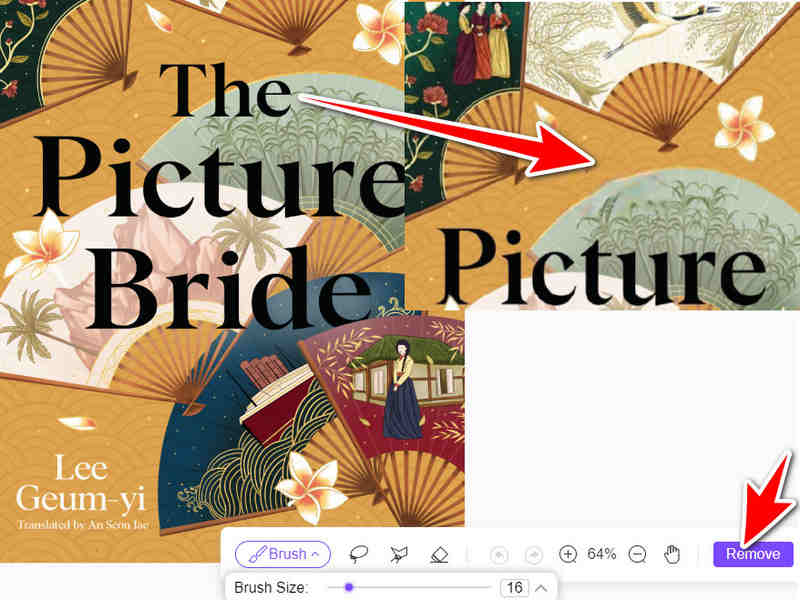
After analyzing the image using its AI technology, ArkThinker will take out the watermark. Once you're satisfied, hit the Download button to return the image to the storage on your iPhone without the watermark.

This web Watermark Removal tool not only removes watermarks from images but also removes texts from images, logos, stickers, and emojis. You can try it any time you want and explore its features.
Part 4. FAQs about Adding and Removing Watermark from Photos on iPhone
What advantages come with watermarking my iPhone pictures?
A watermark asserts ownership over your photographs, protecting them from internet theft. They can serve as a branding tool for your photos and offer a polished touch.
What other options do I have for watermarking my iPhone pictures?
What other options do I have for watermarking my iPhone pictures?
Can a transparent watermark be included on iPhone pictures?
You can change the opacity of your watermark using certain watermarking applications, which will allow it to become partially transparent. If you want a watermark that isn't too noticeable and doesn't overtake the image, this can be a suitable choice.
Conclusion
In conclusion, there are several ways how to add watermark to photos on iPhone, including using the built-in images feature, third-party apps like Fotor, or internet resources like iLoveIMG. Different features and degrees of customization are available with each method. Internet programs such as ArkThinker Watermark Remover offer a practical way to get rid of watermarks. The decision is based on the intended level of functionality as well as individual preferences.
What do you think of this post? Click to rate this post.
Excellent
Rating: 4.9 / 5 (based on 475 votes)
Find More Solutions
How to Add Watermark to Video on Different Devices 2024 How to Losslessly Upscale Image to 4K with AI (Online & Offline) Full Guide to Remove Wondershare Filmora Watermark 3 Shutterstock Watermark Removers to Get Rid of Watermarks Methods to Add Watermark to GIF and Remove Watermark on GIF How to Use Photoshop to Remove Watermark EffectivelyRelative Articles
- Edit Image
- How to Edit and Crop Animated GIFs with 4 Effective Ways
- 10 GIF Converters to Convert Between Images/Videos and GIFs
- Best GIF Editor Tools Suitable to Any Computers and Devices
- How to Make GIF from Images on Desktop and Mobile Phone
- Quick Steps on How to Add Text to a GIF Using Caption Maker Tools
- Add Music to GIF: Incorporate Music to Your GIF After Converting
- GIF Resizer: Ultimate Tools to Resize Your Animated GIF
- [6 Tools] How to Set a GIF Loop Change and Play It Forever
- GIF Cutter: How to Cut GIF with Easy and Fast Methods
- How to Remove Alamy Watermark from Images (100% Working)