


How to Record Screen on MacBook Pro, iMac, or MacBook Air with Audio
“Sometimes, I need to save important content from the website, but how to record screen on Mac?” The good news is that there are built-in features for screen recording if you have a Mac computer. However, many users do not understand how to use these features in various situations. Moreover, these features were vastly improved with macOS Mojave. Therefore, you should read this guide carefully to learn how to screen record on your Mac computer properly.

- GUIDE LIST
- Part 1: How to Record Screen on Mac with Built-in Feature
- Part 2: Record Screen Is Not Working on Mac? How to Fix
- Part 3: More Ways to Record Screen on Mac
- Part 4: FAQs on How to Screen Record on Mac
Part 1: How to Record Screen on Mac with Built-in Feature
Apple has introduced a new screen-recording feature on macOS Mojave and higher. Of course, the screen-recording functionality in QuickTime Player is working too. In another word, you have at least two ways to record the screen on Mac now.
Way 1: How to Screen Record on macOS Mojave
If you are running macOS Mojave or above, open the Applications folder in the Finder app, head to the Utilities sub-folder, and select the Screenshot app. Then you will get the Screenshot toolbar.
The three icons on the very left side are involved with screenshots. The two icons in the middle are for screen recording on Mac. The first one is Record Entire Screen, and the second one is Record Selected Portion.

Before the recording screen on Mac, click the Options menu on the toolbar. Select where to save the Mac screen recording under the Save to section. Then set the Timer according to your preference. If you intend to record a screen with audio on Mac, select Built-in Microphone. If not, select None. Here you can decide whether show mouse clicks and other options.
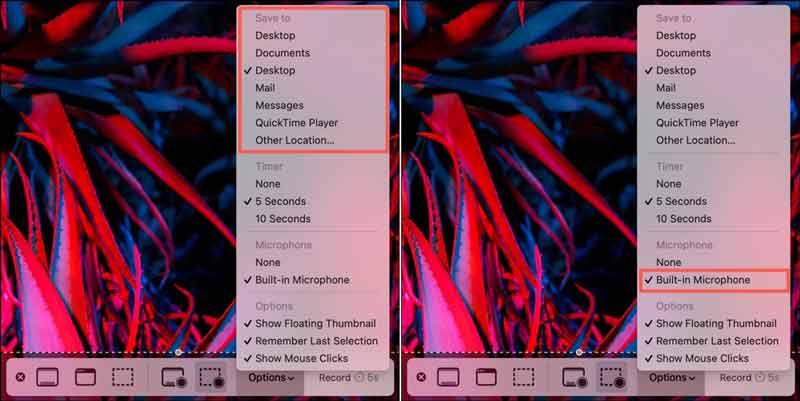
When settings are done, choose Record Entire Screen to record your whole screen or select Record Selected Portion and select the desired area. Hit the Record button and screen recording will initiate, after the countdown.
Note: When recording the screen on Mac, you will get the Stop recording button on the top of the screen. It enables you to stop screen recording immediately.
Way 2: How to Record Screen on Mac with QuickTime Player
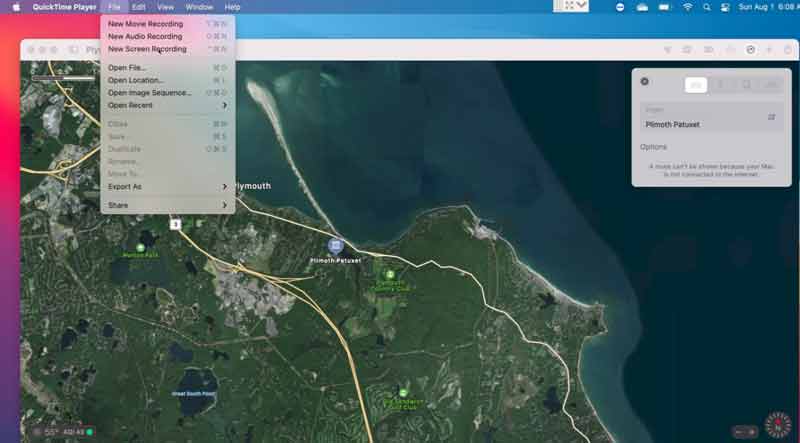
If you want to record a screen or a video on Mac with QuickTime Player, go to the File menu, and choose New Screen Recording.
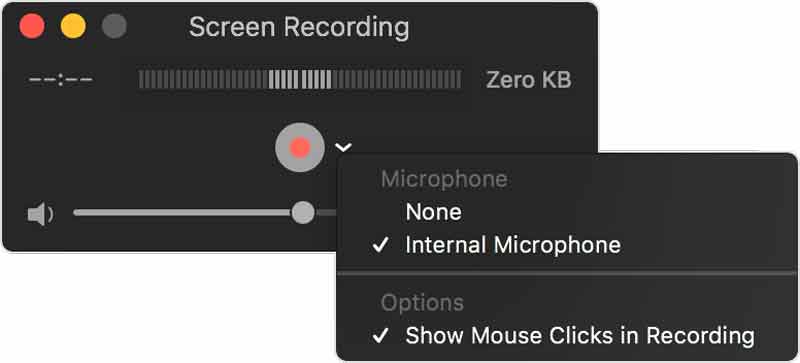
Now, you will be presented with the Screen Recording window. Click and expand the downward icon next to the Record button.
Select the sound source in the Microphone section, and set other options according to your need.
Next, click the Record button. Then press anywhere on your screen to record the whole screen, or select the desired area and hit the Start Recording button.
To finish the screen recording, click the Stop button on the menu bar. Then QuickTime Player will open the recording automatically. You can play, edit, or save it.
Part 2: Record Screen Is Not Working on Mac? How to Fix
Some users complained that the screen-recording feature was not working on their MacBook. This problem could be caused by a variety of reasons. The common causes include incorrect settings, insufficient space, copyright issues, and more. Here we demonstrate how to resolve screen recording not working on Mac.
Solution 1: Try Shortcut
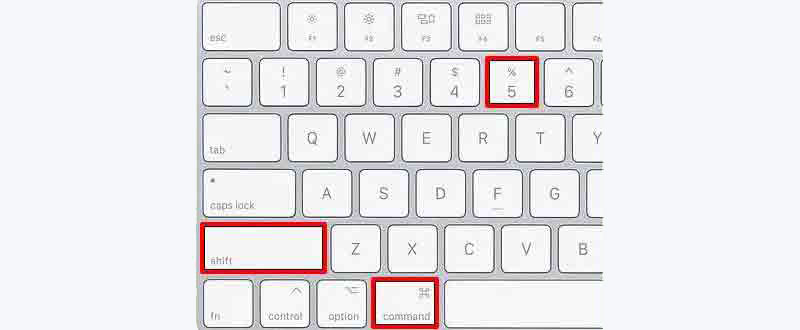
Sometimes, something is wrong with the app icon which leads to the screen recording not working. If you click the Screenshot icon in the Applications folder but nothing happens, press Shift + Command + 5. That opens the built-in screenshot tool.
Solution 2: Set Permissions
If the Mac screen-recording feature is not working for specific apps, you can check and adjust the permissions on the Privacy dialog.
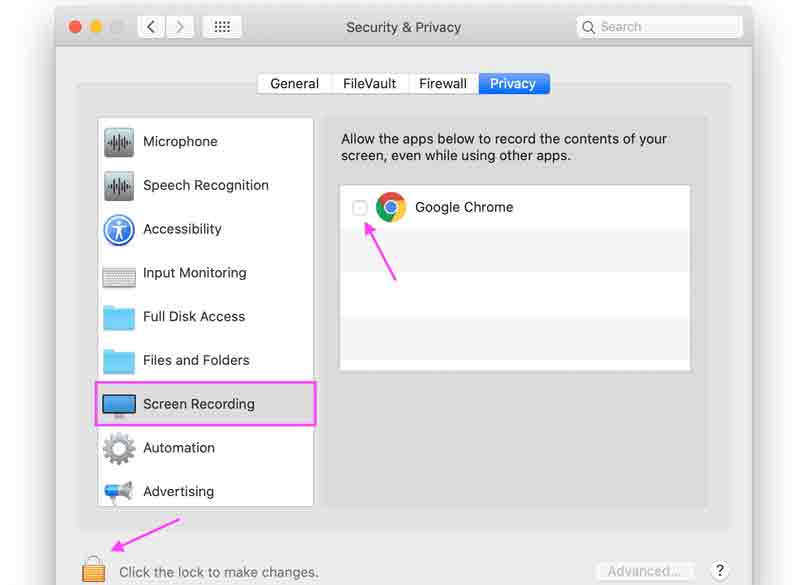
Click the Apple menu, choose System Preferences, and select Security & Privacy.
Switch to the Privacy screen, and select the Screen Recording option on the left side. Then tick the checkbox next to the desired app on the right side.
Solution 3: Restart Mac
Restarting your MacBook is an easy way to fix screen recording on Mac. It closes useless apps in the background and frees up space. So that the screen-recording feature may work normally again.
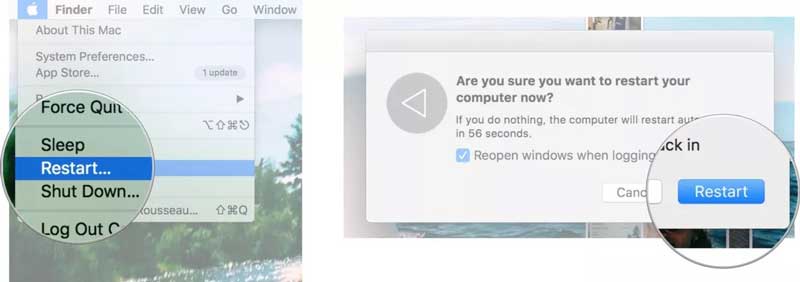
Click and expand the Apple menu and choose the Restart option.
When prompted, click the Restart button.
Wait for your computer to turn back on and try the screen-recording feature again.
Solution 4: Repair with Disk Utility
Sometimes, QuickTime Player or the screenshot app is not working due to unexpected quit. Fortunately, the built-in Disk Utility app can fix this problem.
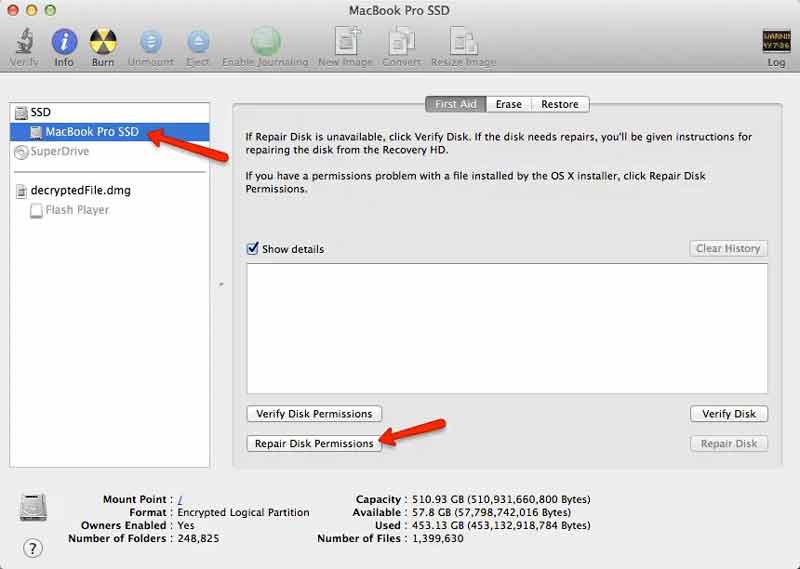
Run the Disk Utility app from your Duck bar or Applications folder.
Choose your boot volume, head to the First Aid tab, and click the Repair Disk Permission button.
As long as the process completes, record the desired screen on Mac again. It should work this time.
Solution 5: Update Mac
The last but not least solution is up your Mac to date. Both QuickTime Player and screen-recording features come with your macOS. The outdated system can lead to a variety of problems. When screen recording is not working on Mac, you should check your update.
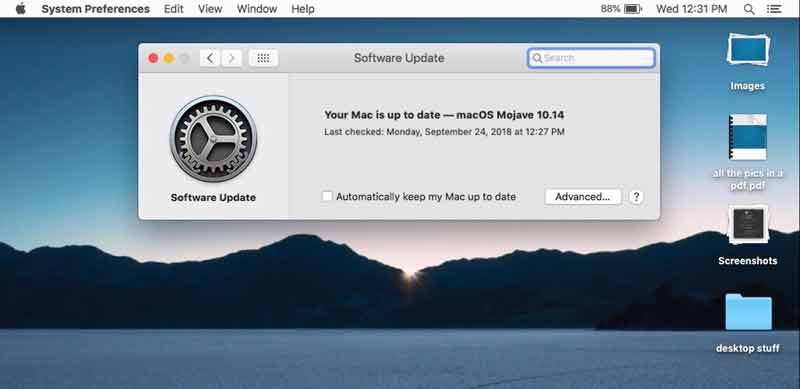
Select the System Preferences from the Apple menu.
Click the Software Update, and hit Update Now or Upgrade Now.
When it finishes, your Mac will reboot and you can try screen recording again.
Part 3: More Ways to Record Screen on Mac
If you have tried the solutions but screen recording is still not working, a third-party screen recording application is a good choice too. They usually provide more advanced features. Here we demonstrate the easiest screen recorders for Mac.
Way 1: Record Screen on Mac with ArkThinker Screen Recorder
As a powerful screen recorder, ArkThinker Screen Recorder is available to both beginners and advanced users. The concise interface enables average people to use it without any trouble. Advanced users, on the other hand, can get the desired result with custom options.
- Record video, screen, audio, and more on Mac easily.
- Include a wide range of custom options.
- Enhance the quality of screen recordings using AI.
- Preview and edit screen recordings directly.
How to Record Screen on Mac
Install Mac screen recorder
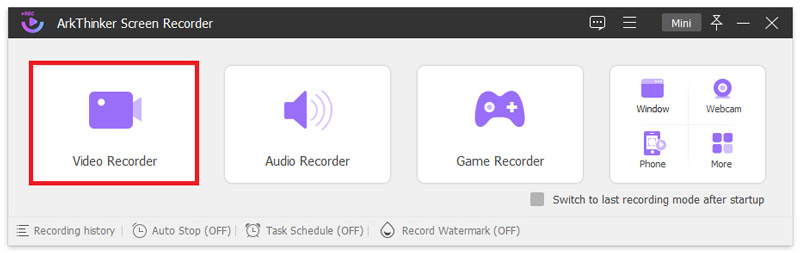
Run the best screen recorder for Mac after you install it on your MacBook. There is another version for PCs. Then you will see the main features. Choose Video Recorder to enter the main interface. If you intend to record audio on Mac, select Audio Recorder. The Game Recorder is optimized for recording gameplay. You can also record a window, webcam, or smartphone.
Record screen on Mac
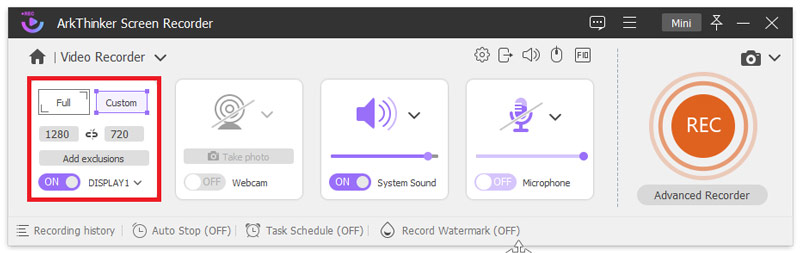
Turn on the Display option and set the recording area, such as the full screen or custom size. To capture both your screen and face, turn on Webcam too. Next, set the audio source, such as System Sound and/or Microphone. Plus, adjust the volume according to your need. When you are done, click the REC button to initiate screen recording on Mac.
Tip: If you need to record the screen automatically, click the Task Schedule menu and set it up.
Edit and save the screen recording
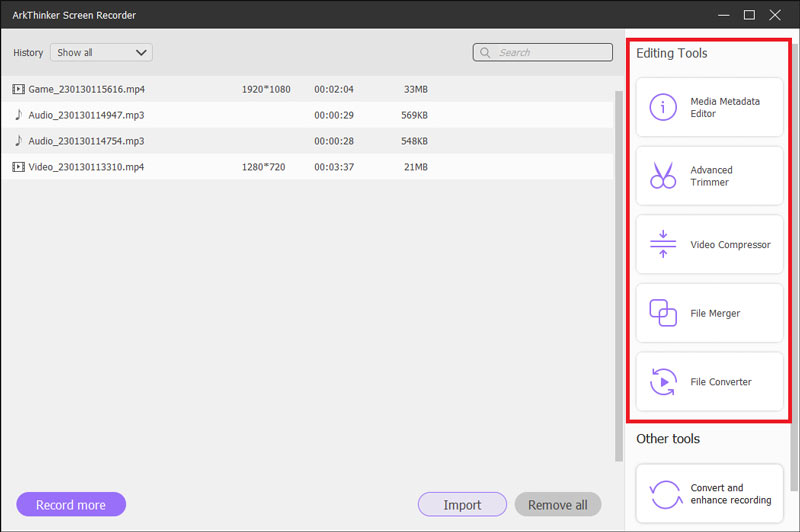
To finish the screen recording, click the Stop button on the menu bar. Then you will be presented with the preview window. Here you can watch the recording and remove unwanted parts. Hit the Save button and you will get more video editing tools on the right side.
Way 2: How to Record Mac Screen by OBS
OBS is an open-source video recorder available to both Mac and Windows computers. Some vloggers and game players use it to record screens since it is free of charge. However, the complicated configuration is a big problem. We demonstrate the basic steps below.
Download the free screen recorder on your Mac from the official website and install it.
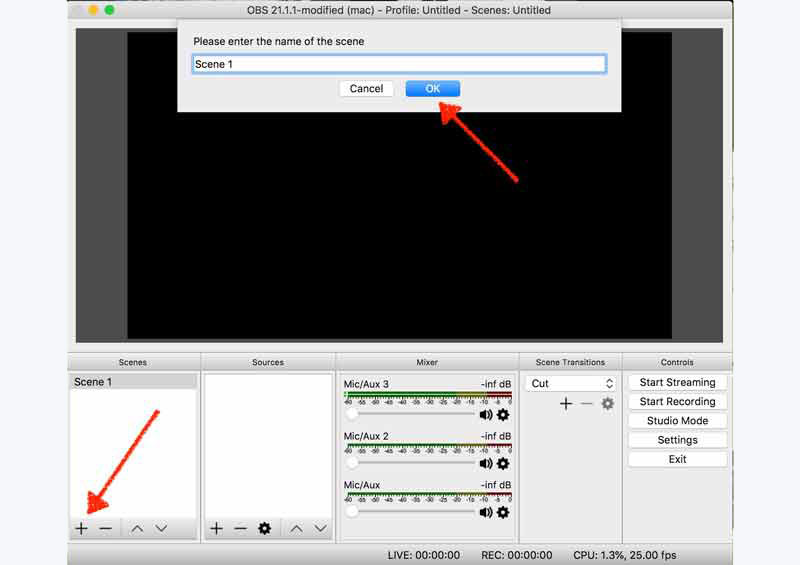
Go to the Scenes panel at the bottom left side, click the + icon to add a new scene, and enter a name.
Then move to the Sources panel, click the + icon, and select where to record. To record the screen, for example, select Display Capture. If you need to record a window, select Window Capture instead.
Set the audio source in the Mixer panel and adjust the volume. If you want to set the output format or other options, click the Settings button in the Controls panel.
Now, click the Start Recording button to begin screen recording on Mac.
Note: OBS is not available to record copyright videos on Mac.
Way 3: How to Record Screen on Mac Online
There are a few screen recorder apps online available to record screens on Mac. Screencast-o-Matic, for instance, is a free screen recorder online. You just need a browser to record a video on your desktop.
Enter the screen that you want to save on Mac. Open your browser, and access the website. Click the Launch Screen Recorder button to open the launcher.
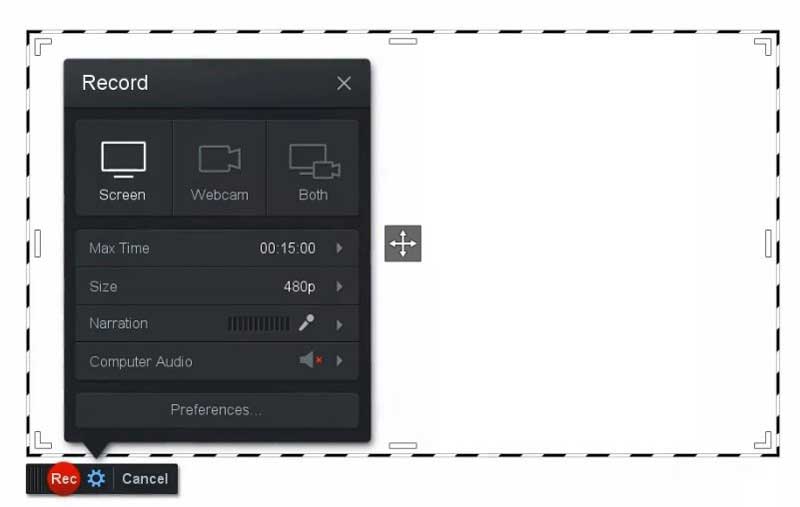
Press the Settings icon to access the custom options. Select the recording sources, like Screen, Webcam, or Both. Then set the recording area by dragging the box. The online screen recorder can record up to 15 minutes, but you can set the Max Time to less than 15 minutes.
Click the Size option and select a proper resolution. Next, set the audio source.
Finally, click the red Rec button to start recording your screen on Mac. When you want to finish, hit the Stop button, and download the recording.
Part 4: FAQs on How to Screen Record on Mac
Is it screen recording on Mac legal?
The answer is determined by the content that you intend to record. It may be possible to capture YouTube videos on Mac, but it is not always ethical or legal. You’d better clarify the permission before recording the screen on Mac.
Why QuickTime Player cannot record Netflix?
All contents on Netflix are protected by copyright. According to Apple, you cannot record them with either the built-in screen-recording feature or QuickTime Player.
What is the best output format for screen recordings?
If you want to get the best output quality or edit the video later, you’d better save them in lossless video formats, such as MKV, AVI, etc. Otherwise, you can save them in MP4 or MOV.
Conclusion
Based on the guide above, you should understand how to record a screen or a video on Mac using the built-in feature of QuickTime Player. Even if it is not working, you can find the troubleshooting from our guide. To get more advanced features, you can try a third-party screen recorder, such as ArkThinker Screen Recorder. More questions about this topic? Please feel free to write them down below this post and we will reply to them quickly.
What do you think of this post? Click to rate this post.
Excellent
Rating: 4.9 / 5 (based on 211 votes)
Relative Articles
- Record Video
- Thorough Ways to Record Screen With Quicktime on Apple Devices
- OBS Screen Recorder: Powerful Screen and Broadcasting Tool
- How to Fix Audacity Won’t Record Issues in 5 Basic Methods
- How to Enable Google Meet Recording on Your Desktop
- Guidelines on How to Trim a Video on Facebook Effectively
- How to Zoom in on a Video with Most Helpful Methods
- Top 7 Video Cropper that Excellently Crop and Resize a Video
- Top-Notch Video Trimmer Available on Windows, Mac, Android, and iOS
- How to Create an Instagram Filter Using Excellent Tools
- Easy Guidelines on How to Trim a Video on Snapchat