


Screen Recording on Chromebook: The Ultimate Guide with 3 Methods
Recording your screen on a Chromebook is important and helpful for a variety of reasons. For example, it can capture some important video meetings or lectures, create tutorial videos, or even save online video content. Additionally, if you want to share the activities on Chromebook, you need to record them and save them as media files. In this article, you will explore effective third-party software or learn how to activate the built-in recorder in two ways. You can choose the best method to screen record on Chromebook.
- GUIDE LIST
- Part 1: How to Screen Record on Chromebook with ArkThinker
- Part 2: How to Screen Record on Chromebook with Built-in Recorder
- Part 3: FAQs about Screen Record on Chromebook
Part 1: How to Screen Record on Chromebook with ArkThinker
If you do not know how to launch the built-in recorder to screen record on Chromebook, you can download ArkThinker Screen Recorder to capture the screen. This software could help you quickly record the Chromebook screen. Moreover, you can record not only the screen activity but also the audio and microphone voice with the help of ArkThinker. So, if you want to record the gameplay or meetings with audio, try to save them with original video and audio quality.
- Capture any screen activities and audio on the Chromebook.
- Record gameplay on Chromebook without delay or slowing CPU.
- Take snapshots when you record the Chromebook screen.
- Record iOS and Android screens on your Chromebook easily.
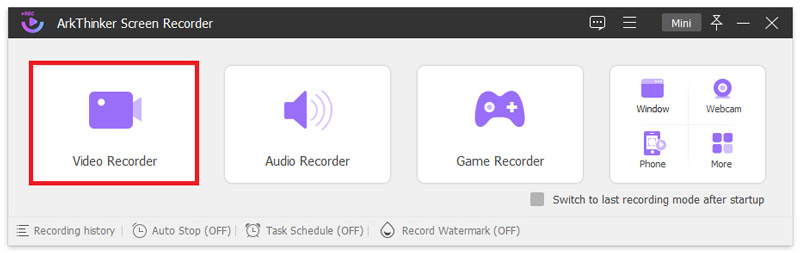
After you have installed ArkThinker on your computer, launch it and click the Video Recorder button on the main screen.
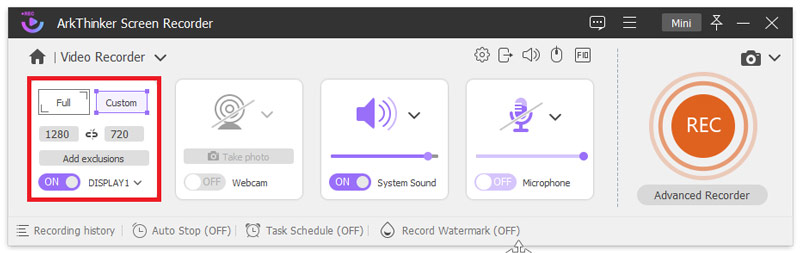
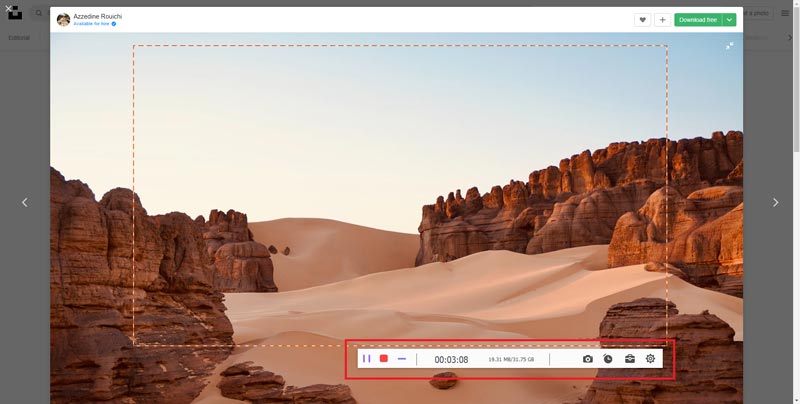
You can choose the portion of your screen to record. You can choose the screen size or click the Custom button to drag the portion on your screen.
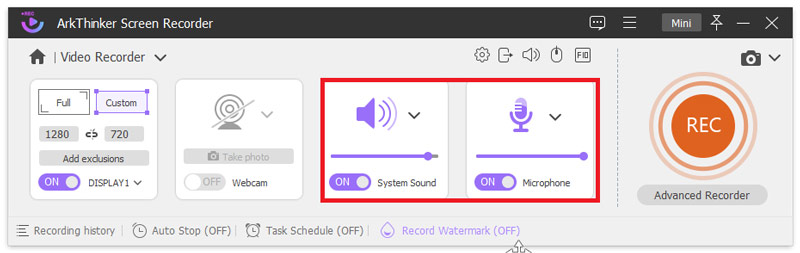
If you want to record the voice while capturing the screen, you can adjust the audio source. You can choose to record system sound or microphone sound.
Afteryou have adjust the settings, you need to click REC to start the recording. And then, click the Stop button to end the recording.
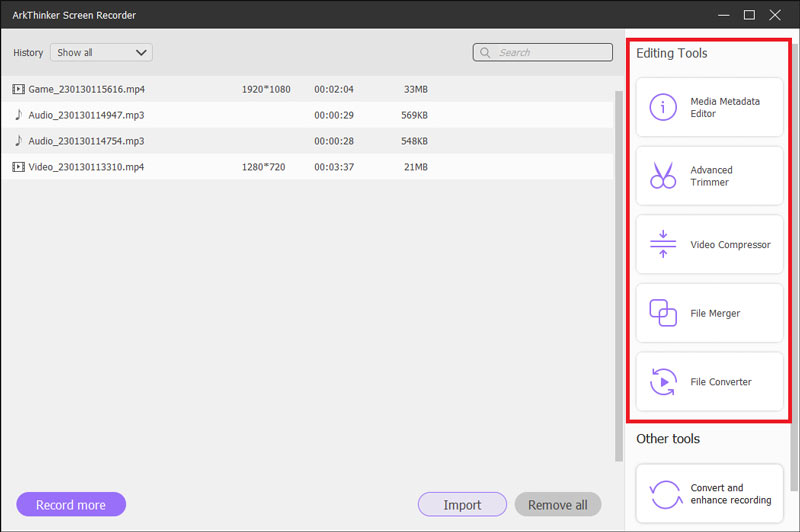
After the recording ends, you can use editing tools to edit the video before you import the video.
Part 2: How to Screen Record on Chromebook with Built-in Recorder
There are 2 ways to use the built-in Chrome recorder to capture screen on Chromebook. You can manually activate the recorder or press shortcut keys to record your screen quickly.
1. Use Shortcut Keys to Record Chromebook
Using the shortcut keys to activate the recorder is a quick way to capture the screen. Especially when you want to record an exciting moment in gameplay, this is an easy and quick way.
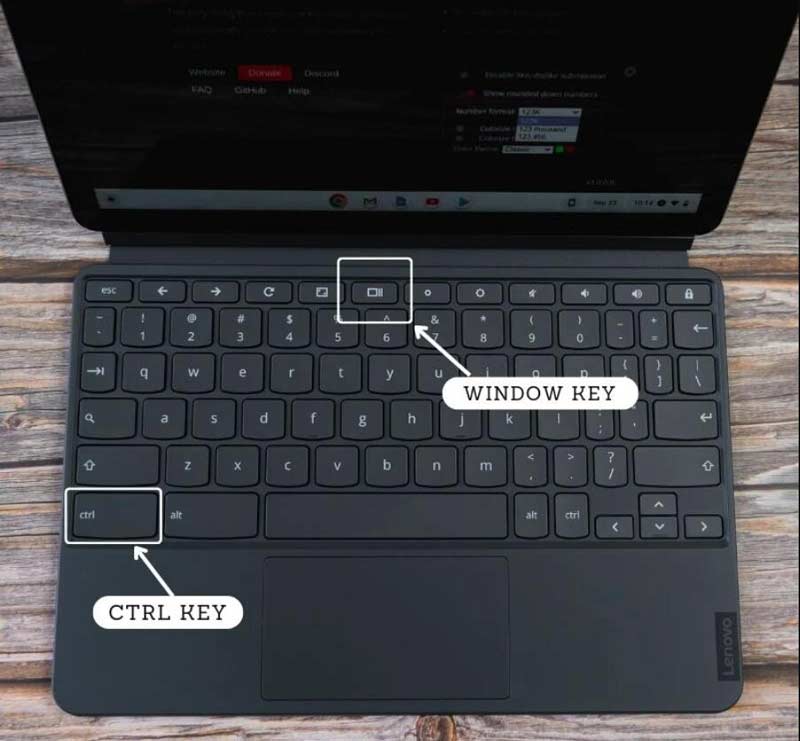
You can press Shift + Control + Show Windows keys to launch the recorder. A menu will then appear at the bottom of your screen.
You can choose the recording portion on your screen and then click the Start button on the menu.
You can click the Stop button to end the recording process. The video will be saved in your folder automatically.
2. Using Screen Capture on Chromebook
If you want to adjust the setting before screen recording your Chromebook, you can manually open Screen Capture.
You should click the up arrow to expand the toolbox of your Chromebook. And then, you should click the Screen Capture button.
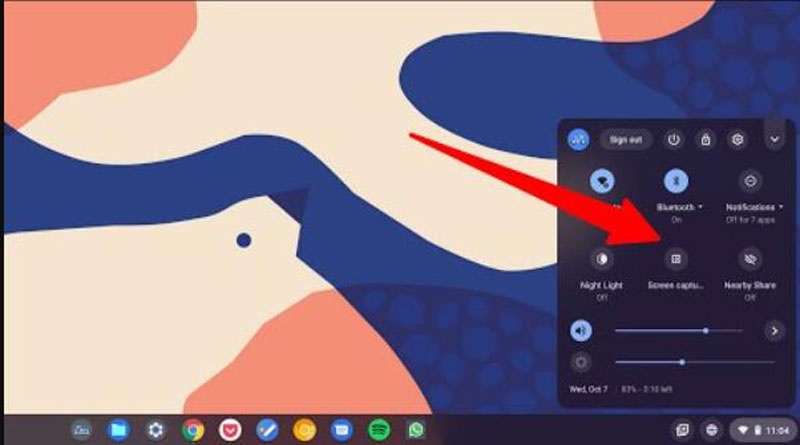
The toolbar will appear at your screen’s bottom after you click the Screen Capture button. And you need to click the Video button if you want to record the screen.
There are three modes: full size, Window, and partial size. You can choose one of them to record your screen.

You can click the Settings button to set audio preference. And click anywhere if you choose the full size or set the frame if you choose window or partial size to start recording.

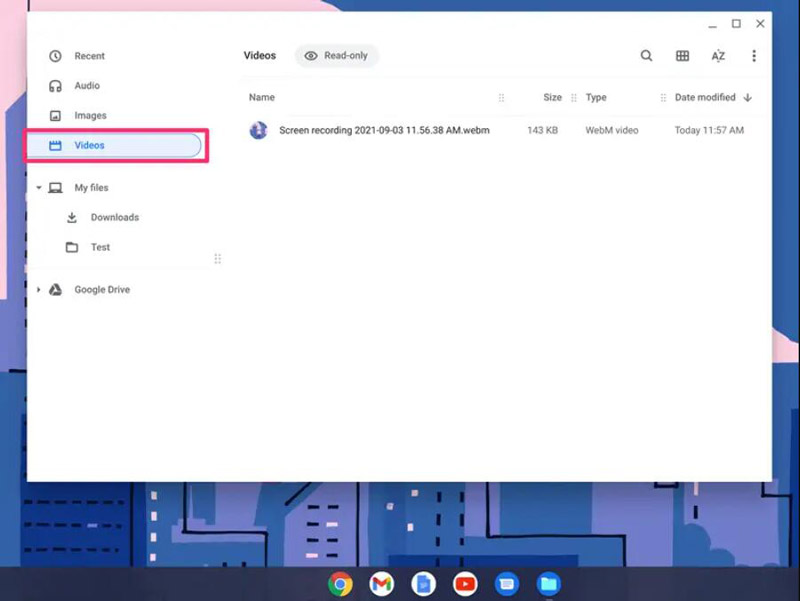
Bonus Tip: Where are Recorded Videos Saved on Chromebook
If you do not set the default destination for your recorded video, these videos will be recorded automatically in your Video folder. Moreover, when you finish recording the video, the video also will be on your clipboard. You can right-click your mouse and paste the video wherever you want. But remember to delete the one in the Video folder. Otherwise, there will be two files to consume your space. And if you are afraid to be confused by them, you can add tags to those files to avoid deleting the wrong video.
Part 3: FAQs about Screen Record on Chromebook
Is there a limit to how long I can record my screen on a Chromebook?
The length of a screen recording on a Chromebook may be limited by the amount of storage space available on your device or the specifications of the app you are using.
Can I pause and resume a recording with Screen Capture?
No. Once you pause the recording, you will stop the recording with Screen Capture. If you want to pause the recording for a while and resume it, you can use ArkThinker Screen Recorder on Chromebook.
How can I edit my screen recording on a Chromebook?
If you are using Screen Capture to screen record your Chromebook, you need another third-party software to edit the recorded video. Instead, if you use ArkThinker Screen Recorder, you can directly edit your video after recording your screen.
Conclusion
You must get familiar with how to screen record on Chromebook from this article. You can use a different way to launch screen capture on your computer without downloading any third-party software. But if you want a more powerful recorder with pausing and resuming or editing recorded video features, you should use ArkThinker Screen Recorder. This software could give you a better recording and editing experience instead of installing another video editing software.
What do you think of this post? Click to rate this post.
Excellent
Rating: 4.9 / 5 (based on 322 votes)
Relative Articles
- Record Video
- Thorough Ways to Record Screen With Quicktime on Apple Devices
- OBS Screen Recorder: Powerful Screen and Broadcasting Tool
- How to Fix Audacity Won’t Record Issues in 5 Basic Methods
- How to Enable Google Meet Recording on Your Desktop
- Guidelines on How to Trim a Video on Facebook Effectively
- How to Zoom in on a Video with Most Helpful Methods
- Top 7 Video Cropper that Excellently Crop and Resize a Video
- Top-Notch Video Trimmer Available on Windows, Mac, Android, and iOS
- How to Create an Instagram Filter Using Excellent Tools
- Easy Guidelines on How to Trim a Video on Snapchat