


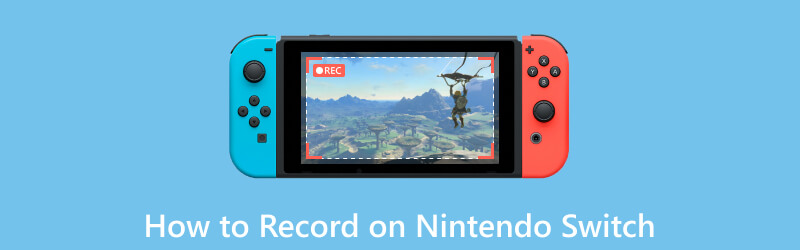
Comprehensive Guide to Recording on Nintendo Switch
The Nintendo Switch is one of the three most popular gaming consoles, offering an innovative and portable gaming experience. The Switch and its gaming capabilities allow you to easily capture and share gaming moments through the built-in recording feature. This post gives you a full guide on how to record on Nintendo Switch.
- GUIDE LIST
- Part 1. Record Gameplay on Nintendo Switch
- Part 2. Use a Capture Card to Record Switch
- Part 3. How to Record Switch Gameplay on PC
- Part 4. FAQs of Nintendo Switch Gameplay Recording
Part 1. How to Record Your Gameplay on Nintendo Switch
The Nintendo Switch offers two main options for recording gameplay, capturing screenshots, and recording video clips. To take screenshots, simply press the Capture button on the left Joy-Con controller. A more elaborate setup is required to record video clips, which we will explore in the following guide.
To record gameplay video clips on your Nintendo Switch, you need to ensure you have a microSD card inserted into the console and it has enough free space to accommodate the video files.
To access the recording feature on your Nintendo Switch, open the game you wish to record and press and hold the Capture button. This will trigger the recording function, and the system will start capturing the previous 30 seconds of gameplay.
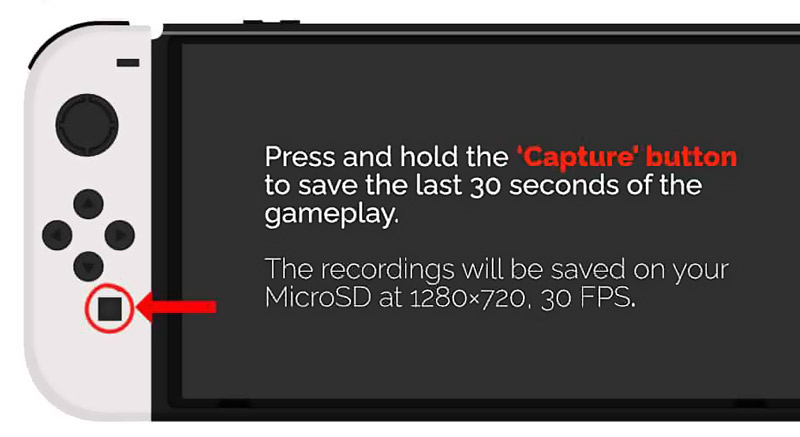
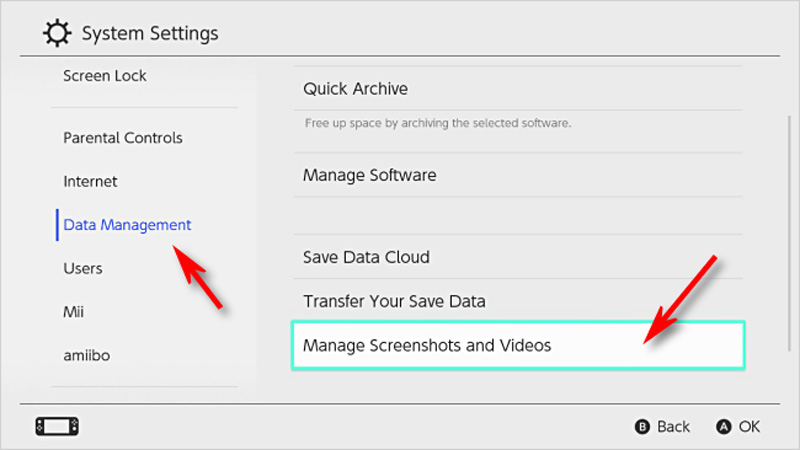
By default, the Nintendo Switch records the last 30 seconds of gameplay. Navigate to Settings, choose the Data Management option, then go to Manage Screenshots and Videos. Here you can customize the recording based on your need.
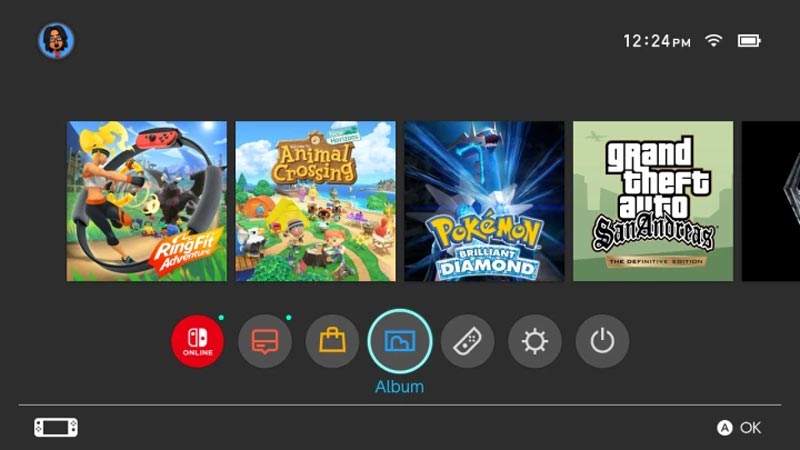
The flexibility of the Nintendo Switch's recording feature lets you edit your recorded clips. After capturing a video, navigate to the Album section on the home menu. Select the desired video and press the Edit button. You can trim the clip, add text, and even overlay audio commentary.
Once you're satisfied with your edited video clip, you can upload and share it with others. The Nintendo Switch offers various options for sharing. You can also use the built-in Nintendo Switch Online app to share your recordings with friends.
Part 2. How to Use a Capture Card to Record Switch Gameplay
An external capture card can be a valuable addition for advanced users who want even more control over their gameplay recordings. Connect it to your Nintendo Switch to capture high-quality footage directly on your PC. Follow the steps below to record your Switch gameplay using a capture card.
First, you need to set up your capture card. Connect the capture card to your computer using a USB cable. Install any necessary drivers or software that come with the capture card. Then take the HDMI cable that came with your Switch and connect one end to the HDMI out port on your Switch dock. Connect the other end to the HDMI-in port on the capture card.
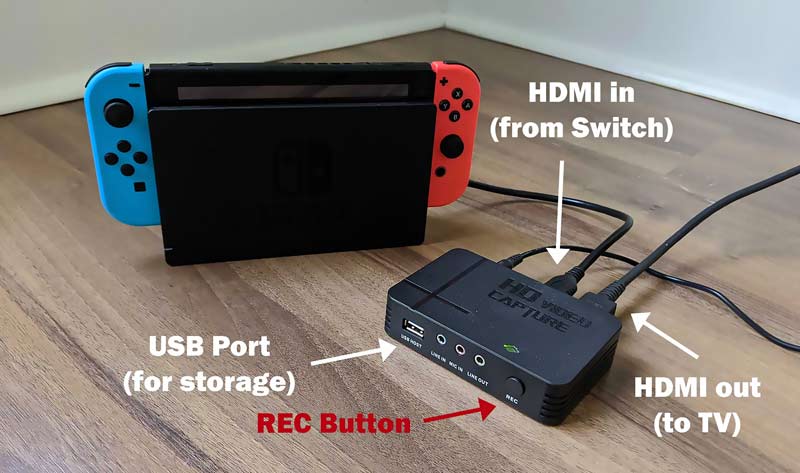
Connect the capture card to your monitor or smart TV. Open the capture card software on your computer and select the appropriate video input source. Set the capture resolution and frame rate as desired.
In the capture card software, select the start recording option. You may also have the option to set hotkeys for starting and stopping the recording. Start playing the Switch game you want to record. The gameplay will be displayed on your monitor or TV, and the capture card will capture it on your computer.
When you are finished recording, return to the capture card software and select the option to stop recording. The captured gameplay footage will be saved to your computer's storage.
Part 3. Better Way to Record Nintendo Switch Gameplay on a PC
To capture your gameplay on Nintendo Switch on your computer, you can also rely on some recording software like ArkThinker Screen Recorder. It can optimize the Switch gaming image quality and record high-definition videos.
Connect the Nintendo Switch to the HDMI input of your PC using an HDMI cable. You may need to select the source to cast the Switch screen to your computer’s monitor.
Install the recommended ArkThinker Screen Recorder and open it. Set the desired video and audio settings for your Switch gameplay recording. It has an individual Game Recorder to easily capture your Switch gaming moments.
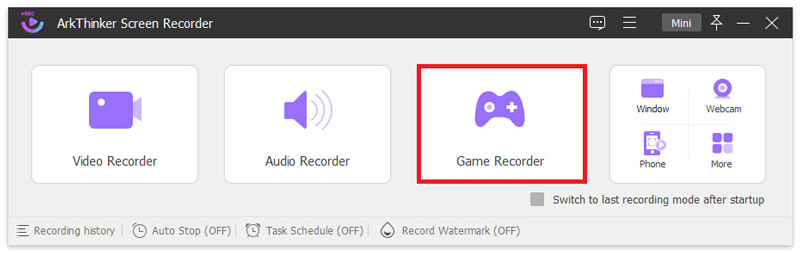
Once everything is set up, click the REC button to capture your Nintendo Switch gameplay. When you finish recording, view and edit it, then save the recorded gameplay file to your computer.

Part 4. FAQs of Nintendo Switch Gameplay Recording
How can I record my Switch gameplay for more than 30 seconds?
Nintendo Switch lets you record the last 30 seconds of your gameplay by pressing the Capture button. If you want to capture more than 30 seconds, you can cast your Switch screen to your computer, then use a capture card or the recommended Game Recorder.
Why can't I record my gameplay on Nintendo Switch?
You may fail to capture your gameplay on the Switch console for different reasons. You should ensure your microSD card has enough storage. Check the software and update your Switch to the latest system version. Also, you can restart your Nintendo Switch to solve the problem.
How do you record yourself while playing Switch games?
Connect your Switch console to a computer and download the Game Recorder. Turn on Webcam to capture yourself. You can freely control the capturing region and put it anywhere on the gaming screen.
Conclusion
Recording gameplay on Nintendo Switch opens up a new world of possibilities for gamers. Whether you want to capture memorable moments, share exciting gameplay with friends, or showcase your skills through livestreaming, the recording feature on Nintendo Switch is a powerful tool at your disposal.
What do you think of this post? Click to rate this post.
Excellent
Rating: 4.9 / 5 (based on 294 votes)
Find More Solutions
Detailed Guide to Record Screen or Videos on Mac Computers Effective Ways to Record Screen on Android Phone or Tablet 3 Best Ways to Tell You How to Screen Record on Chromebook How to Create a Screen Recording and Capture Sound on iPhone How to Screen Record with Audio on Windows 11/10/8/7 PC Voicemail Recording on iPhone, Android Phone, and ComputerRelative Articles
- Record Video
- Full oCam Screen Recorder Review and Best oCam Alternative
- Exploring the Benefits and Usage of Webex Recording
- CamStudio Screen Recorder: Key Functions, Pros, and Cons
- [Solved] How to Screen Record A Video on Instagram Smoothly
- Top 4 Mouse Movements Recorders for Windows and Mac
- How to Use Adobe Screen Recorder to Record Your Contents
- Top 7 Ubuntu Screen Recorders Online and Offline for Ubuntu Users
- Review about Mobizen Screen Recorder and Everything You Need to Know
- Step into Xbox Game Bar: What Is It So Famous For?
- Bandicam Review: Functions, Features and Alternatives